Have you ever pondered the reason behind your Mac's occasional shortage of memory? It can be frustrating to work on a computer with such limitations, experiencing delays when performing various tasks like opening programs. The sluggishness of your Mac might even result in project delays and potential loss of clients. Perhaps you've been contemplating ways to free up memory and enhance your computer's performance. Luckily, there are multiple actions you can undertake to accomplish that goal.
If your Mac possesses sufficient RAM yet still suffers from sluggish performance, there could be an underlying hardware issue. One potential solution is to upgrade your RAM by installing additional modules. However, if purchasing new RAM is not feasible at the moment or you wish to explore other options first, our guide provides proven tips to address the problem effectively. In this guide, we are describing how to free up ram on Mac.
Part 1: Understanding How RAM Works on Mac
RAM, or Random Access Memory, is a fundamental component of Mac's hardware, playing a pivotal role in overall performance. Unlike long-term storage like hard drives or SSDs, RAM offers fast and temporary data access for active processes and applications, enabling smooth multitasking and a responsive user experience.
As a high-speed bridge between the processor and long-term storage, RAM significantly enhances the speed and efficiency of Mac operations, but its contents are cleared when the computer is powered off, making it ideal for temporary data handling during active use.
RAM vs. Storage (Hard Drive or SSD)
Understanding the distinction between RAM and long-term storage (like hard drives or SSDs) is crucial to grasp the role of RAM and why freeing it up is essential for optimizing your Mac's performance. RAM is fast and temporary, storing data needed for prompt task execution, but it clears when the computer is off. In contrast, the storage provides slower but non-volatile storage for files and applications over extended periods. By recognizing this difference, you can appreciate the importance of freeing up RAM to maintain optimal Mac performance and responsiveness.
Part 2: Monitoring RAM Usage on Mac to Free Up RAM Mac
A. Using macOS Built-in Activity Monitor
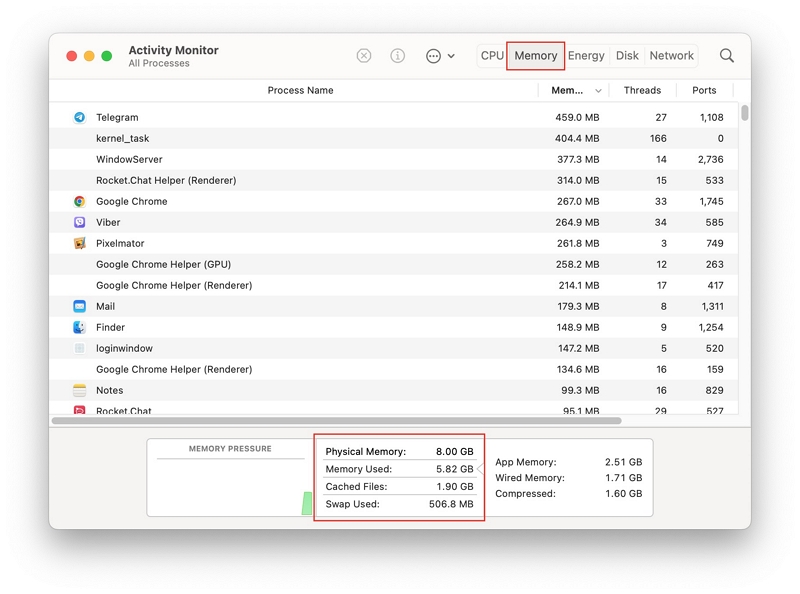
macOS includes a native application called Activity Monitor, designed by Apple, that allows you to monitor the RAM usage on your Mac. It provides valuable insights into the memory consumption of each application and its processes within your system. Follow these steps to check the RAM usage on your Mac:
Step 1: To access Activity Monitor, locate and open the application either in the Applications folder or in the Launchpad.
Step 2: Navigate to the Memory tab by selecting it.
Step 3: The Memory tab will display a comprehensive list of active processes for your apps, along with the corresponding memory usage for each process.
Step 4: Towards the bottom of the window, you'll find a panel displaying the total RAM usage of your Mac.
B. Identifying High-RAM Usage Apps
Identifying RAM-hungry apps is vital for optimal performance. Follow these steps to identify high-RAM usage apps:
Step 1: Use Activity Monitor (Mac):
Access "Activity Monitor" on Mac to see running processes and their resource usage.
Step 2: Sort by Memory Usage:
Click the "Memory" column to see apps using the most RAM at the top.
Step 3: Analyze High Memory Usage:
Focus on apps with significant memory consumption and check if active apps use more RAM, while idle ones use less.
Step 4: Check Background Processes:
Look for background apps consuming RAM even when their main windows are closed.
Step 5: Investigate Suspicious Apps:
Examine apps using considerable RAM despite not being in active use, which may indicate issues.
Step 6: Close Resource-Intensive Apps:
Close or restart RAM-heavy apps causing performance problems.
Step 7: Update Apps and OS:
Keep apps and OS updated to address performance and resource usage.
Regularly identifying excessive RAM usage ensures smooth and efficient computer performance.
Part 3: Methods to Free Up RAM on Mac
If you notice that the Memory Pressure chart in Activity Monitor appears as yellow or red, it indicates the need to free up additional RAM for your Mac to utilize effectively. Fortunately, there are various methods available to achieve this, which we will outline below –
Method 1: Closing Unnecessary Apps
RAM enables your Mac to handle multiple tasks simultaneously, although typically we only require our Mac to perform one or two tasks at a time.
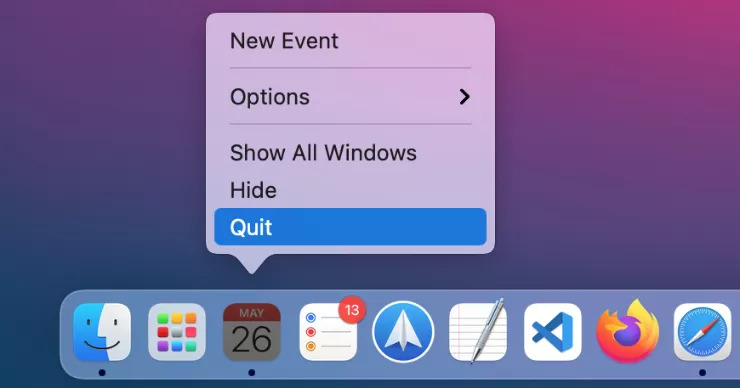
Step 1: Check the Dock to assess if there are numerous open apps.
Step 2: Subsequently, control-click on the apps and select "Quit" to close them.
Method 2: Managing Browser Tabs and Extensions
Web browsers can be RAM-intensive, particularly with multiple tabs and extensions. Each open tab requires memory for content, scripts, and media elements, while extensions also contribute to the memory load.
Consequently, having numerous open tabs and active extensions can strain system resources, potentially causing sluggish performance, slower response times, and even crashes if RAM becomes insufficient to handle the load. Efficient Browser Resource Management Tips:
Limit Open Tabs: Minimize open tabs to reduce RAM load. Close unused tabs and use bookmarks for later reference.
Use One Browser: Stick to a single browser to avoid fragmenting system resources.
Disable Unnecessary Extensions: Periodically review and disable unused extensions to prevent additional RAM consumption.
Use Extensions Sparingly: Be mindful of installing too many extensions, prioritize essential ones, and remove redundant ones.
Use Tab Suspender Extensions: Employ tab suspender extensions to save RAM by putting inactive tabs to sleep.
Monitor Resource Usage: Utilize built-in task managers or extensions to track RAM usage and identify resource-heavy tabs or extensions.
Clear Browser Cache: Regularly clear cache, cookies, and browsing history to free up RAM and enhance browser performance.
Consider Lightweight Browsers: Explore lightweight browser options if RAM constraints are a concern.
By thoughtfully managing tabs and extensions, you can optimize RAM usage, ensuring smoother browsing experiences and improved system performance.
Method 3: Clearing System Cache
Cache data consists of temporary files and data stored on your computer, aiming to expedite future access to frequently used resources. Though caching boosts system performance by reducing the reliance on slower storage devices, it can gradually occupy valuable RAM space. As you utilize applications and browse the internet, the cache accumulates, consuming more RAM.
While beneficial for quick access, this cached data can ultimately diminish available RAM for active processes and applications. Consequently, your computer's performance may suffer, resulting in slower response times and reduced multitasking capabilities. Here are the steps to clear the system cache –
Step 1: Open Finder and click "Go" in the menu bar.
Step 2: Select "Go to Folder."
Step 3: Enter "~/Library/Caches" (excluding quotes) into the prompt, then hit the Enter key.
Step 4: Locate the cache folders you wish to clear (e.g., Safari, Chrome) and delete their contents.
Method 4: Restarting the Mac
The easiest method to free up some RAM on your Mac is by restarting it. Restarting your Mac offers significant benefits for freeing up RAM and optimizing system performance. It clears RAM, eliminating temporary data and cached files, providing a fresh start with more available RAM for active processes.
Additionally, restarting closes background processes, refreshes system resources, resolves memory leaks, improves multitasking performance, optimizes system updates, and enhances overall system stability, ensuring a stable and responsive experience. Regularly restarting your Mac is a simple yet powerful way to maintain efficiency and a seamless computing experience.
Step 1: Access the Apple menu.
Step 2: Choose the "Shut Down" option to proceed with the action.
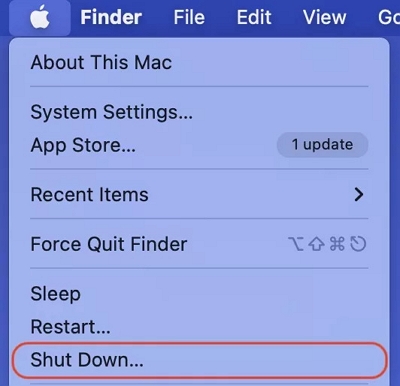
Once your Mac shuts down, it effectively clears all files from the RAM.
Method 5: Adjusting Virtual Memory (Page File)
Virtual memory is a macOS (and other operating systems) technique that compensates for limited RAM. When your Mac's RAM is insufficient for active tasks, macOS uses part of your storage as "swap space" or "page file" to extend RAM.
While this prevents immediate crashes, accessing data from the swap space is slower than physical RAM, leading to potential performance slowdowns, especially on slower storage devices. To clear virtual memory settings on your Mac, follow the below steps:
Step 1: Save any open documents and close all running applications.
Step 2: Click on the Apple logo in the top-left corner of the screen.
Step 3: Select "Restart" from the drop-down menu.
Restarting your Mac allows the system to reset virtual memory settings and free up unnecessary data in the swap space, potentially improving performance if virtual memory was causing slowdowns.
Note that macOS' automatic virtual memory management is efficient for most users. Adjusting virtual memory settings manually is not recommended for casual users, as it can lead to unintended consequences and system instability.
If you consistently experience memory-related performance issues, consider a hardware upgrade, such as adding more RAM, to enhance your Mac's performance effectively.
Method 6: Perform a macOS Update
There is a possibility that a macOS bug is causing your Mac to consume more RAM than necessary. This occasional occurrence is typically addressed promptly by Apple through a patch update.
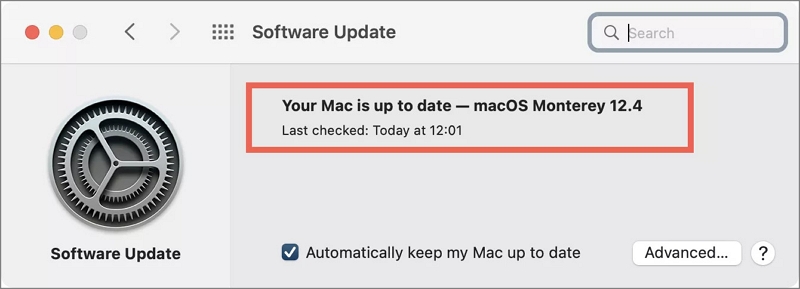
Step 1: Navigate to the System Preferences.
Step 2: Select "Software Update" to check for any available updates that could potentially resolve your RAM-related issues.
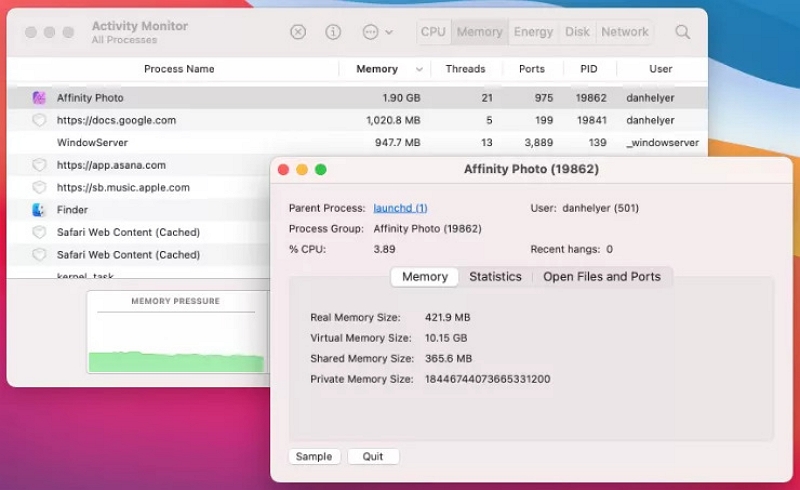
Method 7: Terminate processes in Activity Monitor
If there is still a significant RAM usage issue on your Mac, you can identify the culprit by utilizing Activity Monitor.
Step 1: Launch Activity Monitor.
Step 2: Navigate to the Memory tab.
Step 3: Click on the Memory column to display the processes listed in order of their memory usage.
Step 4: Examine the top items to identify any potentially suspicious activities. You may need to conduct online research on unfamiliar processes to determine their purpose, as some of them are vital for macOS functionality, such as Kernel_Task.
Step 5: If you come across an unnecessary process, select it and click on the "i" button to access additional information about it. Then, proceed to choose the option to quit the selected process.
Method 8: Perform a malware scan on your Mac
Malicious software such as computer viruses, adware, spyware, and other forms of malware can consume your Mac's RAM in the background, leading to sluggish performance. To determine if this is the cause, obtain a trusted malware scanner, download it, and conduct a comprehensive scan of your Mac system.
Method 9: Remove items from the Login Items list
Login Items refer to programs that automatically launch during Mac startup. Some applications stealthily add themselves to this list, which can be problematic. If you wish to optimize your RAM usage, removing Login Items should be your primary consideration. Rest assured, you won't be deleting the app itself; you'll simply prevent it from auto-launching upon startup. To eliminate Login Items and simultaneously reduce memory usage on your Mac, follow these steps:
Step 1: Access System Preferences > General.
Step 2: You need to locate the "Open at Login" option.
Step 3: Deselect the programs that you prefer not to load during Mac startup.
Step 4: Click the "-" sign located below the list.
Part 4: Easy Way to Free Up RAM on Mac with Few Clicks
Cleaning your Mac can significantly improve its speed and performance. Macube, an affordable solution, can enhance the performance of your Mac by freeing up ram, eliminating the need for expensive alternatives, and saving you money. This powerful software efficiently identifies and removes unnecessary files that take up valuable storage space across various macOS system folders, including iTunes, photos, mail, browsers, and outdated large files.
Macube helps you recover substantial storage space, leaving you astonished by the results. Furthermore, it effortlessly cleans up downloads and junk files, identifies and removes large and old files, and eliminates duplicate files. With just a single click, you can manage extensions, clear web history, uninstall applications, and delete large or old files. Macube provides an effective way to personalize your Mac.
Features:
Simplify the process of removing unnecessary clutter with just a single click.
Protect your privacy and strengthen the security of your personal information by clearing your browser's cache and history.
Ensure that the uninstallation process thoroughly and comprehensively removes Mac apps.
Effortlessly detect and remove duplicate items in just three simple steps.
Get prompt assistance with professional email support, receiving timely responses within 24 hours.
Here are the steps to remove junk files on Mac –
Step 1: Opt for Smart Scan to efficiently locate junk files throughout your entire Mac.

Step 2: Preview the scanning results and choose the unnecessary files accordingly.
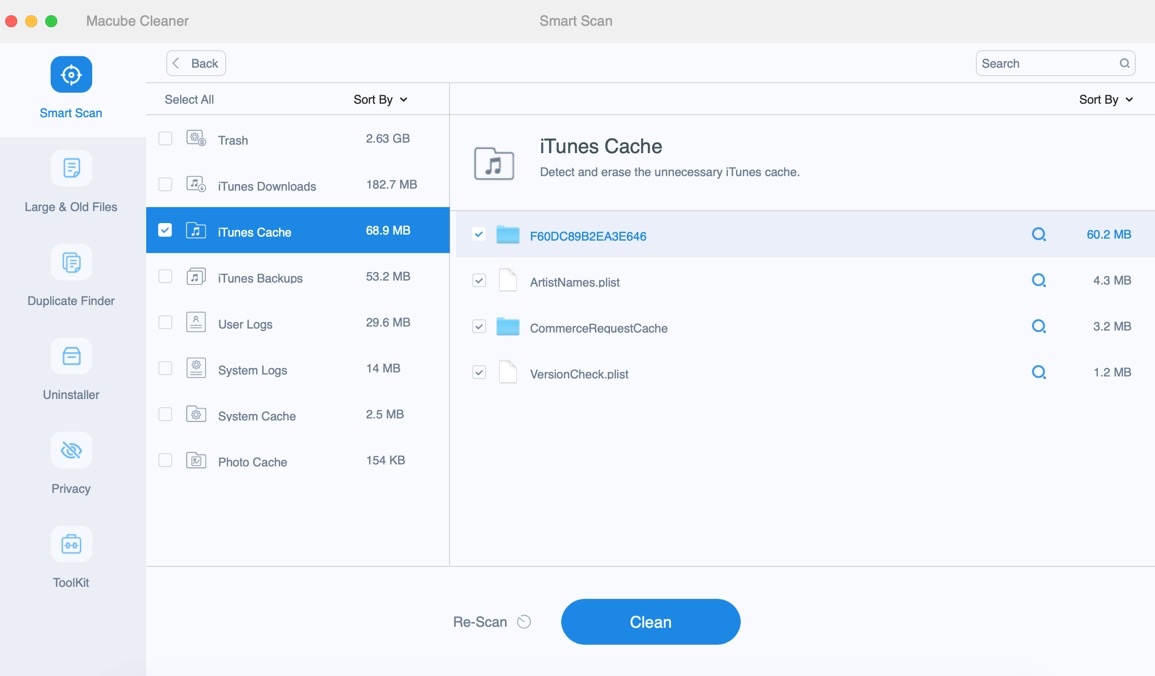
Step 3: Reclaim your disk space by clearing all junk files with just one click.
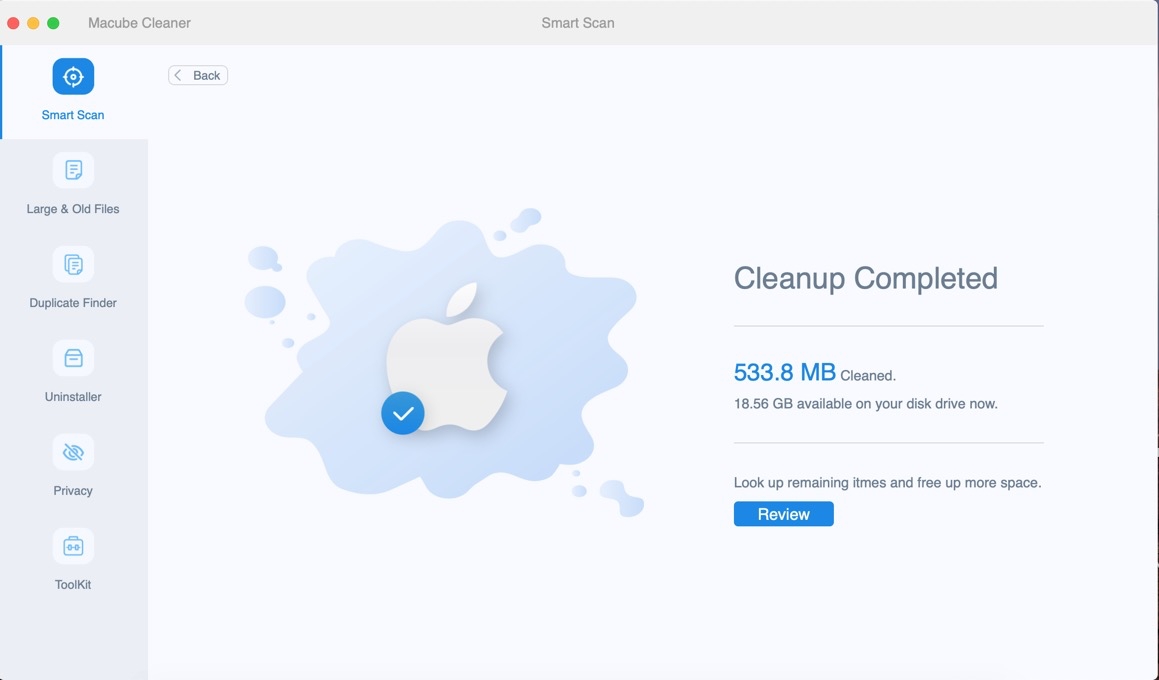
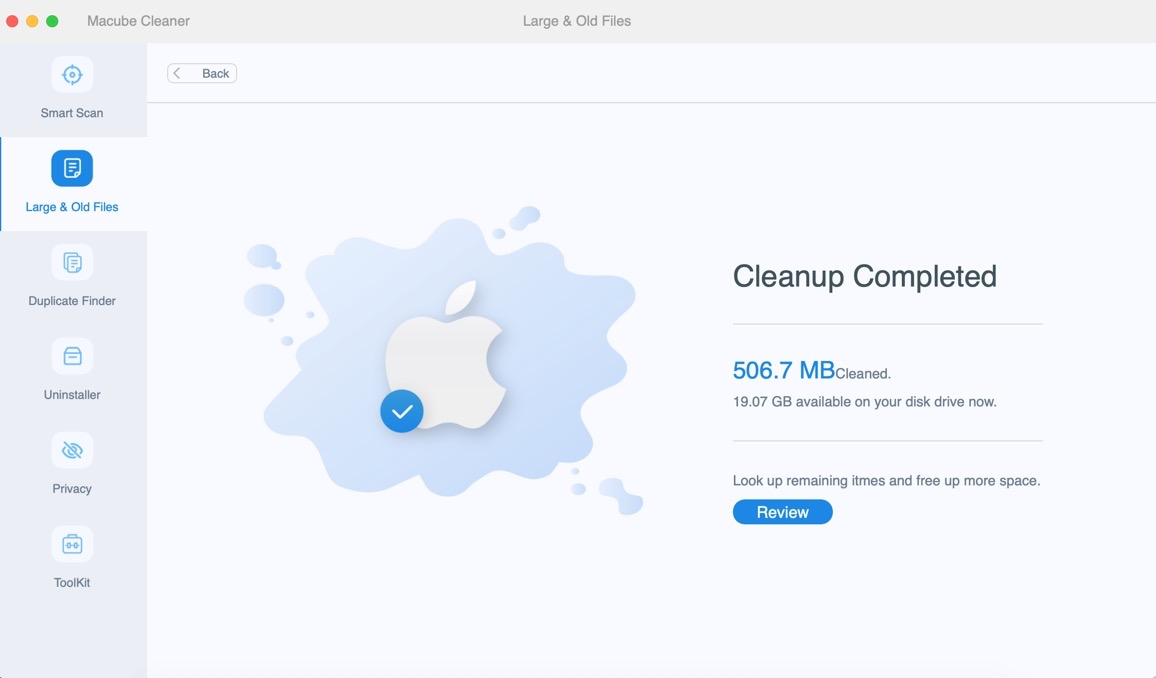
Here are the steps to clean up large and old files on Mac –
Step 1: Select the Scan option to locate large and old files across your entire Mac.
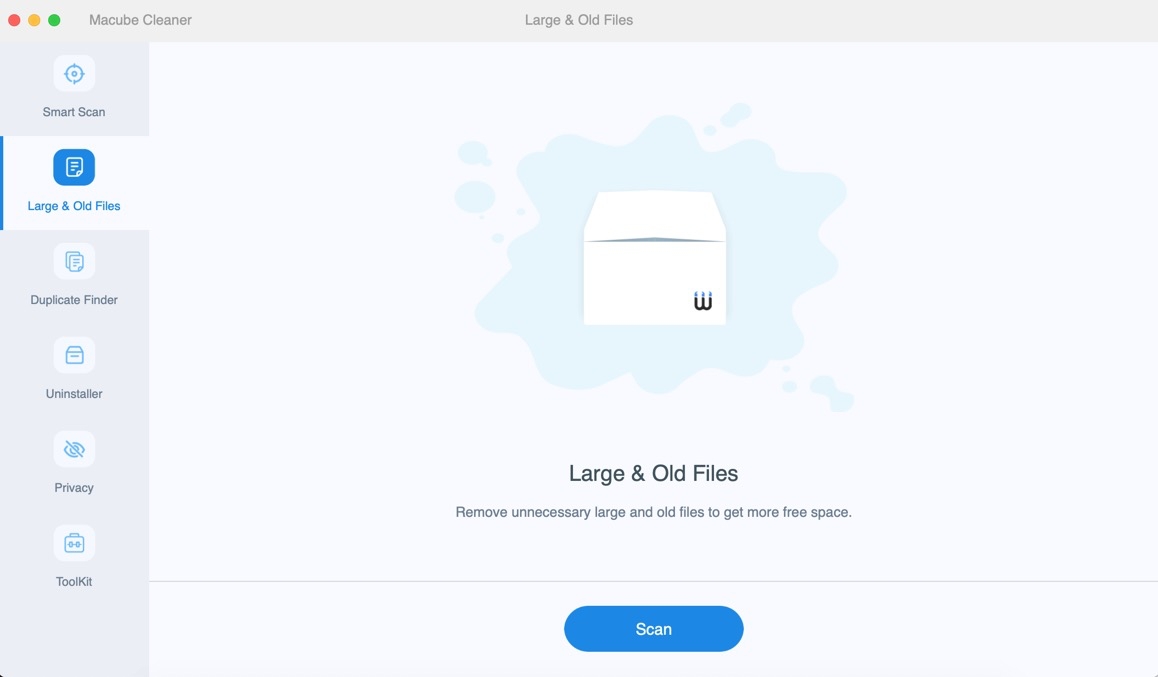
Step 2: Review the scanning results and choose the files that are no longer needed.
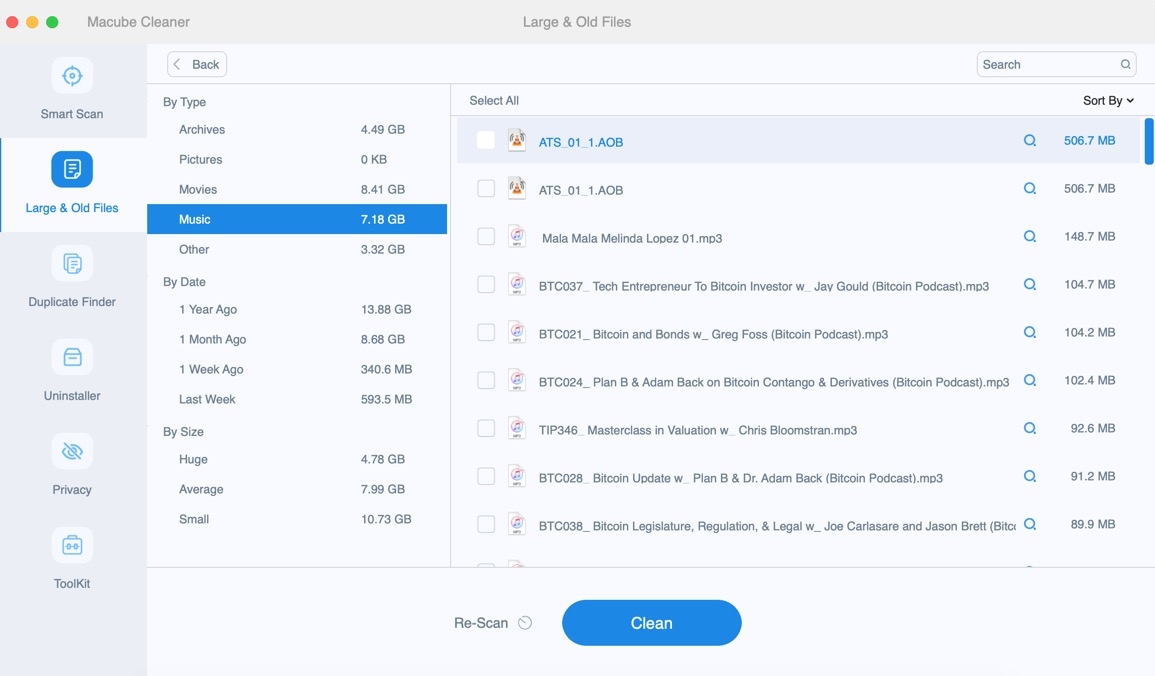
Step 3: Reclaim your disk space by easily clearing unnecessary files with just one click.
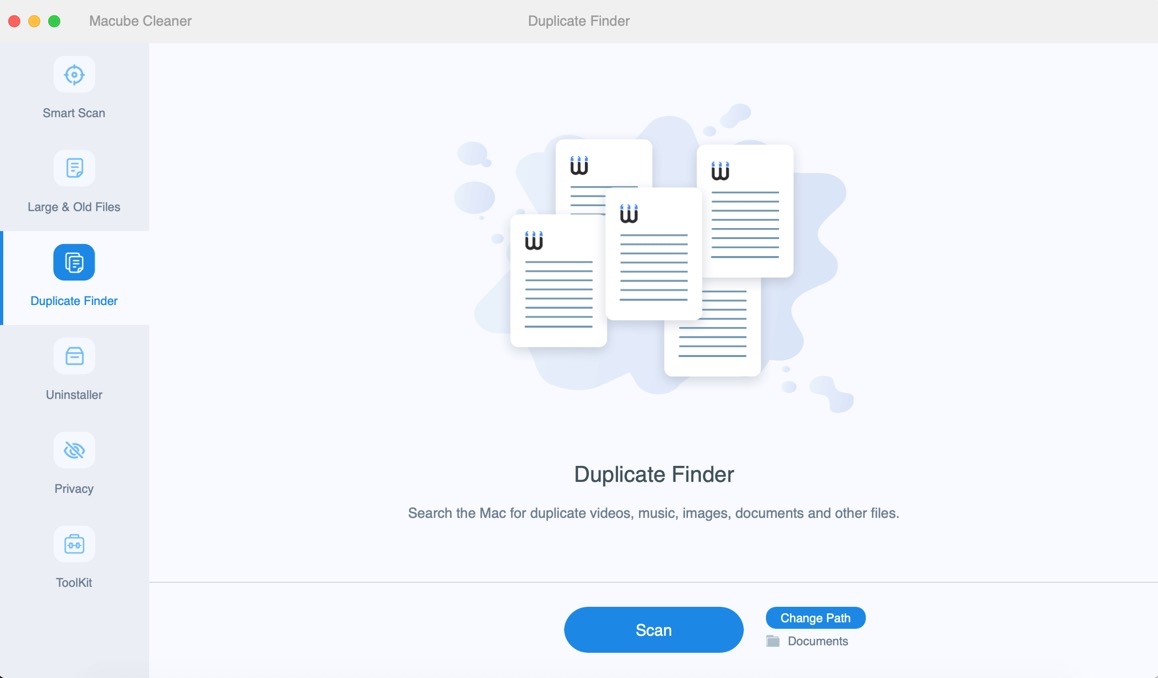
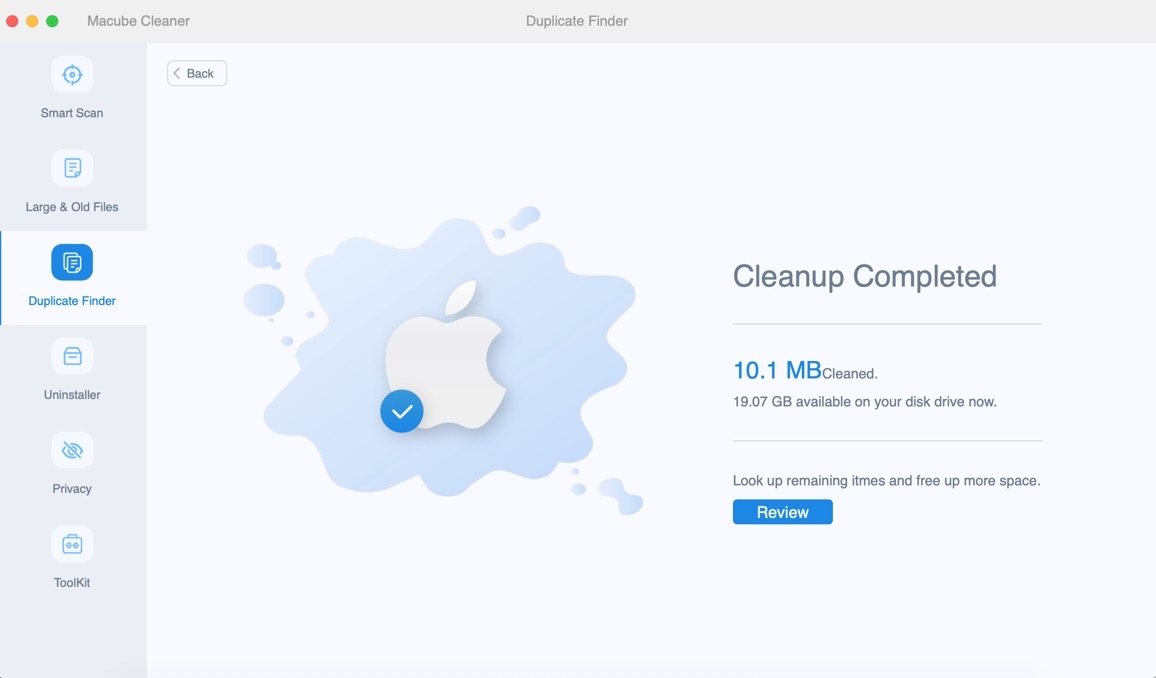
Here are the steps to remove duplicate files on Mac –
Step 1: Choose a specific path and initiate the scanning process for duplicate files.
Step 2: Review the scanning results and choose the duplicate files that are no longer needed.
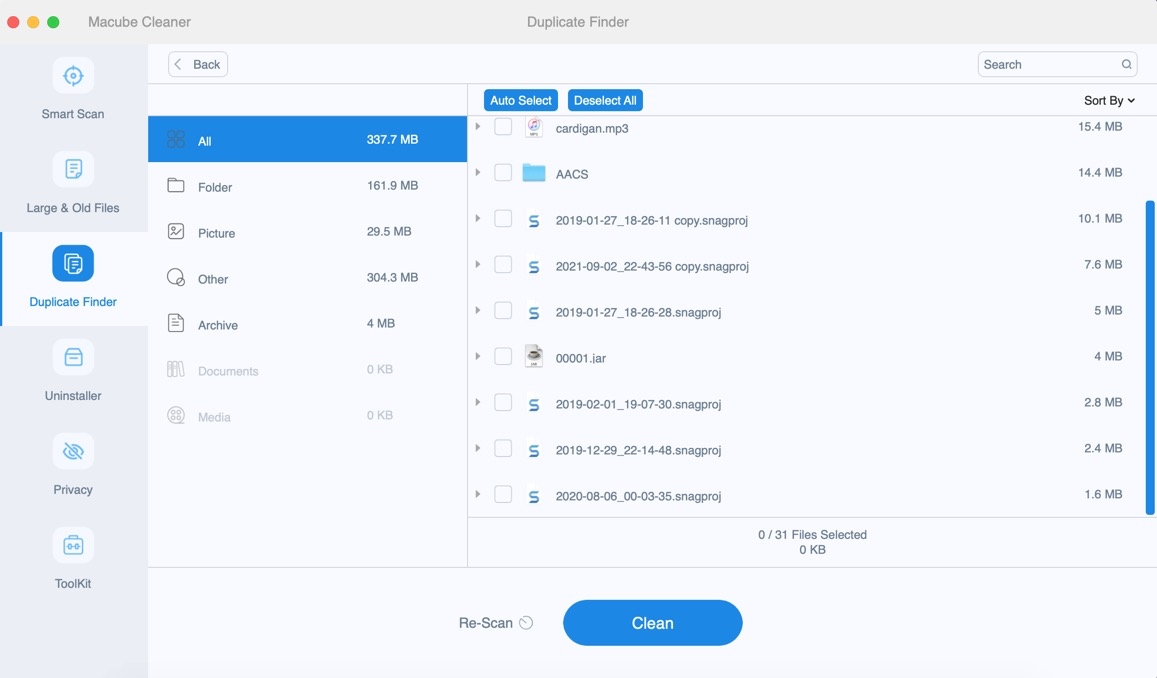
Step 3: Reclaim additional disk space by clearing the duplicate files with just one click.
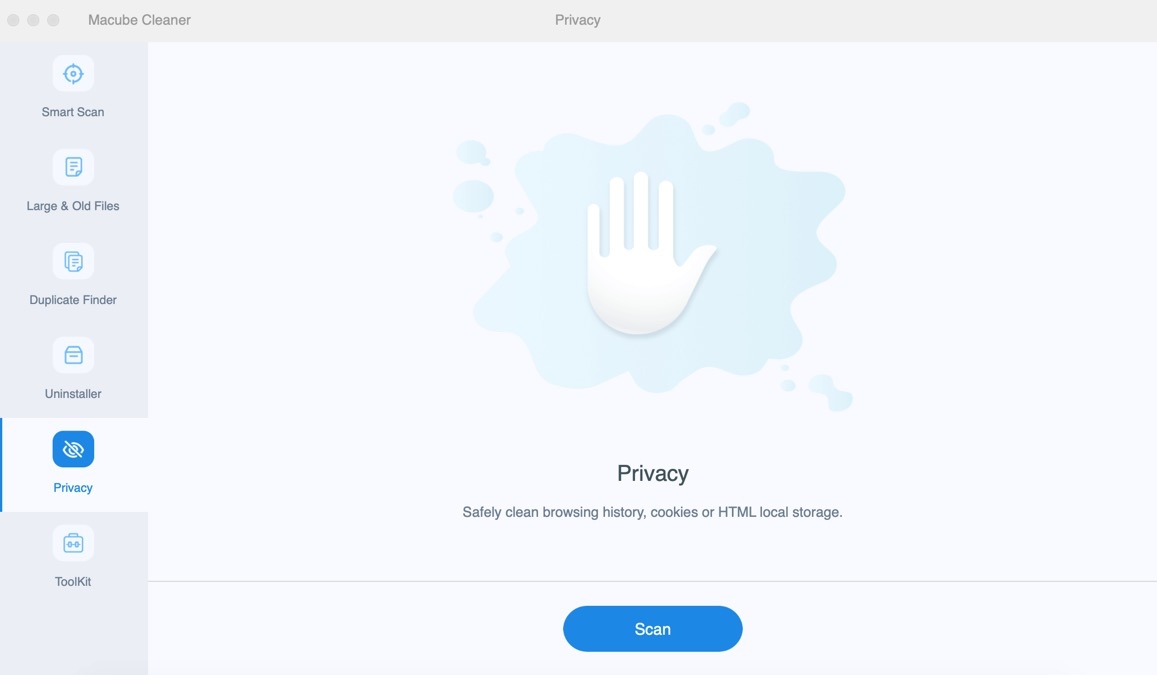
Here are the steps to protect privacy on Mac –
Step 1: Select the Scan option to find cookies and browsing histories on Mac browsers.
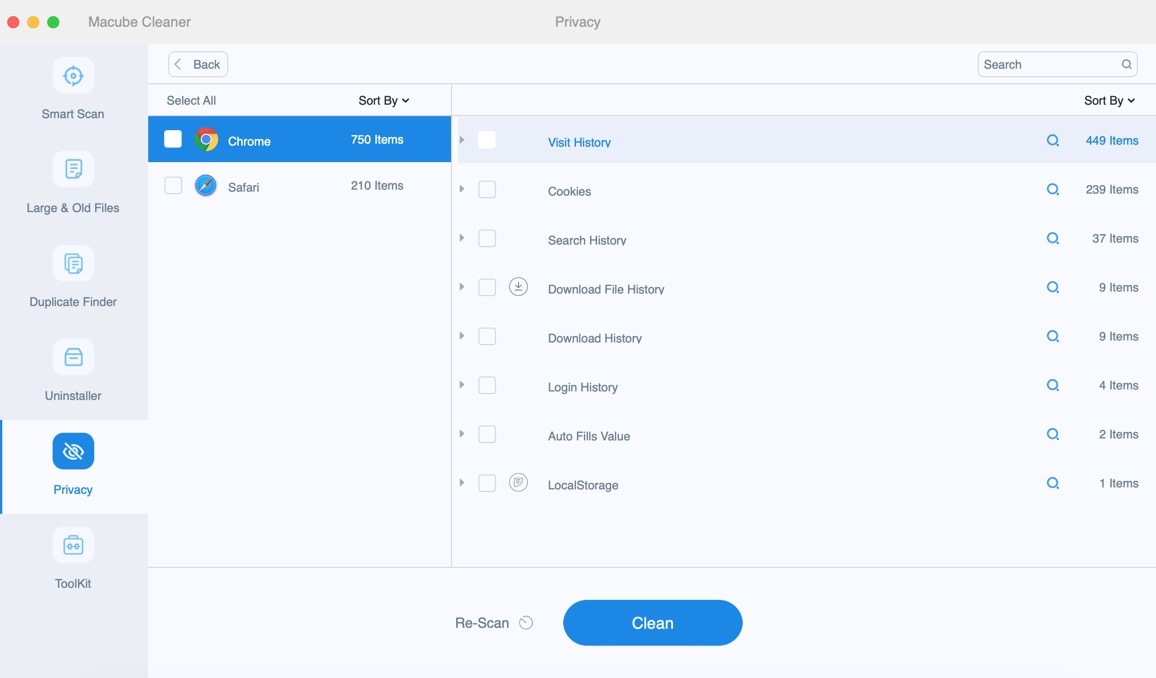
Step 2: Review the scanning results and choose the files that are no longer necessary.
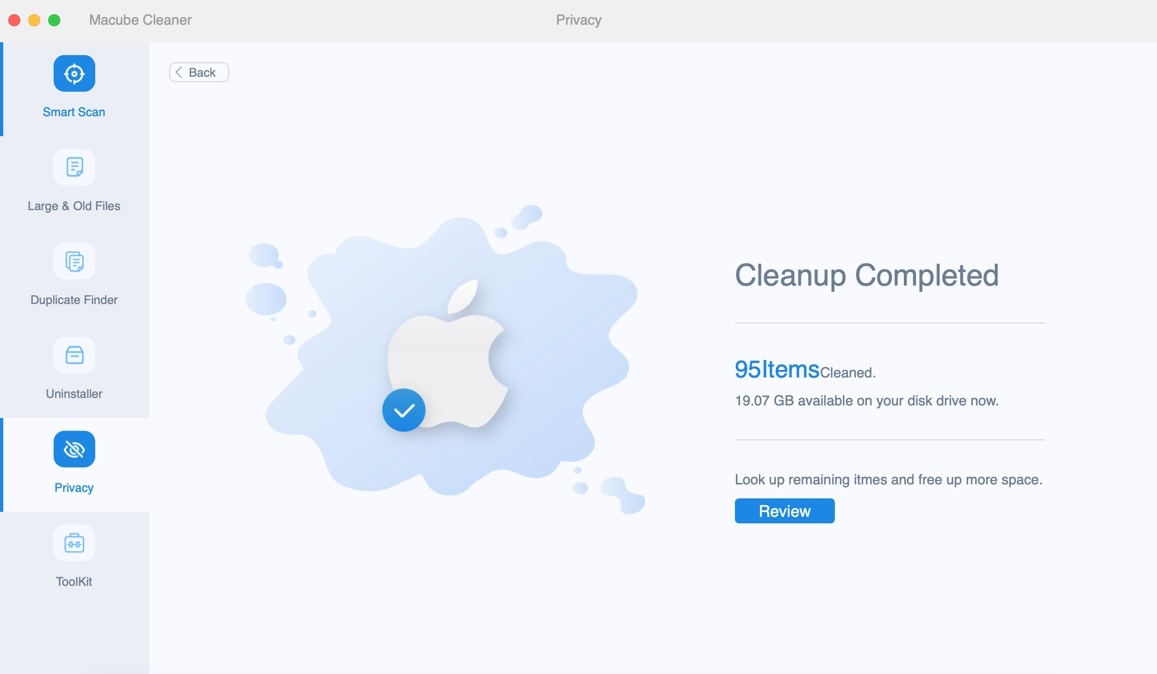
Step 3: Safeguard your privacy by clearing cookies and browsing histories with a single click.
FAQ: How to Free Up RAM Usage?
1. What are the indications that prompt you to allocate more RAM on your Mac?
Insufficient RAM on your Mac can lead to performance issues when the system is overwhelmed with multiple demanding applications simultaneously executing various tasks. When faced with inadequate RAM, you may encounter the following problems:
A popup notification displays the message "Your system has exhausted its application memory."
The overall performance of your Mac slows down, affecting tasks such as app launching and video playback.
Although typing remains functional, there is a noticeable delay before any input appears on the screen.
Applications become unresponsive and fail to respond to any user input, resulting in freezing or lock-up scenarios.
Your entire Mac becomes unresponsive, accompanied by a cursor transforming into a vibrant spinning pinwheel.
2. Is it possible to upgrade the RAM on a Mac?
Determining whether you can increase the RAM on your Mac depends on the specific model you have. To check your Mac model and its RAM capacity, follow these steps: Press the Option key and click the Apple menu, then select System Information. From there, navigate to the Memory section in the sidebar. This section will provide details about the upgradable memory options for your Mac.
Conclusion:
Experiencing a sluggish Mac can be incredibly frustrating. Fortunately, in many cases, the cause is simply excessive RAM usage. By clearing out unused applications, you can often restore your Mac's speed and performance. In this guide, we have described how to free up ram on Mac. However, Macube will be our recommendation for you. With the utilization of Macube, you can take proactive measures to prevent this issue from arising. This powerful Mac cleaner not only improves your Mac's performance but also ensures optimal conditions for other components within your machine.

Macube Cleaner
Speed up and troubleshoot your Mac super easily with a Macube full-featured free trial!
Start Free Trial