“System Data is 81GB in size on my iMac storage! How can I clear the huge System Data? I have only used my Mac for 3 months.” -from Apple Community

Sufficient storage space is important for your Mac to run at its best level and it must be annoying to find System Data occupies so much precious disk space. If you are also stuck with the issue above, take it easy, this guide will help you out by introducing basic, advanced and ultimate fixes for clearing System Data storage on Mac.
Part 1. What is System Data Storage on macOS?
System Data is a special segment on the Mac storage bar, including different types of files that can’t be categorized into other parts on storage such as Photos, Messages and Documents. It generally contains the items below:
- App cache, system cache and browser cache.
- Time Machine snapshots and iOS backups.
- Leftover files of uninstalled apps.
- Plug-ins and extensions.
- Application installer files.
So, how much system data is normal on Mac? Well, the answer varies depending on many factors. Here is an example for your better understanding: if you seldom use your Mac, then 10-30 GB of System Dada is normal while 30-60 GB System Data is typical for users who run macOS usually.
Part 2. What is the Difference between System Data and Other on Mac Storage
“System Data storage” and “Other storage” on Mac are indeed the same item. “Other” is changed to “System Data” since macOS Monterey, which means you will find “Other” instead of “System Data” on older macOS versions like High Sierra.
Part 3. How to Check System Data Storage on Mac?
Here is how to check System Data on your Mac. The steps are slightly different for Monterey and its later version.
For Monterey:
Step 1: Access Apple Menu and select About This Mac.
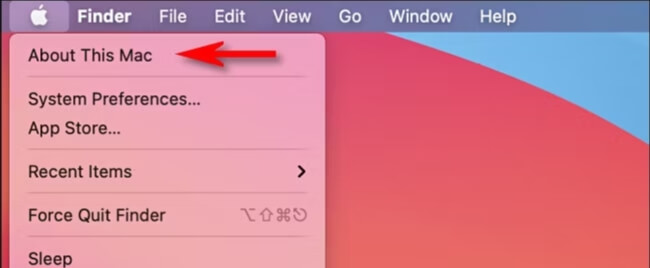
Step 2: Switch to Storage and hover your mouse over the storage bar to locate and check the space taken by System Data.

For Monterey Later(e.g. Sonoma and Ventura):
Step 1: Click the Apple logo in the upper pane and then choose System Settings.
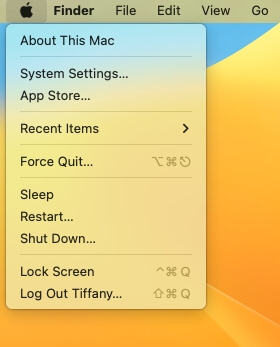
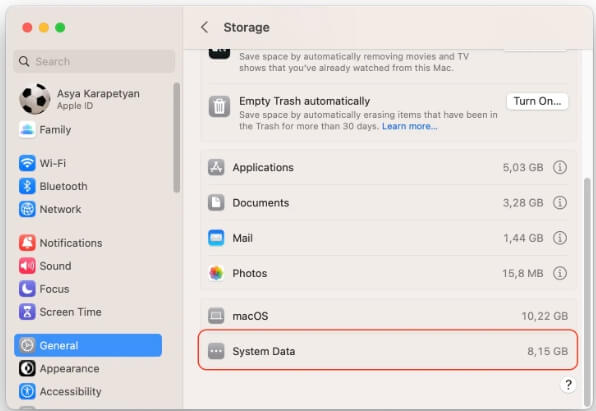
Step 2: Click General in the sidebar and choose Storage in the right pane. Then, check the size of System Data.
Part 4. How to Access System Data on macOS
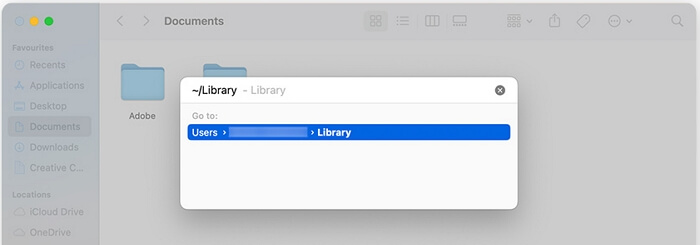
The files in System Data are mostly saved in the Library that can be accessed by following the steps here.
Step 1: Open a Finder window and choose Go in the top menu. Then, click Go to Folder.
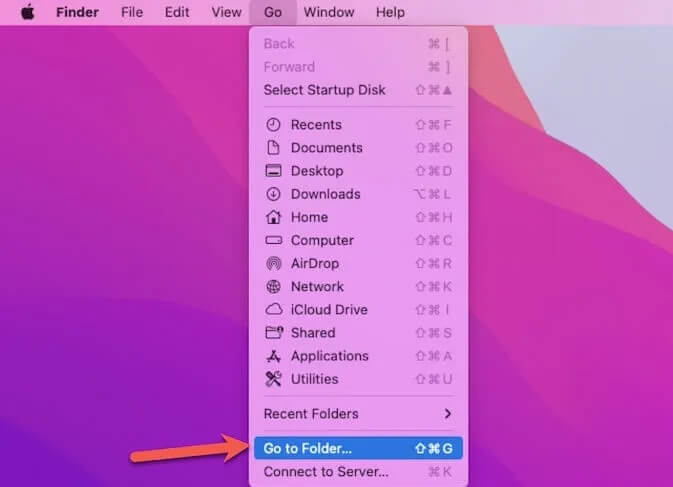
Step 2: In the Go to Folder box, input ~/Library and hit Enter.
Part 5. Basic Ways to Clear System Data Storage on Mac for Free
Here 6 tested and worked ways are summed up for you to effectively release the space used by System Data. You can follow them one by one to reclaim your valuable storage as much as possible.
Way 1. Delete Time Machine Snapshots
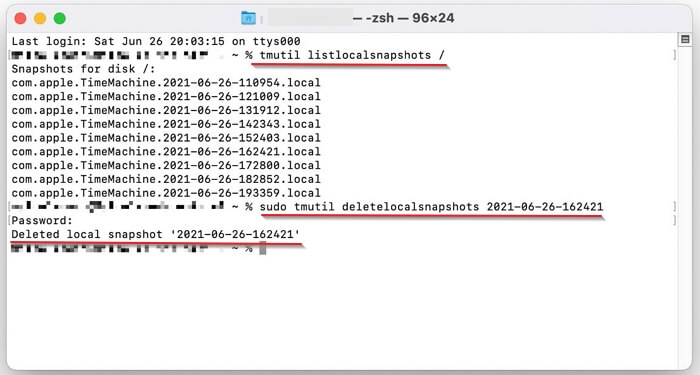
Time Machine snapshots are generated when the backup drive hasn’t been connected to your Mac and are deleted automatically when your Mac is full. However, they can consume a certain amount of storage and enlarge the System Data. Therefore, deleting Time Machine snapshots is a useful method to reduce Mac System Data.
Step 1: Open Launchpad. Search Terminal and click the option to run Terminal.

Step 2: Type “tmutil listlocalsnapshots /” and hit Enter. Then, the list of snapshots will be shown.
Step 3: To delete a snapshot, input “sudo tmutil deletelocalsnapshots date timestamp”(e.g. sudo tmutil deletelocalsnapshots 2021-06-26-123740) and press Enter.
Step 4: Enter your admin password if required and the selected snapshot will be deleted.
Way 2. Clear Cache
Cache can accumulate over time. Luckily, it’s available to clear it. Instead of manually deleting cache in the system folder, it’s suggested to use a specialized tool like Macube Cleaner to help do the job because wrong file deletion could cause data loss or system issues. Macube Cleaner works excellently on sweeping junk from your macOS. It supports removing app cache, system cache, browser cache, system logs, temporary files and other types of useless files without affecting your Mac. Furthermore, it simplifies the cache cleanup process into easy 3 steps.
More About Macube Cleaner
- Completely uninstall apps within one click.
- Easily remove stubborn files or sensitive files.
- Conveniently manage all extensions and plugins in one place.
- Provide a 7-day free trial for you to test its all features.
Clear App & System Cache in 3 Steps
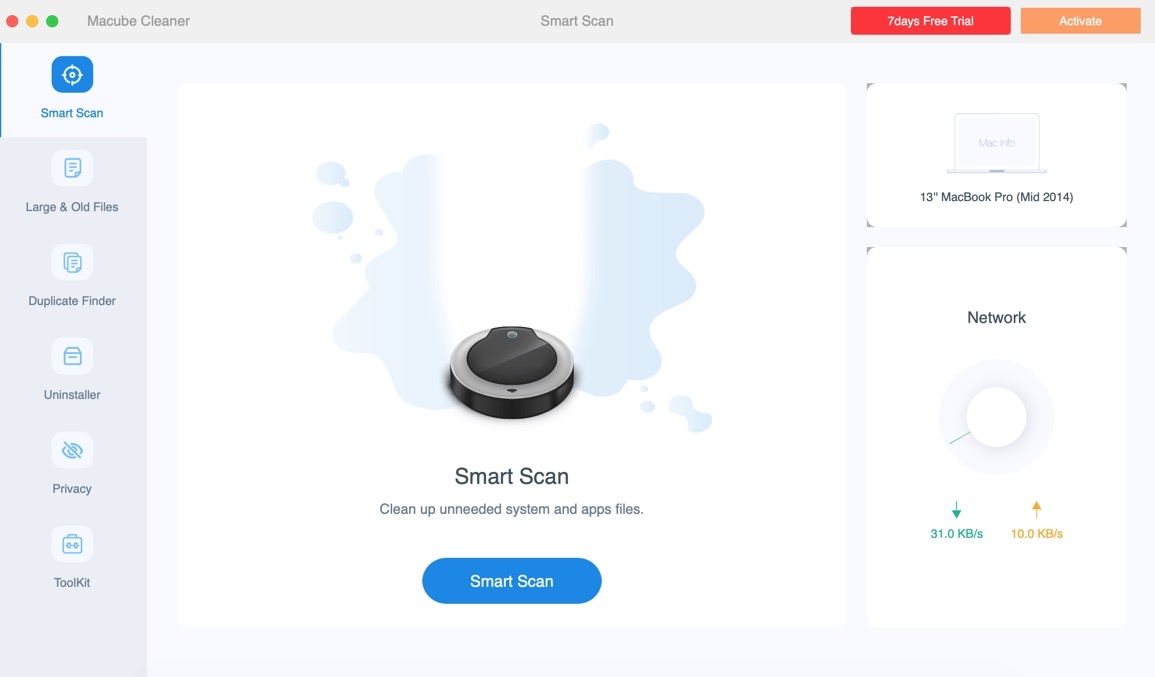
Step 1: Download, install and run Macube Cleaner on your Mac.
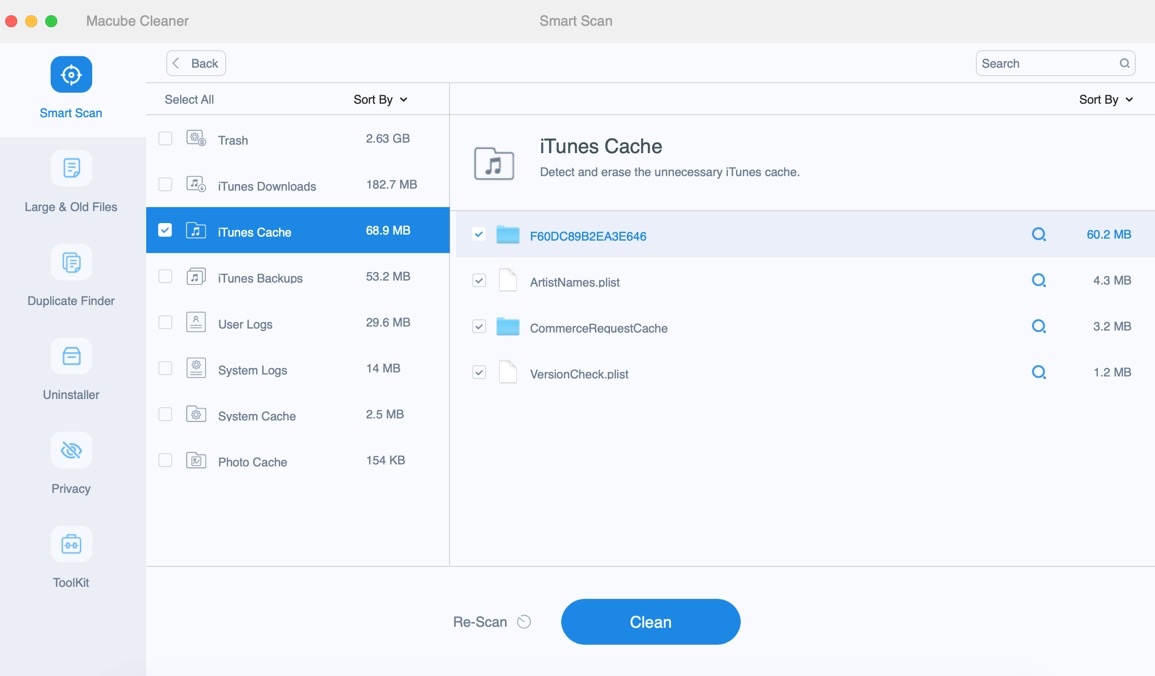
Step 2: Hit Scan to run the Smart Scan feature. Then, all junk including the cache of system and app will be scanned out.
Step 3: Check all cache items and remove them by clicking Clean.
3 Steps to Clean up Browser Cache
Step 1: Get Macube Cleaner on your Mac and open it.
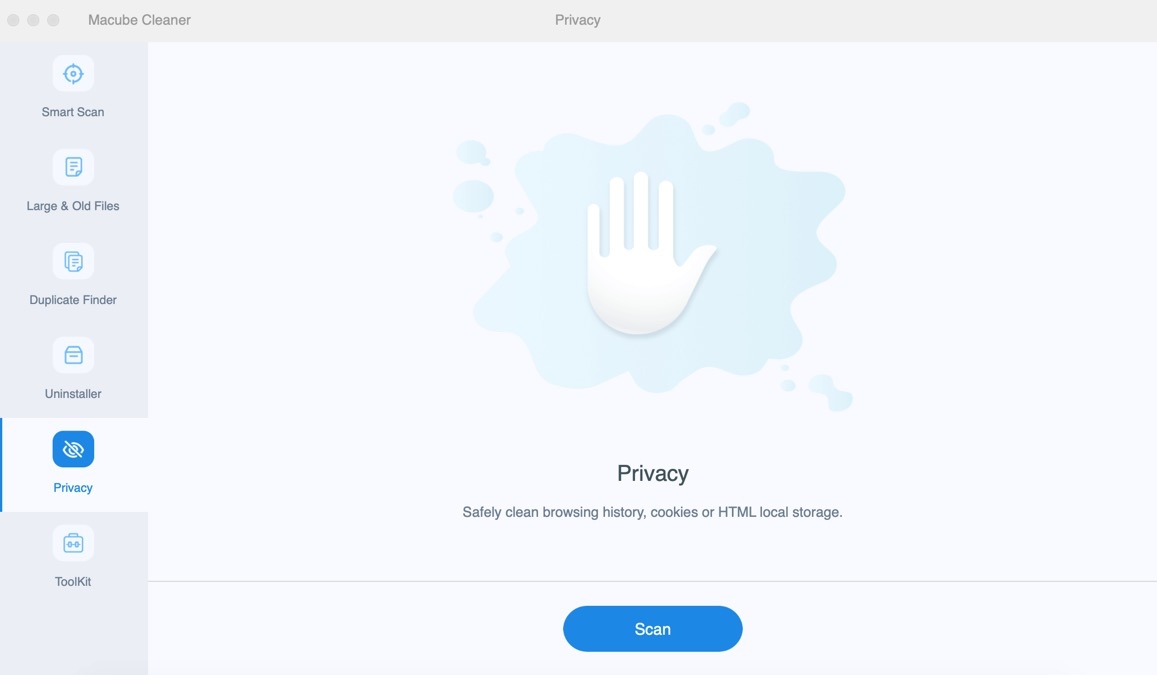
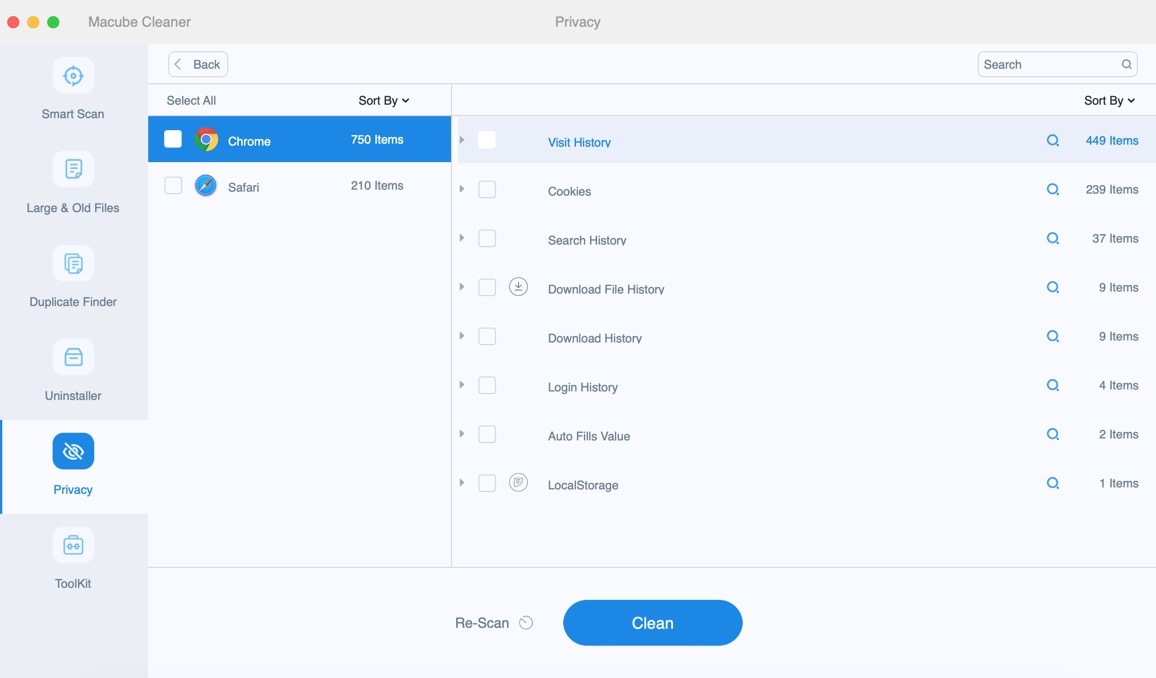
Step 2: Choose Privacy tab and click Scan. Instantly, you can see the browsing data of any browser like Safari, Chrome and Firefox installed on your Mac.
Step 3: Click Visit History for each browser and then hit Clean to get rid of the cached images and files.
Way 3. Remove Unneeded Extensions and Plugins
Uninstalling unnecessary extensions or plugins assists in cleaning up System Data. Therefore, it’s recommended to check the extensions on your favorite browser and remove the unneeded ones. Here is how to get it done on Safari and Google Chrome.
For Safari:
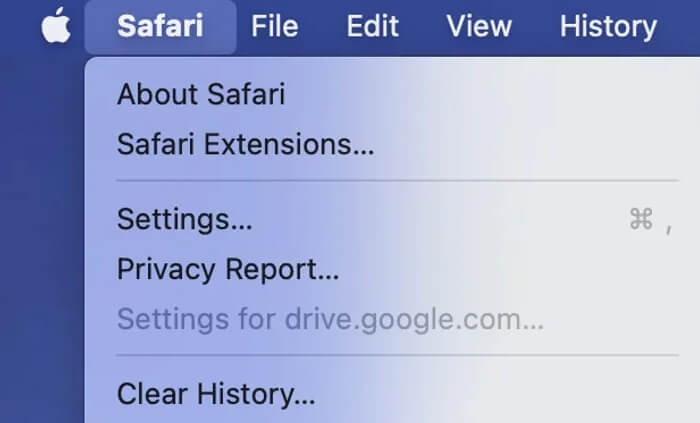
Step 1: Open Safari and click Safari in the feature bar, followed by choosing Settings.
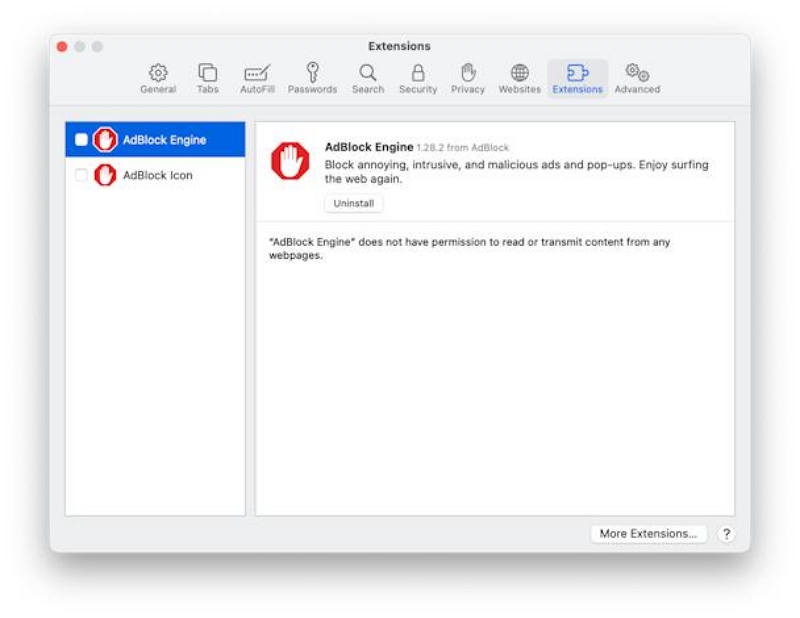
Step 2: Choose Extensions tab to locate the extensions and plugins installed on your Mac.
Step 3: Look through the left extension list and select the one you don’t need. Then, click Uninstall to get rid of it.
For Chrome:
Step 1: Run Google Chrome and click the 3-dot option. Next, choose Extensions > Manage extensions.
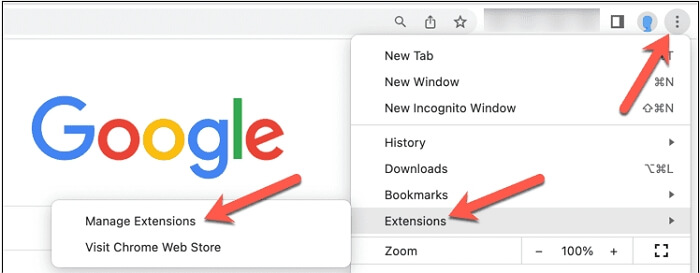
Step 2: Locate the extension you want to delete and click Remove to do it.

Way 4. Delete iOS Backups
If you usually back up your iPhone with iTunes, then you can consider deleting the old iOS backups to easily free up System Data Storage. Simply follow the steps below to complete iPhone backup removal.
Step 1: Connect your iPhone to your Mac with a certified USB cable.
Step 2: Open Finder and choose your iPhone in the sidebar.
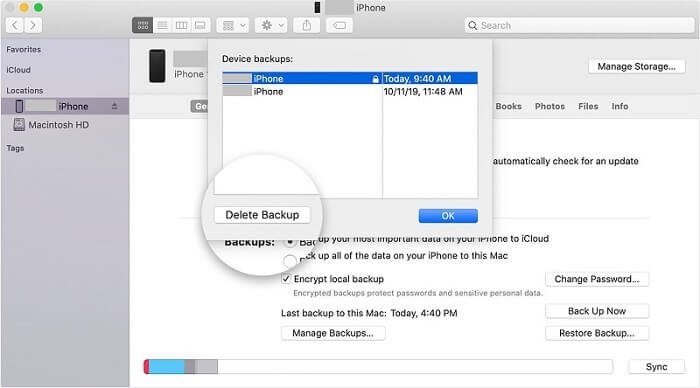
Step 3: Click Manage Backups in the right section.
Step 4: Choose the unneeded backup to delete.
Way 5. Remove App Installer Files
It’s no doubt a good idea to delete app installer files that are usually useless after software installation but can increase the System Data storage space. To delete these app installer files, here is how.
Step 1: Head to the Downloads folder by opening a Finder window and choose Downloads in the sidebar.
Step 2: Locate the app installers like DMG/PKG files and move them to Trash.

Way 6. Clear Leftovers of Uninstalled Apps
Have you deleted an app from your Mac through moving the app to Trash? It’s a pity to tell you that you haven’t completely uninstalled the unneeded app and it leftovers are still occupying the System Data storage. However, it’s available to wipe the leftover files from your macOS and here is the short guide.
Step 1: Run Finder and click Go > Go to Folder in the upper menu.
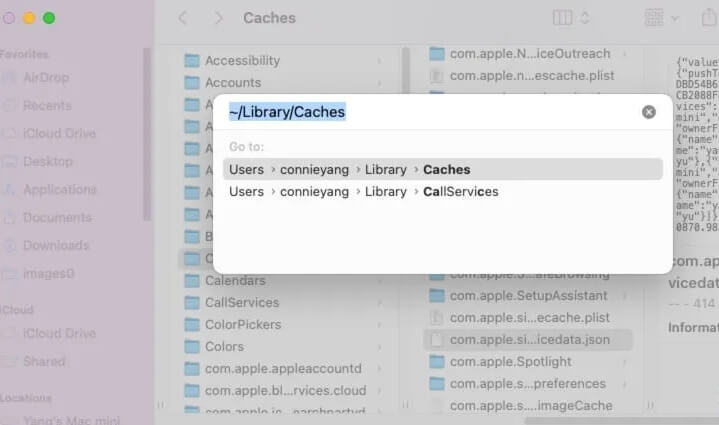
Step 2: Input the following paths one by one in the Go to Folder box to access the corresponding folders. Remember to press Enter after entering each path. Then, locate and delete the items related to the uninstalled app in each folder.
- ~/Library/Application Support
- ~/Library/Application Support/CrashReporter
- ~/Library/Caches
- ~/Library/Containers
- ~/Library/Cookies
- ~/Library/Internet Plug-Ins
- ~/Library/Logs
- ~/Library/Preferences
- ~/Library/Saved Application State
- /Library/Caches
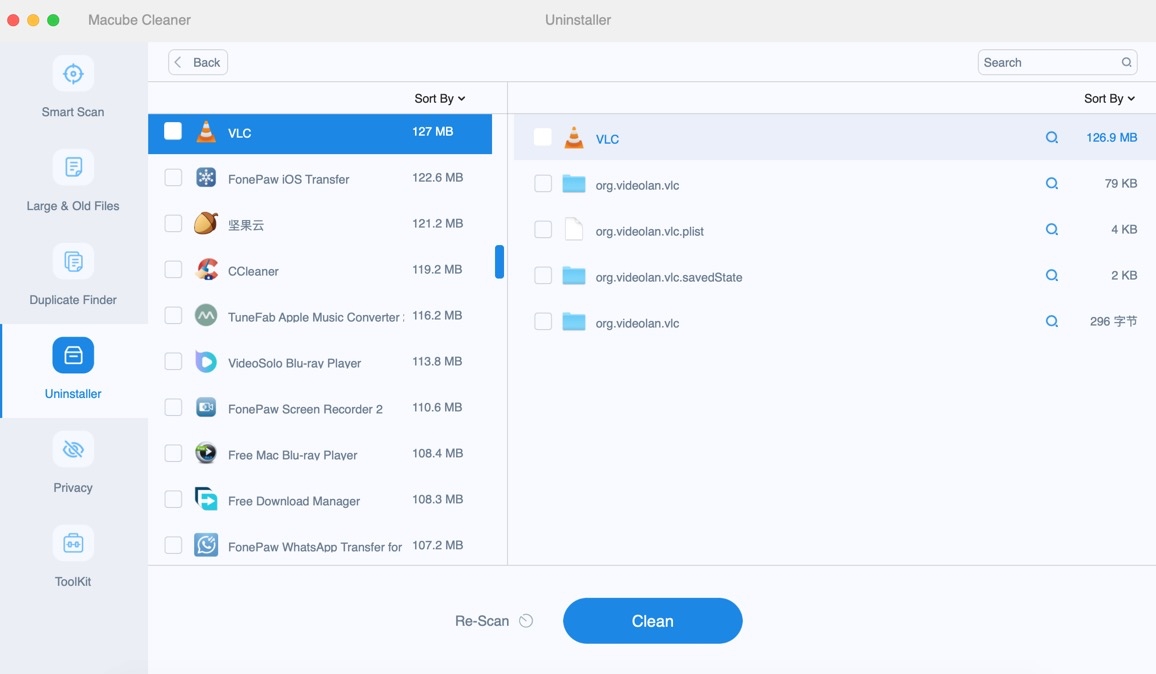
Tip: Macube Cleaner is highly recommended to you if you want to uninstall apps on your Mac without leftovers.
Part 6. Advanced Ways to Clean up System Data Storage on Mac
If you are familiar with macOS, you can attempt to manually clear System Data Storage. What you need to do is navigate to the Library folder via the steps in Part 4 and locate the files associated with System Data, then proceed to delete them. Please be careful when you are clearing the Library folder to avoid deleting important system files that are critical to the functioning of macOS.
Part 7. Ultimate Way to Reduce System Data Storage on Mac
Is the System Data storage still huge after applying the ways above? Then, erasing the Mac hard drive and reinstalling macOS must be helpful. Before doing a clean macOS reinstallation, please don’t forget to back up your data on your Mac.
Step 1: Boot your Mac into Recovery Mode via the steps below.
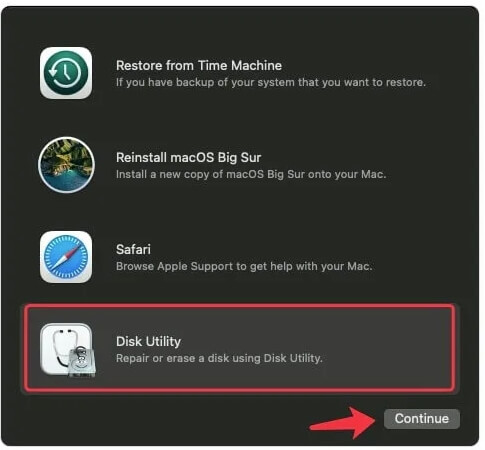
For Mac with Apple silicon M1:
- Power off your Mac and press the power button to access the startup options.
- Select Options and click Continue. Now, your Mac is in Recovery Mode.
For Mac with Intel chip:
- Restart your Mac.
- Press and hold Command + R until the Apple logo or spinning globe appears on your Mac screen.
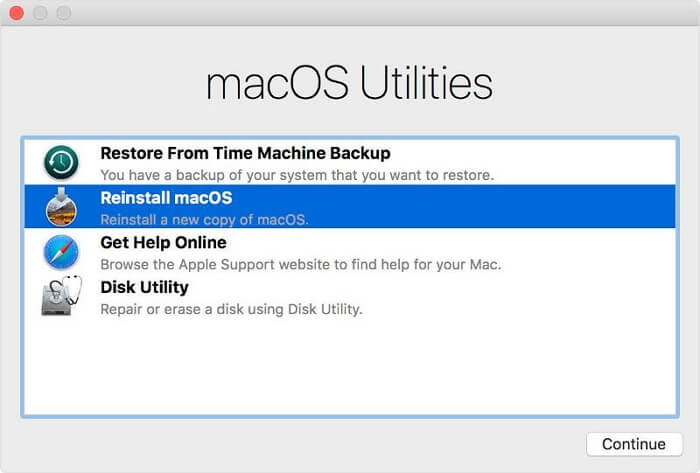
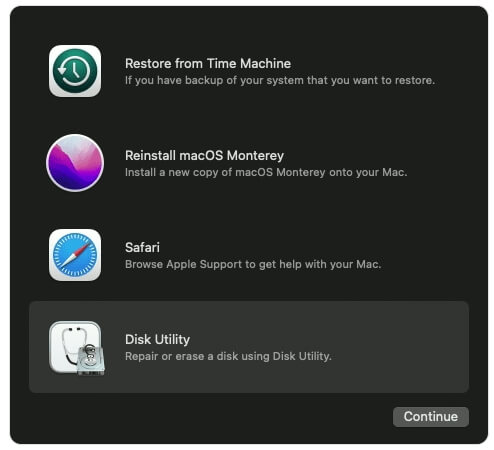
Step 2: In the shown Utility window, click Disk Utility and hit Continue.
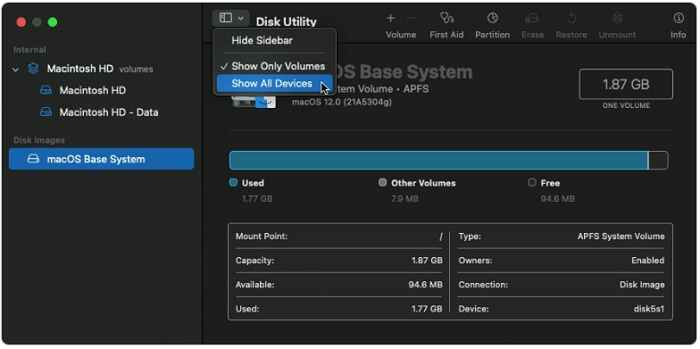
Step 3: Click the View icon and choose Show All Devices.
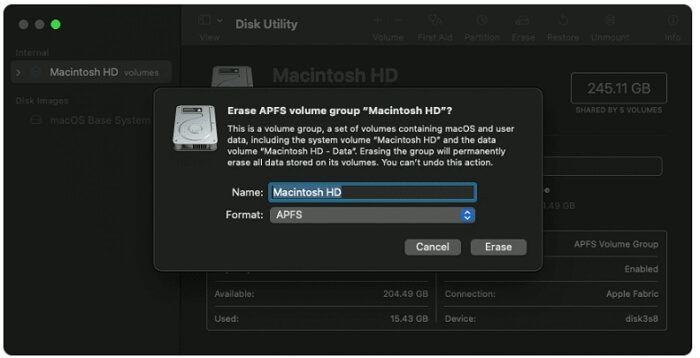
Step 4: Select Macintosh HD from the left bar and click Erase in the top pane.
Step 5: Set Macintosh HD as the drive name and select APFS as the formal. After that, hit Eraseto start wiping the drive.
Step 6: After drive erasing, delete any volumes in the sidebar but do not remove the Macintosh HD volume.
Step 7: Quit Disk Utility and you will be led to the Utilities window again. Now, choose Reinstall macOS. System Data in the newly installed system will be small.
Wrap Up
System Data on Mac can be effectively cleared with the ways in this post. We have divided the ways into different levels, such as cleaning up cache with Macube as a basic method and reinstalling macOS as an ultimate solution. You can follow the solutions in the order of Basic - Advanced - Ultimate to decrease System Data storage as much as possible.

Macube Cleaner
Speed up and troubleshoot your Mac super easily with a Macube full-featured free trial!
Start Free Trial