Since its introduction, WhatsApp has become a ubiquitous messaging platform, connecting millions of people worldwide. It allows you to engage in text chat, video chats, and share media files with your family and friends, and it's supported on all devices, including Mac. However, if for any reason, you decide to uninstall WhatsApp from Mac, don't panic. In this ultimate guide, we will explore the best methods to completely uninstall WhatsApp from your Mac, using a third-party tool or the official manual method.
Part 1: All You Need to Know Before Uninstalling WhatsApp on Mac
Will uninstalling WhatsApp delete all my chat history?
Uninstalling WhatsApp from your Mac does not automatically delete your chat history. By default, WhatsApp saves chat backups on your iCloud account or local storage, depending on your settings. If you wish to retain your chat history, ensure you've backed up your chats before proceeding with the uninstallation.
How do I ensure that all WhatsApp files are completely removed from my Mac?
The best way to ensure WhatsApp files are completely removed from your Mac is by using Macube Cleaner. However, if you prefer using the official manual method, you'll need to go to the application folder on your Mac and search for all WhatsApp-related files to remove them.
Can I reinstall WhatsApp on my Mac after uninstalling it?
Yes, of course. You can reinstall WhatsApp on your Mac after uninstalling it. You just need to download it from the official website or the App Store. However, bear in mind that reinstalling the app won't restore your previous chat history unless you have backed up your chats.
What problems will it cause if it is not completely removed?
Leaving residual WhatsApp files on your Mac after an incomplete uninstallation can cause several issues. These may include wasted storage space, potential conflicts with future installations, and hidden background processes that might affect your Mac's performance.
Part 2: How to Completely Uninstall WhatsApp from Mac
Macube Cleaner is a comprehensive cleaning software that provides a one-stop solution for all your Mac maintenance needs. The software is incredibly easy to use and comes with a wide range of features, giving you access to the right tools to remove duplicate files, uninstall apps, and do lots more. With Macube Cleaner, you can effortlessly uninstall WhatsApp from your Mac and its associated files. And it supports other helpful tools, such as a large file finder, an extension manager, a similar image finder, and a privacy cleaner. It also boasts a one-click cleaning function called “Smart Scan”, allowing you to quickly scan your Mac for all kinds of junk and other unnecessary files, and remove them in one simple click.
Key Features
- Uninstall WhatsApp and remove its related files safely and securely.
- Facilitates the removal of a wide range of apps on Mac without compromising the system’s function.
- Offers a 7-day free trial for users to explore all features without limitations.
- Besides app uninstaller, Macube Cleaner, also supports a built-in duplicate file finder, large file finder, similar image finder, etc.
Step 1: Download and install Macube Cleaner on your Mac.
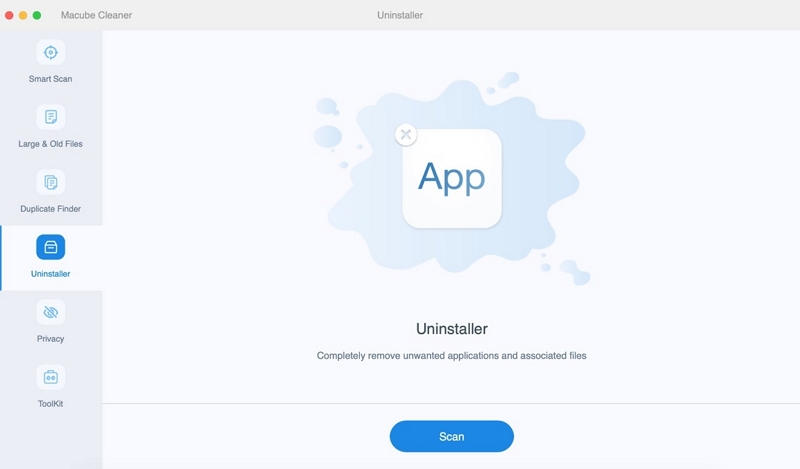
Launch the program and choose the Uninstaller feature. Then, click the Scan button to proceed.

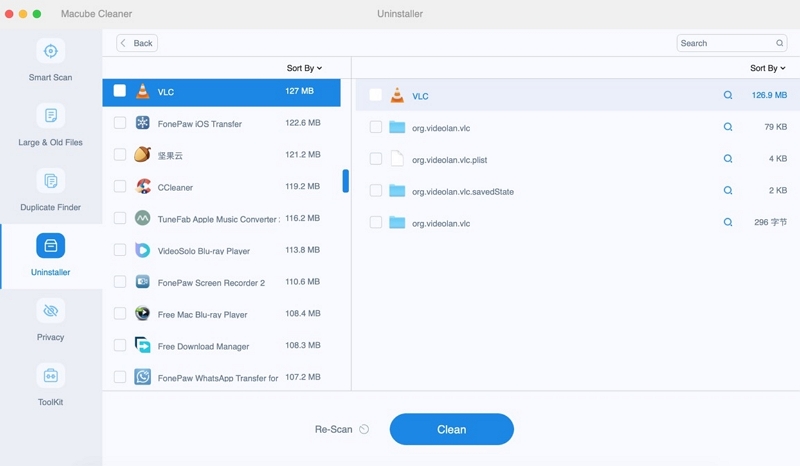
Step 2: Next, Macube Cleaner will show you a list of all the apps on your Mac. All you meed to do is to preview the result and select WhatsApp from there.

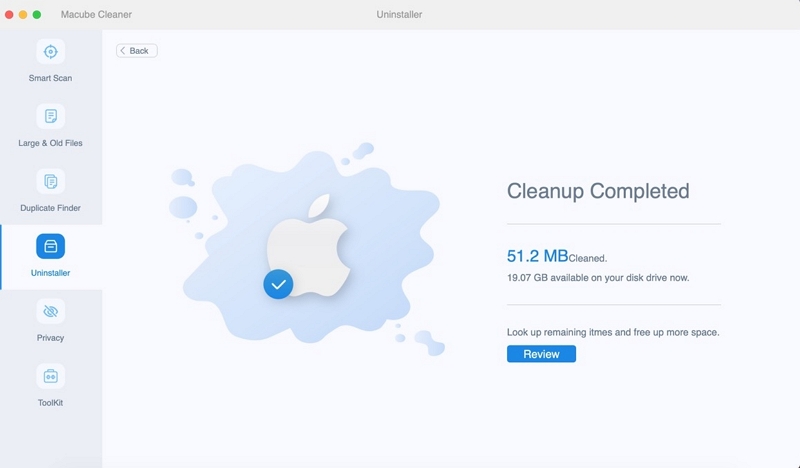
Step 3: After that, tick the checkbox next to all files associated to WhatsApp and click the Clean button to start uninstalling WhatsApp and its associated files from your Mac completely.

Part 3: Official Way to Uninstall WhatsApp on Mac Manually
Another way to uninstall WhatsApp on a Mac is by using the manual method. But unlike using Macube Cleaner, you need to uninstall the WhatsApp application first before removing associated files. See how this works in the steps below;
Step 1: Quit WhatsApp: Make sure WhatsApp is not running.
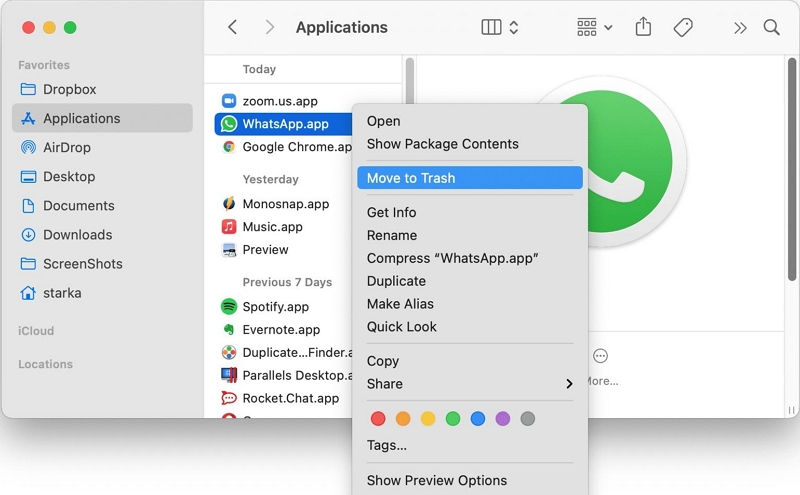
Step 2: Move WhatsApp to Trash: Open the Application Folder and locate WhatsApp from the list of apps. Then, right-click the WhatsApp app icon and select Move To Trash from the drop-down

Step 3: Delete Application Support Files:
Next, simultaneously click Command + Shift + G on your keyboard and navigate to the library location. Then, find and remove the following WhatsApp files;
- ~/Library/Application Support/WhatsApp/
- ~/Library/Caches/WhatsApp/
- ~/Library/Saved Application State/WhatsApp.savedState/
- ~/Library/Preferences/WhatsApp.plist/
- ~/Library/Preferences/WhatsApp.Helper.plist/
- ~/Library/Logs/WhatsApp/
Conclusion
Uninstalling WhatsApp from your Mac is a straightforward process, but it requires careful attention to ensure complete removal. Using third-party tools like Macube simplifies the process and guarantees a thorough uninstallation, removing all associated files and data. Alternatively, if you prefer to do it manually, follow the steps we've provided to remove all WhatsApp-related files from your Mac.
Hot Articles

Macube Cleaner
Speed up and troubleshoot your Mac super easily with a Macube full-featured free trial!
Start Free Trial