Downloading files and apps on your Mac system is a common activity for any busy individual. However, over time, these downloads can accumulate and take up so much valuable storage space, causing your computer to start operating abnormally. Trust me, you don't want to get caught up in a situation whereby your Mac keeps misbehaving due to full storage. So, read this guide to learn how to uninstall and remove downloads on Mac to free up storage and optimize your device's performance.
Part 1: Smartly Remove Unwanted Downloads from Browser/Skype/Email
The most effective way to manage and uninstall downloads on your Mac is by using Macube Cleaner. It is a powerful and user-friendly application that allows you to easily organize and remove unwanted downloads from your browser, Skype, and email applications. With Macube, you can reclaim valuable storage space within a few clicks. Plus, it offers a wide range of features, including duplicate files finder, file shredder, batch remover, similar image finder, and lots more that enables you to optimize the performance of your Mac without requiring advanced knowledge.
Key Features
- Smart scan tool facilitate quick and easy scanning of in-app caches, system caches, email attachments, and lots more.
- Supports large and old files finder, which enables you to easily find and delete large and old files without hassle.
- Boasts advanced privacy feature, preventing your files and important data from third-party access.
- Select and remove multiple downloads at once and remove them in a single click, streamlining the uninstallation process.
- It offers affordable plans compared to its competitors.
- Built-in privacy protector allows you to securely clear sensitive browser data and caches.
Now, let's learn how to remove downloads using Macube Cleaner;
How to Remove Downloads with Macube
Way 1: Remove Downloads from Browser Mac
Step 1: Open Macube Cleaner on your Mac and start the installed program once the process is complete.
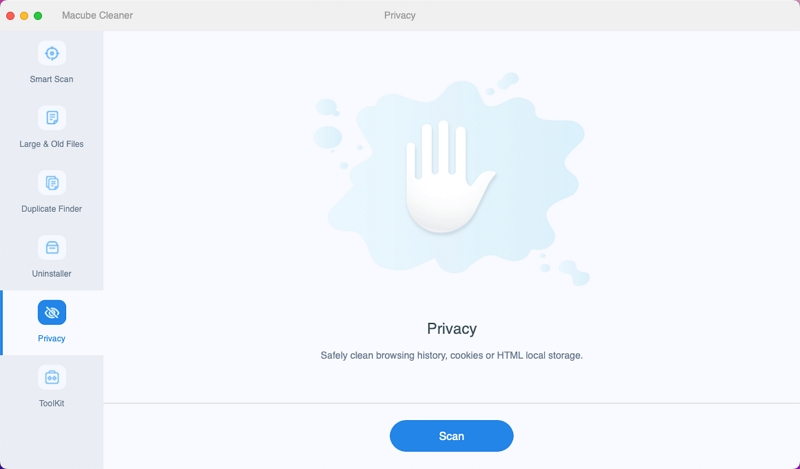
Step 2: Navigate to the left interface and select the Privacy. Then, click on Scan button to proceed.
Step 3: Macube Cleaner will employ its Smart Scan technology to start finding downloads. Then, select the specific browser you want to erase downloads from and tick the checkbox next to Download Files and Download History.
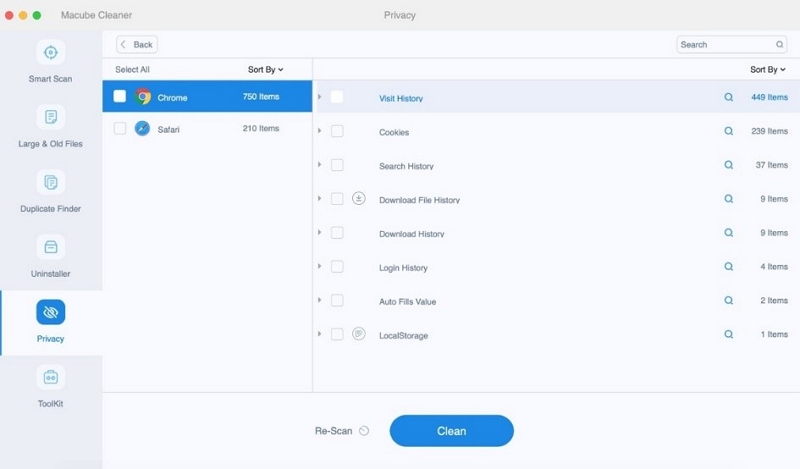
Step 4: Finally, click the Clean button to finish the operation.
Way 2: Remove Unwanted Skype & Email Downloads From Mac
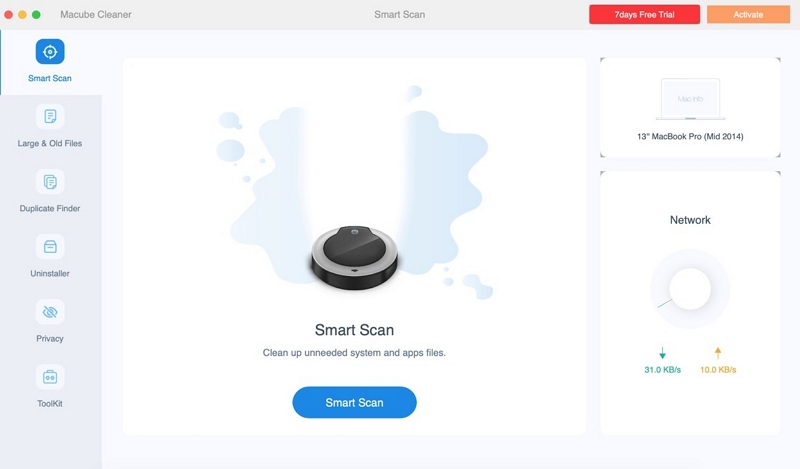
Step 1: Open Macub Cleaner and select Smart Scan from the left bar. Then, click Email Attachment or Skype Attachments.
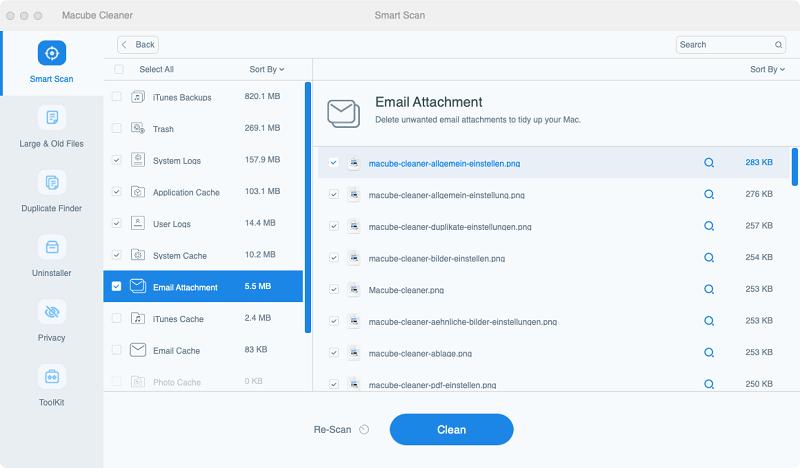
Step 2: Choose the mail & skype attachments you wish to delete and click the Clean button to finish.
Overall, using Macube Cleaner allows you to easily and efficiently uninstall unwanted downloads from your browser, Skype, and email applications, ensuring a clutter-free and optimized Mac experience.
Part 2: Manually Remove Download Caches on Mac
If you don't want to use the above techniques, you can use a manual technique to remove download caches in your Mac. Though the process is not as straightforward as using Macube. Let's explore the process to operate without wasting much of your time;
For Safari Downloads
Safari is the default web browser on Mac, and it accumulates a significant amount of download caches over time. Here, we’ve explained how do clear Safari downloads on Mac manually within a few clicks;
Step 1: Open Safari and click on the Show Downloads icon at the top right side of the toolbar.
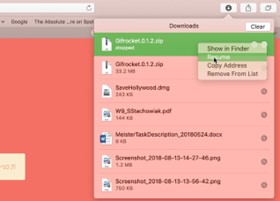
Step 2: Click the Clear button to remove all the Safari downloads instantly.
For Skype Downloads
To remove Skype downloads and their associated caches on your Mac, follow these steps;
Step 1: Ensure that Skype is not running on your Mac. Then, Open Finder and click on "Go" in the menu bar.
Step 2: Press and hold the "Option" key to reveal the "Library" option, then click on it and locate and open the "Application Support" folder.
Step 3: Within the Application Support folder, look for the "Skype" folder and delete it.
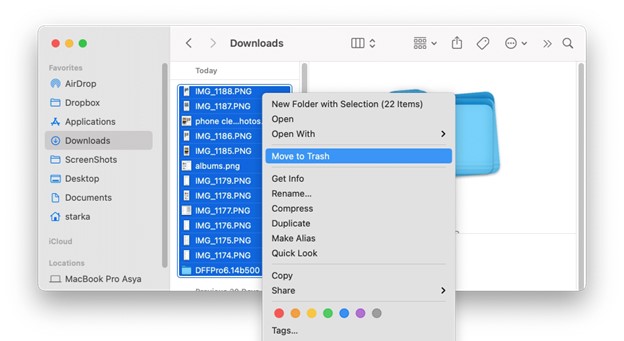
Step 4: Empty the Trash on your Mac to permanently remove the Skype download caches.
For Email Downloads
For Email applications such as Apple Mail or Microsoft Outlook, follow the following steps to get the job done;
Step 1: Launch Finder and click on "Go" in the menu bar. Then, press and hold the "Option" key to reveal the "Library" option, then click on it.
Step 2: Navigate to "Application Support" folder and find the folder corresponding to your email application (e.g., "Mail" for Apple Mail or "Outlook" for Microsoft Outlook).
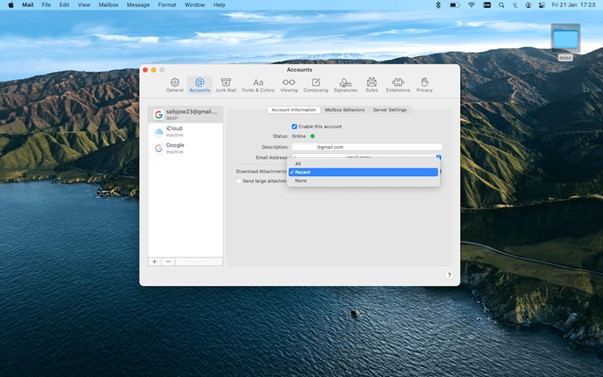
Step 3: Open the folder related to your email application and delete any caches or downloaded files that are no longer needed.
Part 3: How to Completely Uninstall Apps on Mac
In addition to removing downloads, you may also want to uninstall apps that you no longer use or need on your Mac. Luckily, Macube also supports a built-in Uninstaller feature that allows you to easily uninstall apps with their leftover files automatically with just one click. See the steps to get the job done in the instructions below;
How to Completely Uninstall Apps with Macube
Step 1: Install the latest version of Macube Cleaner on your Mac.
Step 2: Open the program and choose the Uninstaller > click the Scan button.
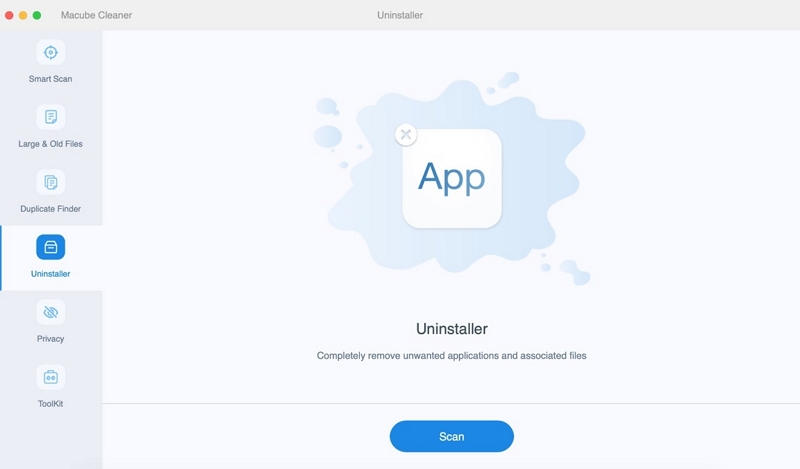
Step 3: Macube Cleaner will begin to scan your Mac for available apps. Then, it'll display the list of apps discovered on your computer.
After that, preview the results and choose the apps you want to uninstall. Then, tick the relevant checkboxes of the apps leftover files to proceed.
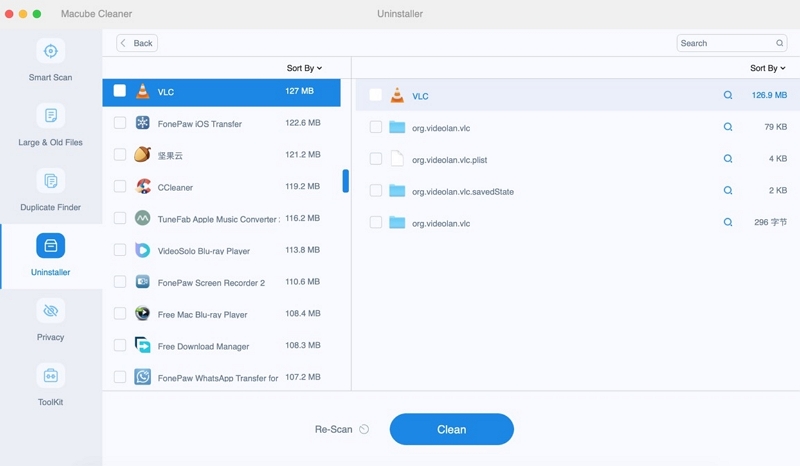
Step 4: Finally, click the the Clean button to uninstall the selected apps from your system.
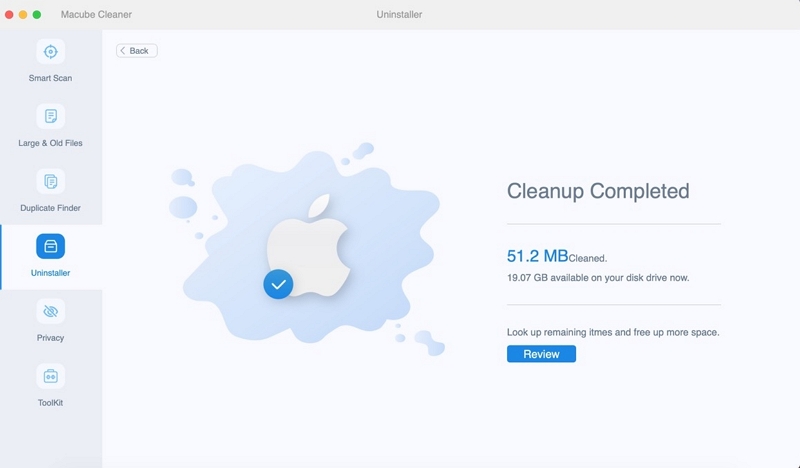
By using Macube, you can easily and completely uninstall apps from your Mac!
Part 4: Hot FAQs on Uninstalling Downloads on Mac
Where to Find the Downloads Folder on Mac?
The default location for downloaded files on a Mac is the Downloads folder. You can find the Downloads folder in the Dock or in the sidebar of the Finder window. Additionally, you can change the download location in the preferences settings of your web browser.
How Do I Completely Uninstall an App on Mac That Won't Delete?
If you encounter an app on your Mac that won't delete using the standard uninstallation methods, you can try the following techniques:
- Force Quit the Mac App: Use the Activity Monitor to force quit the app if it is still running in the background.
- Remove App Files: Locate the app's files manually by navigating to the Applications folder or Library folder and delete them.
- Clear App Preferences: Search for the app's preferences files and delete them to ensure a complete uninstallation.
- Use a Third-Party Uninstaller: If the above steps don't work, you can use a third-party uninstaller tool like Macube Cleaner to thoroughly remove the app from your Mac.
Why Can't I Delete Downloads on My Mac?
If you are unable to delete downloads on your Mac, it may be due to several reasons, such as:
- File Permissions: Check if you have the necessary permissions to delete the files. You may need to change the file permissions to delete them.
- File in Use: Make sure that the files are not currently in use by any application. Quit any applications that may be using the files and try deleting them again.
- Locked Files: Check if the files are locked. Right-click on the files and select "Get Info" to see if the "Locked" checkbox is selected. Uncheck it and try deleting the files again.
If you are still unable to delete the downloads, restarting your Mac or using a third-party uninstaller tool like Macube Cleaner can help resolve the issue.
Conclusion
In this comprehensive guide, we have explored various methods to effectively uninstall downloads on your Mac. By utilizing tools like Macube Cleaner and following the step-by-step instructions provided, you can easily remove unwanted downloads from your browser, Skype, and email applications. But if you don’t wish to use a third-party app, you can opt for the manual method, Though we recommend using Macube Cleaner.
Hot Articles

Macube Cleaner
Speed up and troubleshoot your Mac super easily with a Macube full-featured free trial!
Start Free Trial