Besides Safari, Google Chrome is probably the most widely used browser for Mac users. And sometimes, when the Chrome keeps crashing, freezes or won't start, you are recommended to fix the problem by uninstalling and reinstalling the browser.
Deleting the browser itself is usually not enough to fix the Chrome problems. You need to completely uninstall Chrome on your Mac, which means to delete not only the browser but also its supporting files (bookmark, browsing history, etc.) If you are not sure about how to uninstall Google Chrome or somehow can't uninstall the Chrome. Follow the instructions to delete Google Chrome from your Mac.
Part 1: How to Remove Google Chrome from Mac Manually
If you want to delete Chrome from your Mac manually, you need to follow the 4 steps in order to completely remove the Chrome browser and erase all the data.
1. Clear Browsing Data
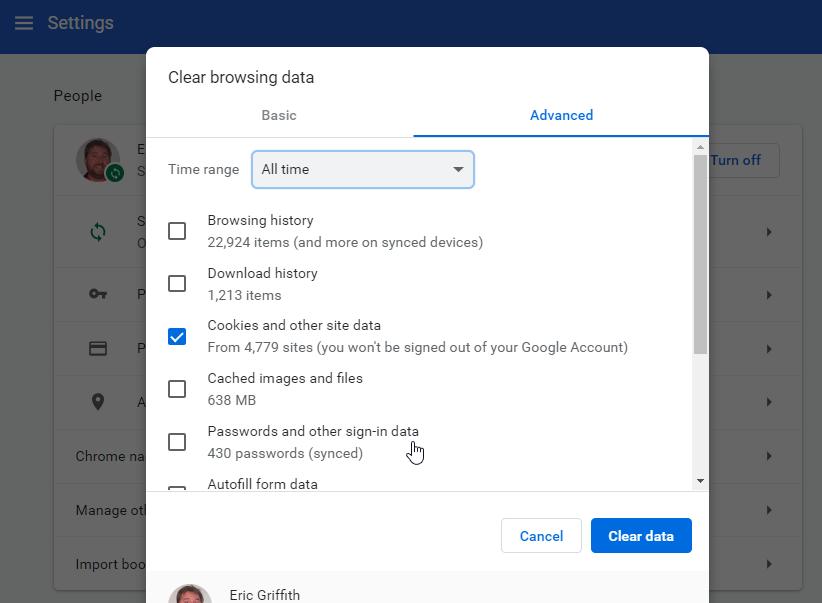
Your browsing data stores cookies, caches, histories, and your passwords on Chrome. Before uninstalling the browser, you had better to clear the browsing data:
- Open the three dots icon at the top right corn, then choose More tools > Clear browsing data.
 Tips:
Tips:
- Use the shortcut keys “Shift + Command + Delete” or input chrome://settings/clearBrowserData to the address bar and tap Return, can directly into the "Clear browsing data" window.
- Select a time range from the drop-down menu (you can just choose All time/Last hour/Last 7 days), and tick the types of data that you want to delete.
- Hit “Clear Data” to confirm.
And you can delete your profile before the uninstallation.
2. Quit Google Chrome
Some users can't uninstall the Chrome and come across this error message "Please close all Google Chrome windows and try again". It could be that the Chrome is still running in the background. Therefore, you should quit the browser before uninstalling it.
- In the Dock, right-click the Chrome icon.
- Select Quit.
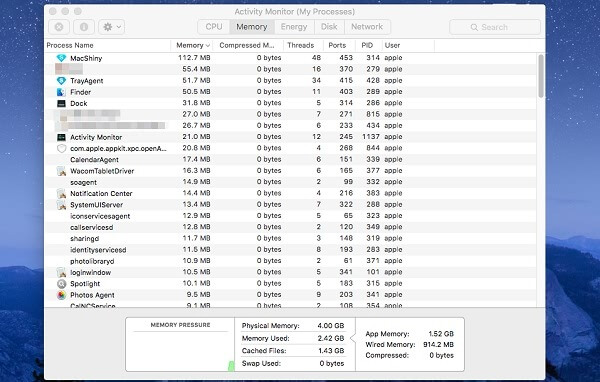
If the Chrome is crashed or frozen, you can force quit it in Activity Monitor:
- Open Applications > Utilities > Activity Monitor.
- Find the Chrome processes and click X to quit the processes.
3. Delete Google Chrome
Go to Applications folder and find Google Chrome. Then you can drag it to the Trash or right click to choose "Move to Trash". Please remember go to the Trash and empty it.
4. Delete Related Files
In some cases, the Chrome acts weird because of corrupted app files. Therefore, it is essential to delete related files of the Chrome:
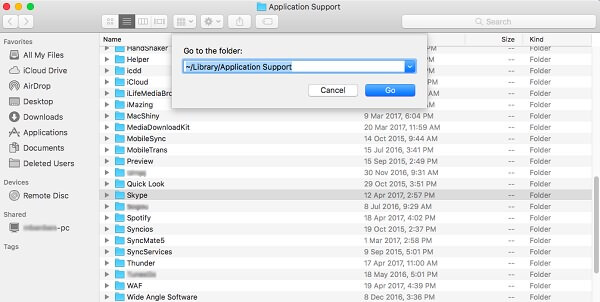
- At the top of the screen, click Go > Go to Folder or open "Go to Folder" with the “Command-Shift-G” shortcut.
- Enter
~/Library/Application Support/Google/Chrometo open the folder of Chrome and press Return. - Move the folder to Trash and empty it.
- The Chrome folder in Library contains information about bookmarks and browsing history of the browser. Please make a backup of the information that you need before deleting the app files.
- Restart your Mac before reinstalling Google Chrome.
Part 2: How to Uninstall Google Chrome in One Click [Free]
There is also a much simple way to completely uninstall Google Chrome in one click, and don’t require you to sort out the app files of Chrome at all. That is to use Macube Cleaner, which contains an easy-to-use app uninstaller for Mac. The uninstaller can:
- Scan out the app files that are safe to remove.
- Quickly locate downloaded apps and app files on Mac.
- Delete apps and all the files related to it in one click.
And the good news is, this tool is free to use for 7 days, so you can just install it and utilize this feature to solve your Chrome problem without paying a dime.
Here is how to quickly delete Google Chrome from your Mac with Macube Cleaner.
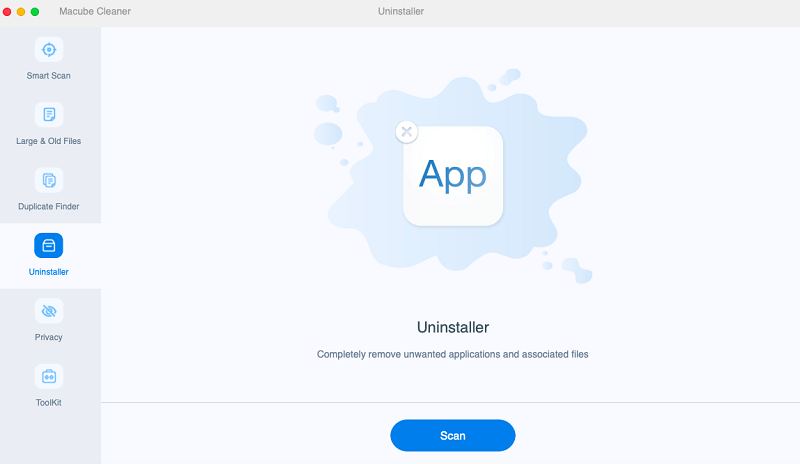
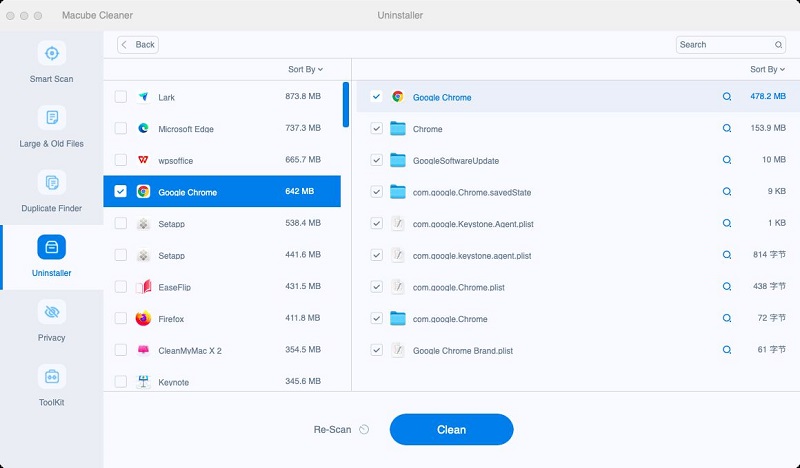
Step 1. Open Macube Cleaner and click Uninstaller to scan.
Step 2. All downloaded applications on your Mac will be display. Select Google Chrome.
Step 3. Select the app, supporting files, preferences and other files, and click Clean.
 Note:
Note:
- Macube Cleaner is a comprehensive Mac cleaner. With Macube Cleaner, you can also clean duplicate files, system files, large old files in one click to free up more space on your Mac.
Bonus: How to delete an app that cannot be deleted?
Do you always get frustrated when trying to uninstall software? Get a notice like this? The following will tell you the easiest way to solve it.
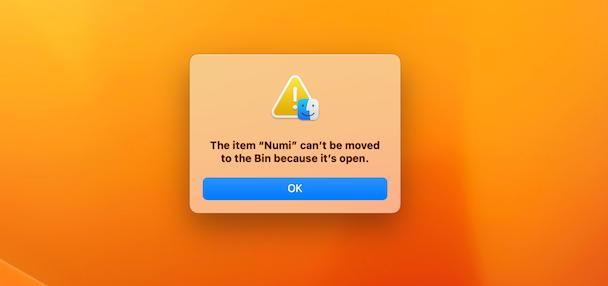
Some apps are pre-installed macOS components that are protected by the system, while others refuse to be removed because they are already open, even though you are not launching or opening it.
The most efficient way:
A. Force out of the problematic application: Press Command + Option + Esc, or close the application if it is in the list.
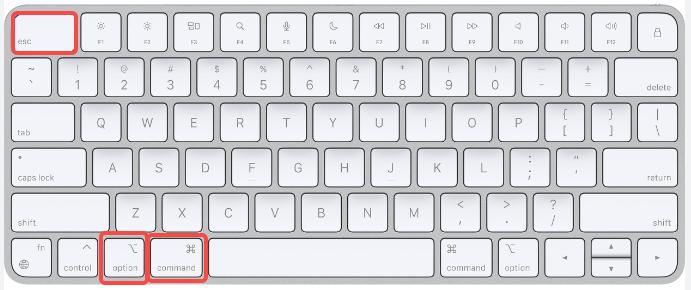
B. Restart the Mac and manually delete it again: If you still can't remove it, it's probably pre-installed, so it should remain on your Mac.
Deleting applications can be an annoying process. Hopefully, after using the methods in this article, your problem has been solved. If you have any more help, please come to the official website of Macube Cleaner to find other answers.
Conclusion
This article concludes 2 ways that you can use to uninstall Chrome from your Mac. If you want to delete the Chrome app manually, you need to follow the 4 steps to delete your browsing data, quit the app, remove Chrome and all the related data. If you prefer to use a quicker and professional way, you can use Macube Cleaner – which can help you finish the task in one click.

Macube Cleaner
Speed up and troubleshoot your Mac super easily with a Macube full-featured free trial!
Start Free Trial