If you are familiar with macOS, you may have heard of Secure Empty Trash. Secure Empty Trash is an inbuilt feature working on permanently erasing the items on Trash and making it impossible to recover them. However, you can only find this option in OS X El Capitan earlier because Apple removed this useful feature in OS X EI Capitan and later. So, how can you securely empty the Trash on your Mac if you are running recent macOS like Big Sur or Catalina? Luckily, there is always a way for you to do this and we will share more details in the following section.
How to Empty Trash Securely on Sonoma/Ventura/Big Sur
Although the recent macOS doesn’t provide a quick option like Secure Empty Trash for you to clean up Trash without leaving a trace, you can still empty Trash securely by specifically forever deleting files from Trash and this part will show you how to get it done.
Step 1: Restore Unwanted Files from Trash
- Create a new folder on your desktop first.
- Open Trash. Drag and drop the files you want to shred into the created folder.
Step 2: Use Macube to Permanently Remove the Folder
Macube Cleaner is a multifunctional cleaner for Mac, which provides different features to make your macOS lightweight. It can remove junk and unnecessary data like cache, temporary files and duplicate images/videos from your Mac and in turn release gigabytes of storage space for you. Furthermore, it supports other powerful features to protect your privacy, such as shredding your sensitive documents and clearing your browsing data. Its File Shredder will be used here, which can forever wipe files from macOS with no chance of recovery.
More about Macube:
- Uninstall apps on Mac completely within one click.
- Remove stubborn files easily.
- Manage plug-ins and add-ons in one place.
- Clear system junk like user logs and system logs without affecting the macOS.
- Support any versions of macOS.
Forever Delete the Folder with Macube:
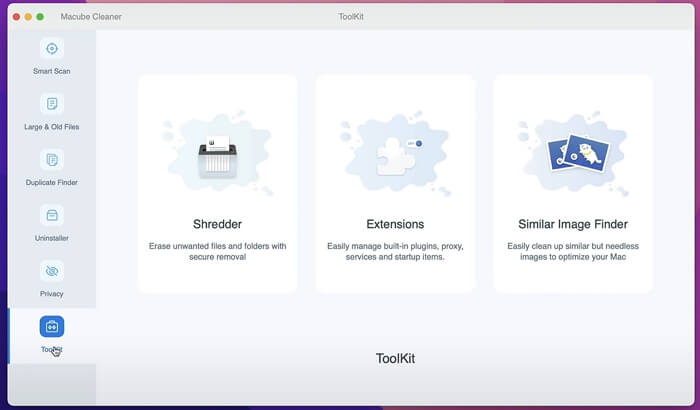
Step 1: Run Macube Cleaner on your Mac and click Toolkit in the sidebar.
Step 2: Choose Shredder to continue.
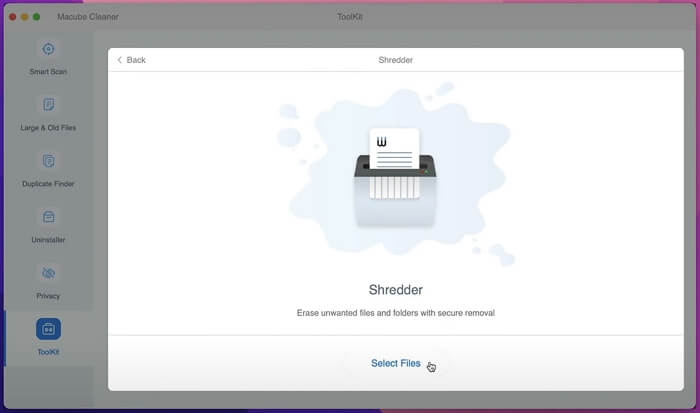
Step 3: Click Select Files in the Shredder screen.
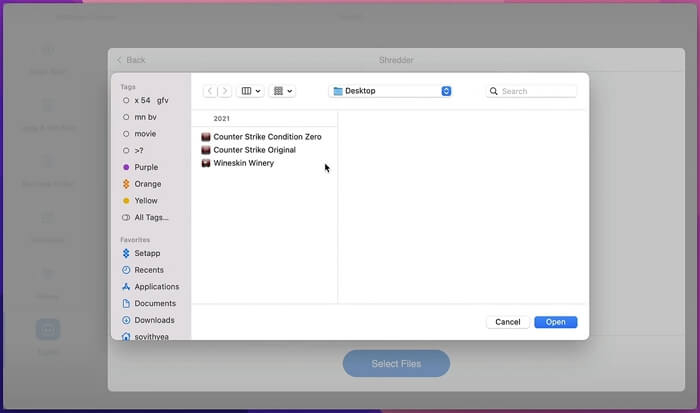
Step 4: Choose the folder containing the items of Trash. Then, click Open to input the folder.
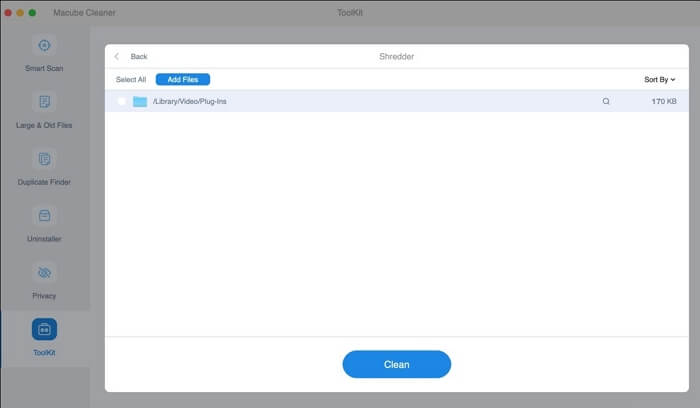
Step 5: Check the folder and hit Clean. Instantly, Macube will erase the folder for you.
Note: The files deleted by Macube Shredder are unrecoverable.
How to Secure Empty Trash on OS X El Capitan Earlier
If your Mac is installed with the old macOS such as Yosemite, the Secure Empty Trash feature is available to you and you can use it to conveniently but effectively clear the entire Trash.
To use Secure Empty Trash option, here are 2 ways.
Way 1. Use Shortcuts
- Right-click the Trash icon on the Dock while pressing Command button.
- Click Secure Empty Trash.
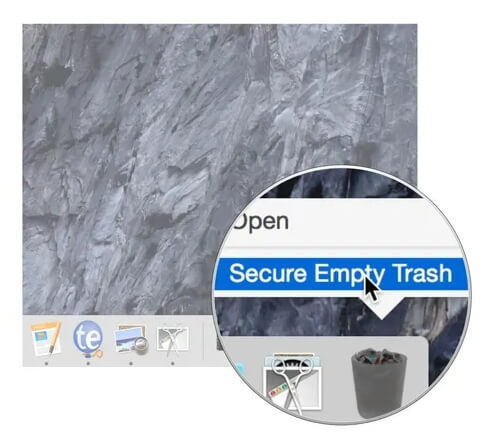
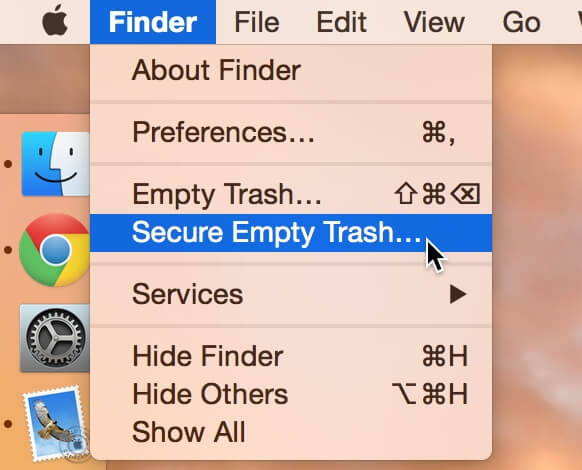
Way 2. Through Finder
Click Finder in the upper menu and then select Secure Empty Trash from the drop-down menu.
How to Empty Trash on macOS with Empty Trash Feature
Different from Secure Empty Trash, simple Empty Trash option won’t delete all items from Trash instantly, though you can see nothing after using the feature. The removed items will be erased when they are overwritten by new data. This leaves us an opportunity to get back the deleted files that are deleted by accident or we regret to remove them after deletion. To apply Empty Trash option, here 4 ways are summed up for you.
Way 1. Right-click the Trash icon on the dock and click Empty Trash.
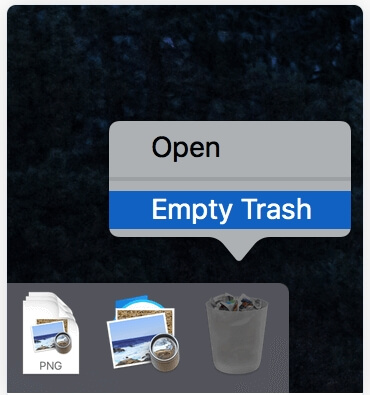
Way 2. Open Trash and click Empty in the top-right corner.
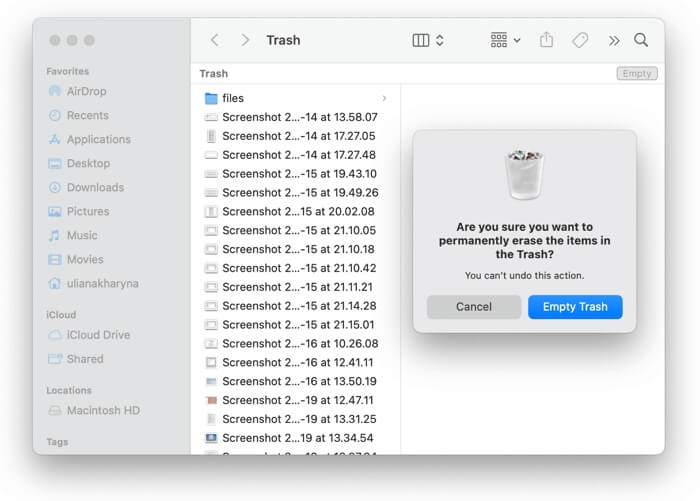
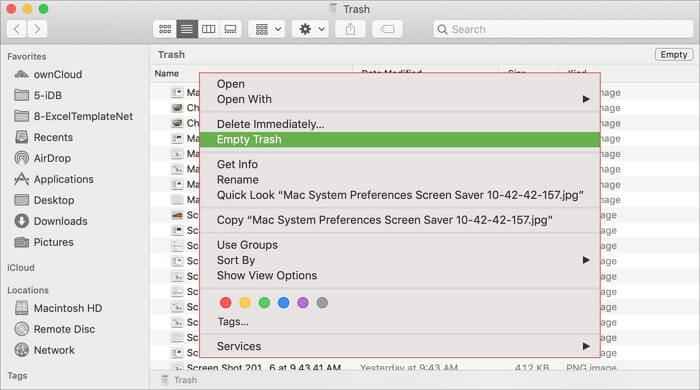
Way 3. Access Trash first. Then right-click the blank area to choose Empty Trash.
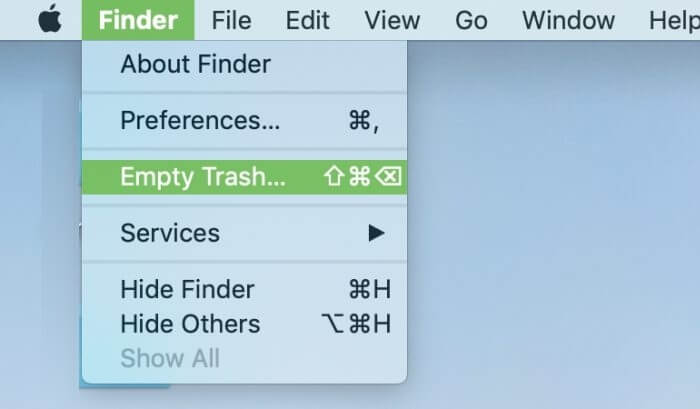
Way 4. Choose Finder in the upper pane, followed by clicking Empty Trash.
How to Clear Trash without Using Empty Trash Option
Besides the built-in Empty Trash feature, there are other 2 methods for you to clean up Trash on Mac.
Method 1. Use Terminal
Step 1: Press Command+Space to open Spotlight Search.
Step 2: Search for Terminal and hit Return to open it.
Step 3: Input the command: sudo rm -R and then press Space.

Step 4: Access Trash and drag the unneeded files into the Terminal and hit Return.

Step 5: Enter your admin password and press Return.
Method 2. Use Third-party Tool
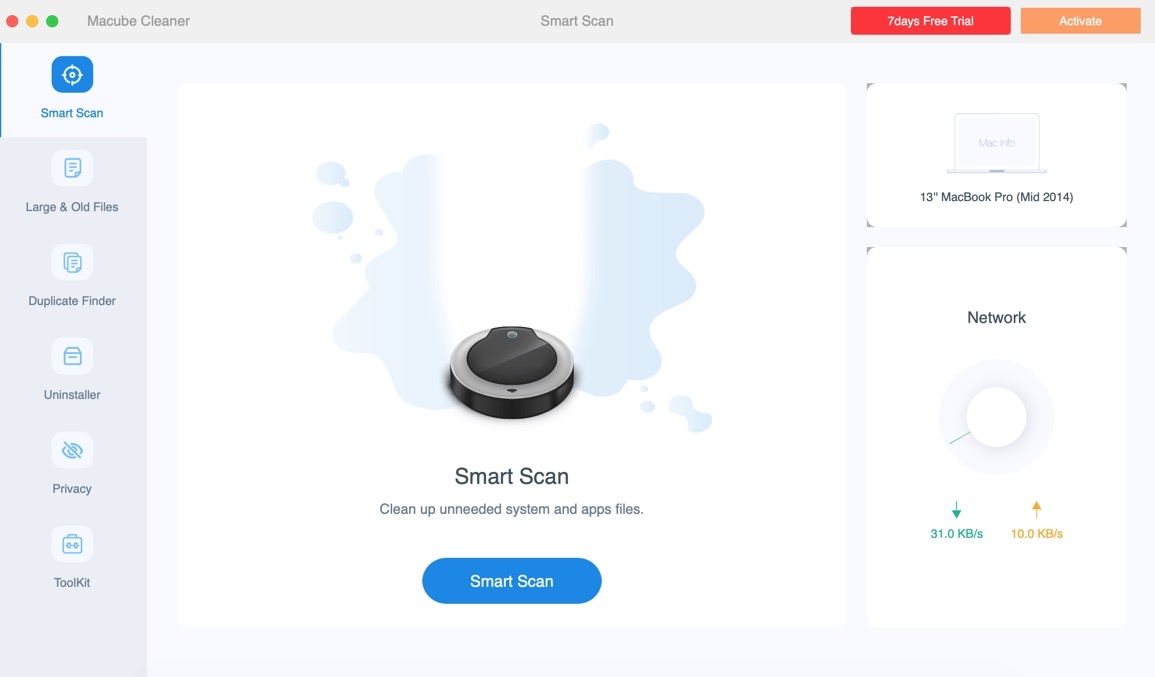
Step 1: Install and launch Macube Cleaner, a professional junk cleaner on your Mac.
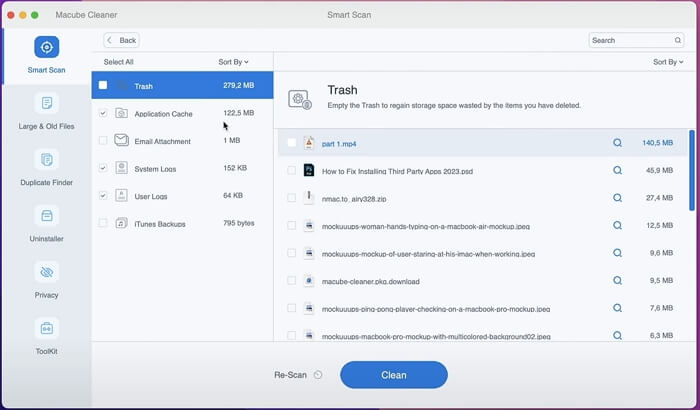
Step 2: Click Smart Scan to find out all unnecessary data such as cache and temporary files.
Step 3: Check Trash and hit Clean to empty the entire Trash.
Tip: To remove some files from Trash, please remember to only select the target files.
Bonus: How to Change Settings about Emptying Trash on Mac
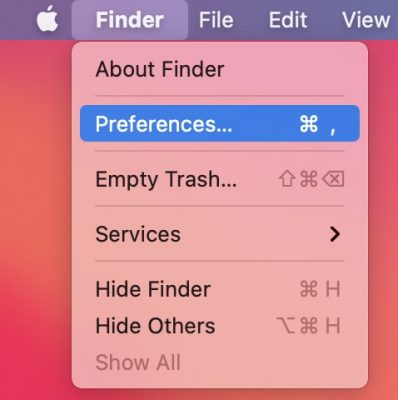
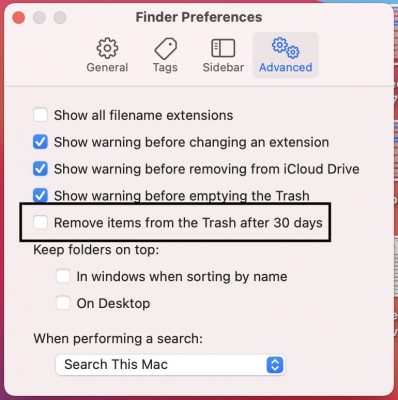
macOS supports automatically emptying Trash every 30 days and displaying the Trash warning depending on your choice. You can set them up by following the steps below.
Step 1: Click Finder in the upper menu and choose Preferences.
Step 2: Switch to the Advanced tab.
- Check Remove items from the Trash after 30 days to set the auto-deletion.
- If you want tostop receiving the warning message before emptying Trash each time, check Show warning before emptying the Trash.
Wrap Up
Believe you know how to securely empty Trash or empty Trash using the traditional ways on macOS Sonoma or earlier now. You can pick the way based on your requirements and OS.

Macube Cleaner
Speed up and troubleshoot your Mac super easily with a Macube full-featured free trial!
Start Free Trial