“I can't update macOS because 165 GB of purgeable space is occupying most of my available 180 GB storage. How can I clear the huge purgeable space on my Mac running macOS Ventura?”
This issue is a concern for many Mac users, preventing them from installing new apps, updating macOS, or performing high-resource tasks like video editing with iMovie. If you are one of them, take it easy, this post will tell you how to remove purgeable space on your Mac Monterey/Ventura/Sonoma with your fingertips. Now, let’s delve into more details.
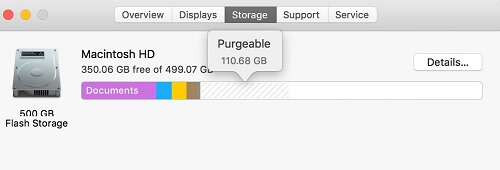
What is Purgeable Space on Mac?
Purgeable space is the storage space for the files that are unnecessary for macOS running and will be purged automatically by macOS when the space is insufficient. The unnecessary files commonly include the items as follows.
- Cache of apps and the system.
- The local snapshots of Time Machine.
- Items in Trash.
- The old or outdated files.
- The local version of the files stored in iCloud.
- The videos you watch on your Apple TV or Apple Music.
How to Check Purgeable Space on macOS Monterey/Ventura/Sonoma
You can see how much space is held by purgeable storage on the recent macOS such as Sonoma via the following steps.
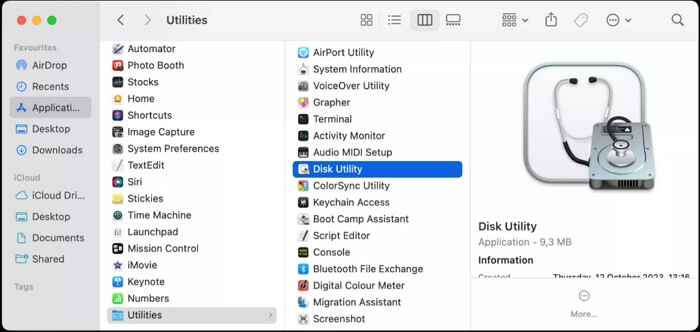
Step 1: Open Launchpad and search Disk Utility. Next, click Disk Utility from the result to open it.
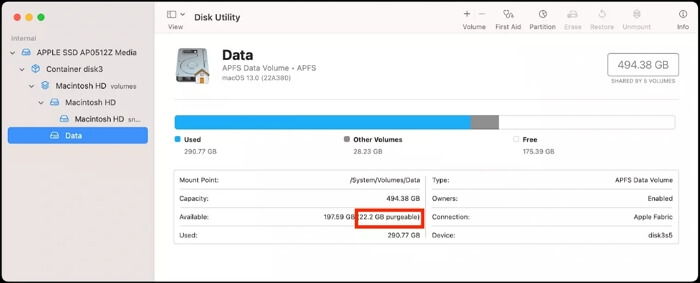
Step 2: Click the View icon and select Show All Devices.
Step 3: Select your Macintosh HD and then Data in the sidebar of Disk Utility.
Step 4: Locate the Available tab in the right section. You can see the amount of purgeable space next to the Available storage.
Can I Delete Purgeable Space on My Mac and Is It Safe?
Yes, you can manually delete purgeable space on your Mac. macOS typically manages this automatically, but you can intervene when needed to free up space. Moreover, it’s secure to clear purgeable storage on macOS if you carefully follow the proper ways.
How to Remove Purgeable Space on Mac Monterey/Ventura/Sonoma
This part will focus on the recent versions of macOS including Monterey, Ventura, Sonoma and Sequoia to show you how to clear purgeable space on Mac and in turn reclaim gigabytes of storage space.
Way 1. Restart Mac
Restarting your Mac is the simplest and cannot be overlooked. By restarting Mac, system resources like temporary cache and memory will be wiped and it’s helpful if you are running many resource-heavy apps or tasks when purgeable storage is large.
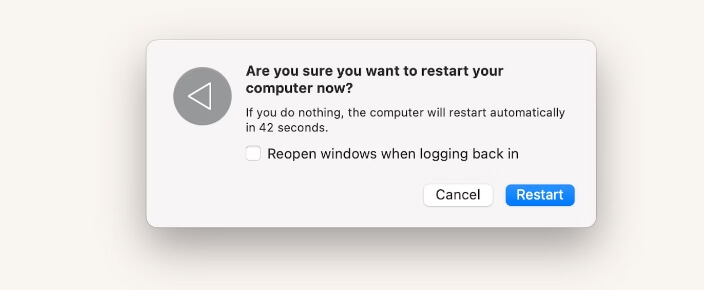
Step 1: Click the Apple icon > Restart.
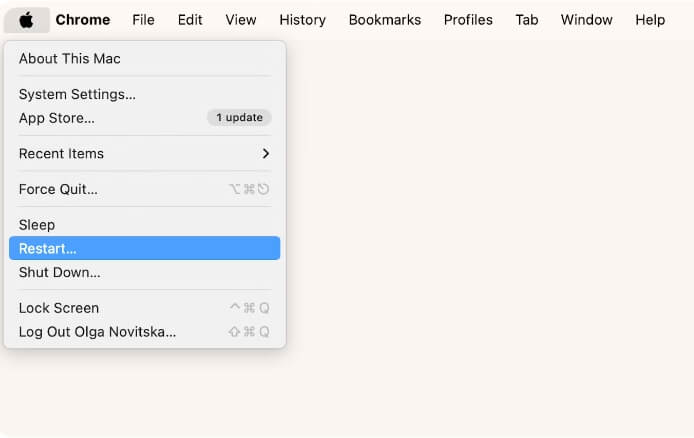
Step 2: Hit Restart in the confirmation box.
Way 2. Empty Trash
Has it been a long time since you last emptied the trash? Then, clear the Trash must greatly reduce purgeable storage. Simply right-click Trash and choose Empty Trash.

Way 3. Clear Cache
When it comes to cleaning up app cache or system cache on Mac, you can choose to delete them in the corresponding folder or use the specialized software. Here, an easy and secure way using Macube Cleaner will be shared with you. Macube Cleaner is a multi-functional tool dedicated to optimizing your Mac via storage cleanup. It is able to accurately scan out different kinds of junk including app cache, browser history, system cache, user logs, etc and then remove them without affecting your macOS. Additionally, it has other useful features such as large & old file finder, app uninstaller and file shredder.
Discover More About Macube
- Quickly find large and old files from your Mac based on your settings.
- Delete duplicate images, documents or other files to easily release disk space.
- Remove stubborn files or apps in one click.
- Manage plugins and extensions in one stop.
Steps to Clear All Cache on Mac by Using Macube
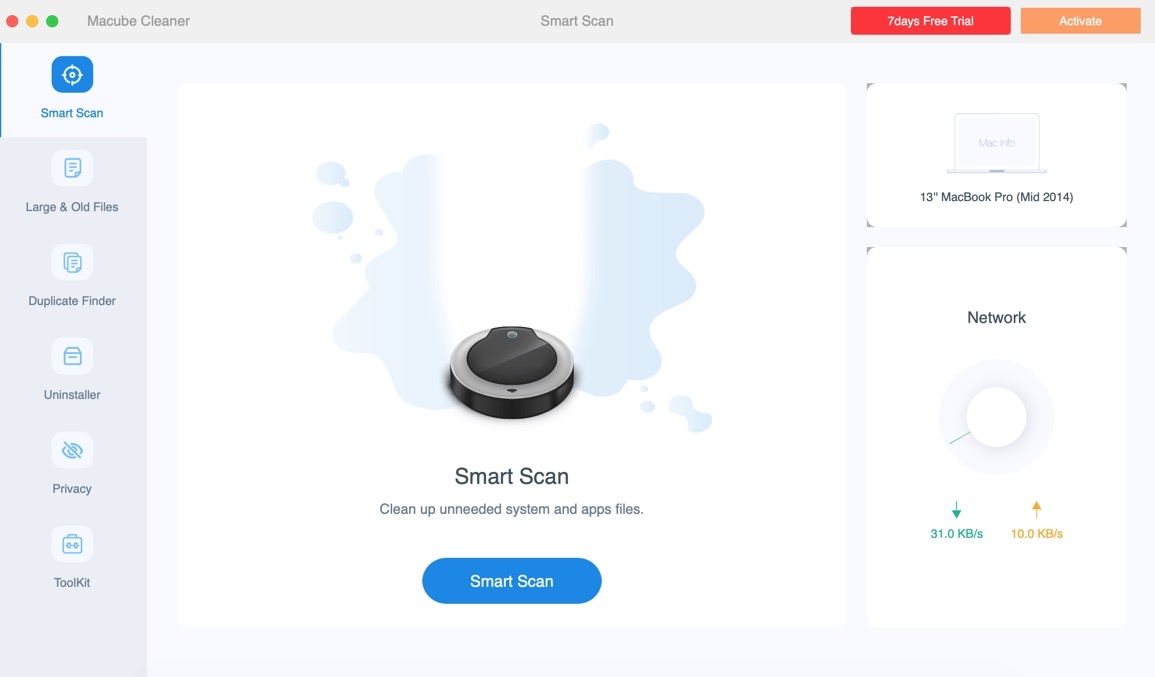
Step 1: Launch Macube Cleaner after installing it on your iMac or MacBook.
Step 2: Click Smart Scan so that Macube can scan your macOS to find app cache, system cache, email attachments and so on.
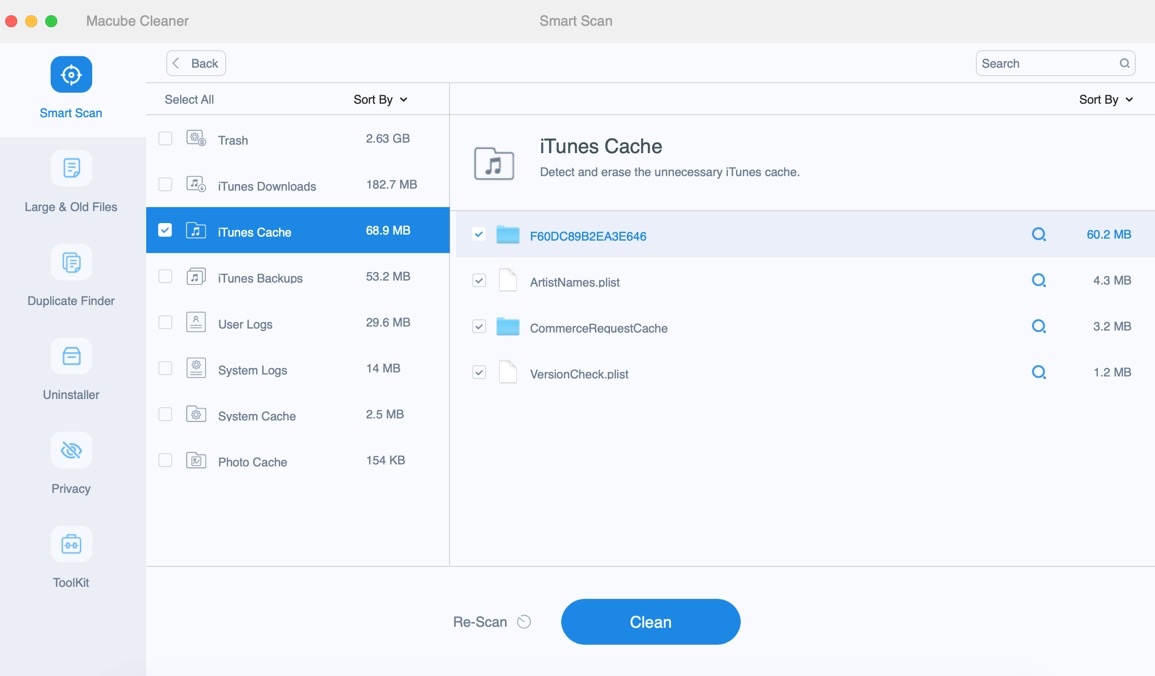
Step 3: Select all types of cache and hit Clean to get rid of them from your macOS.
Way 4. Disable Auto-Backup in Time Machine
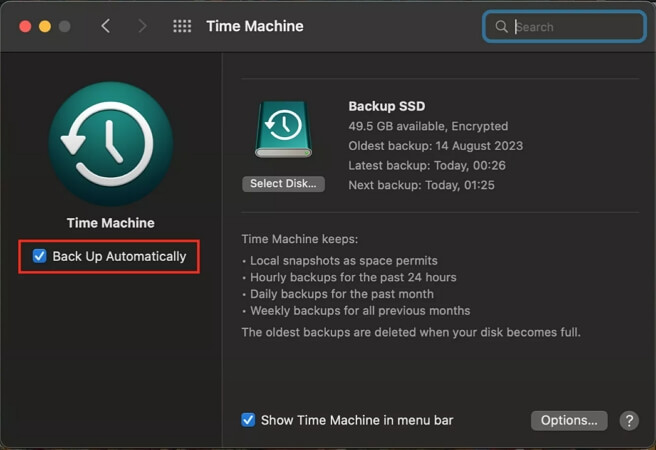
Disabling local snapshots is an effective way to clear purgeable space on Mac, approved by users online. Local snapshots can take up a certain amount of storage space, though they aid in getting back your data if there is a system crash. It’s suggested to turn off local snapshots to clean up purgeable space and then enable it.
Step 1: Access the Time Machine feature.
For macOS Monterey:
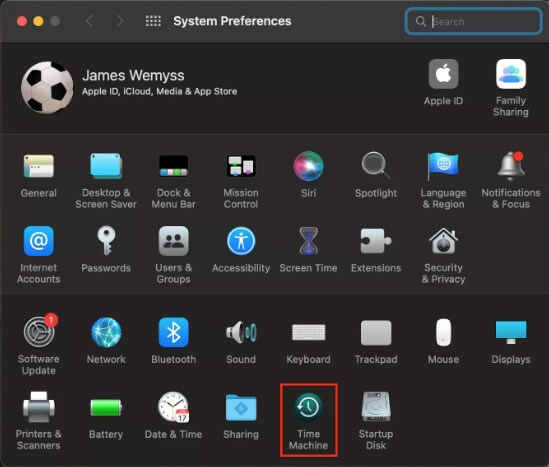
- Click the Apple icon and choose System Preferences.

- Select Time Machine.
For macOS Ventura&Sonoma:
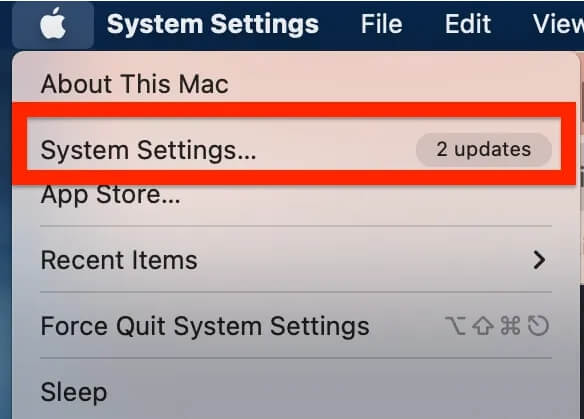
- Open the Apple Menu and select System Settings.
- Click General and chooseTime Machine.

Step 2: Uncheck Back Up Automatically in the Time Machine window.
Way 5. Use Terminal
Terminal works on removing purgeable space by creating large files so that purgeable storage is cleared for saving the created files. However, the steps are complicated and it’s recommended to try this way if you are familiar with commands and Terminal.
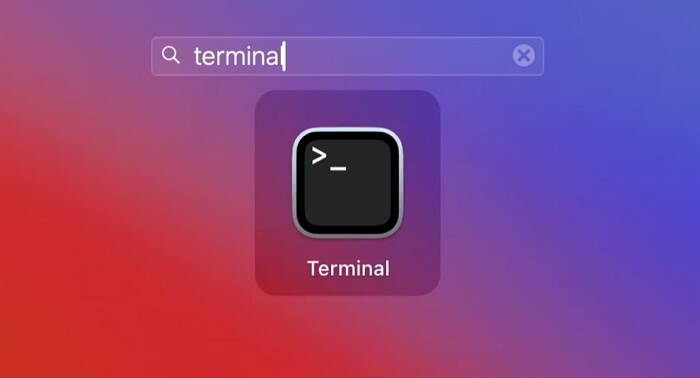
Step 1: Search Terminal in Launchpad and click the related result.
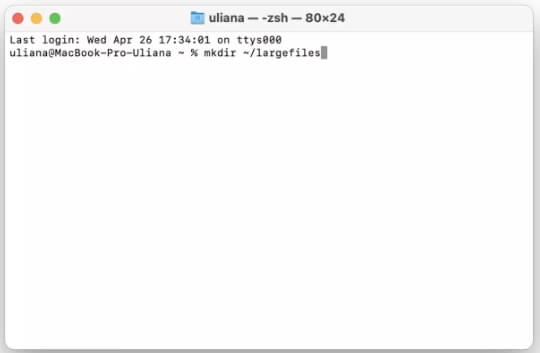
Step 2: Type the command “mkdir ~/largefiles” and press Enter to create a folder named largefiles.
Step 3: Input this command “dd if=/dev/random of=~/largefiles/largefile bs=15m” and hit Enter. A subfolder named largefile will be created.
Step 4: Press Ctrl + C to stop the previous command and enter the command “cp ~/largefiles/largefile ~/largefiles/largefile2”.
Step 5: Repeat Step 4 above but change the name largefile2 each time until you see a message prompting low disk space.
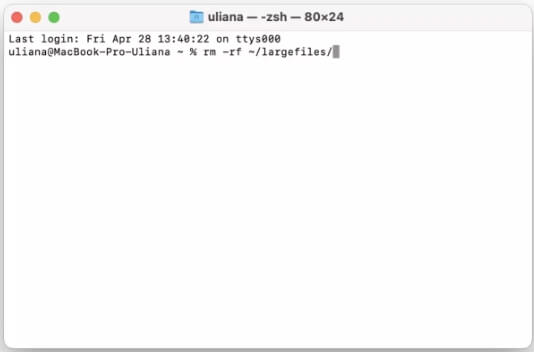
Step 6: Execute the command “rm -rf ~/largefiles/”. This will remove the large files you made before.
Step 7: Right-clickTrash and choose Empty Trash to move everything out of it.
Way 6. Enable Optimize Storage
To delete watched TV shows or movies on Apple TV or Apple Music, a part of purgeable space, there is a quick solution that enables the inbuilt Optimize Storage and here is how to get it done.
On macOS Monterey:
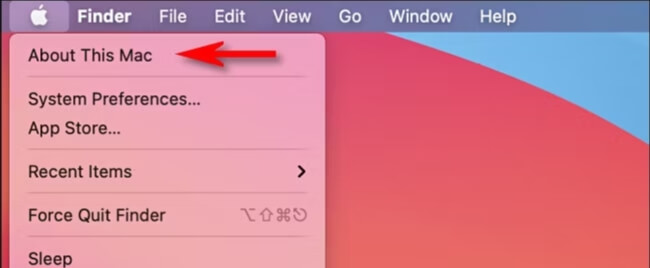
Step 1: Select About this Mac from the Apple menu.
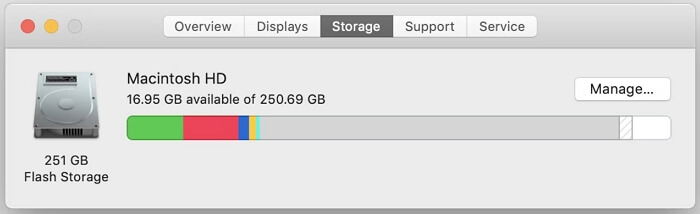
Step 2: Switch to Storage in the pop-out andhit Manage.
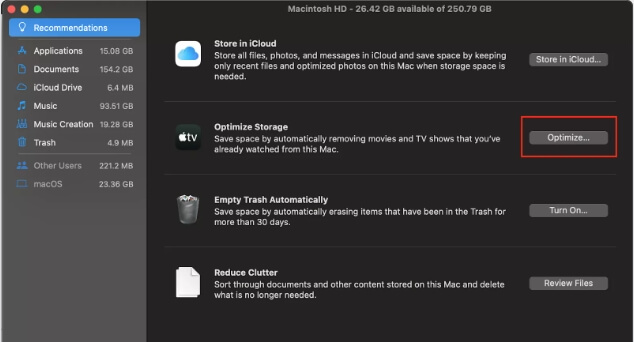
Step 3: Click Optimize under Optimize Storage section.
On macOS Ventura/Sonoma:
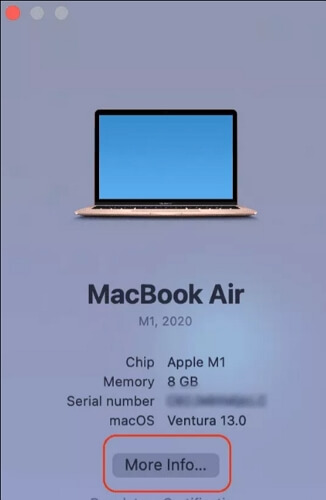
Step 1: Select the Apple icon in the top pane. Then, choose About This Mac and click More Info Storage.
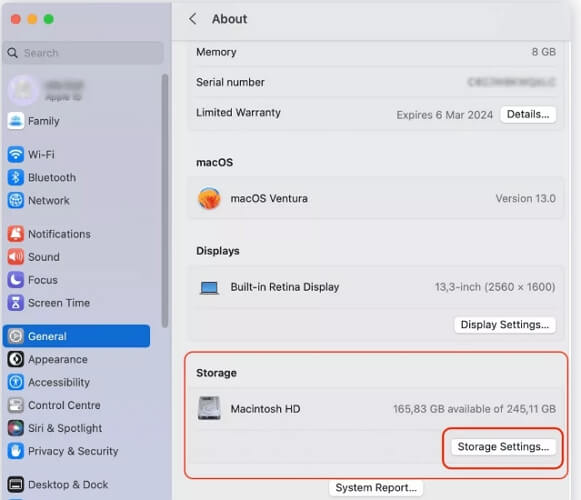
Step 2: Choose General in the side menu and locate Storage in the right section. Next, hit Storage Settings.
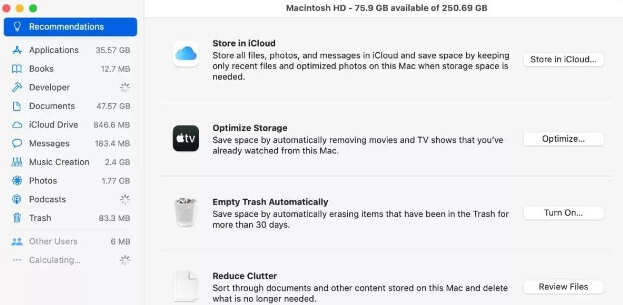
Step 3: Click Optimize next toOptimize Storage.
Way 7. Delete Old Files
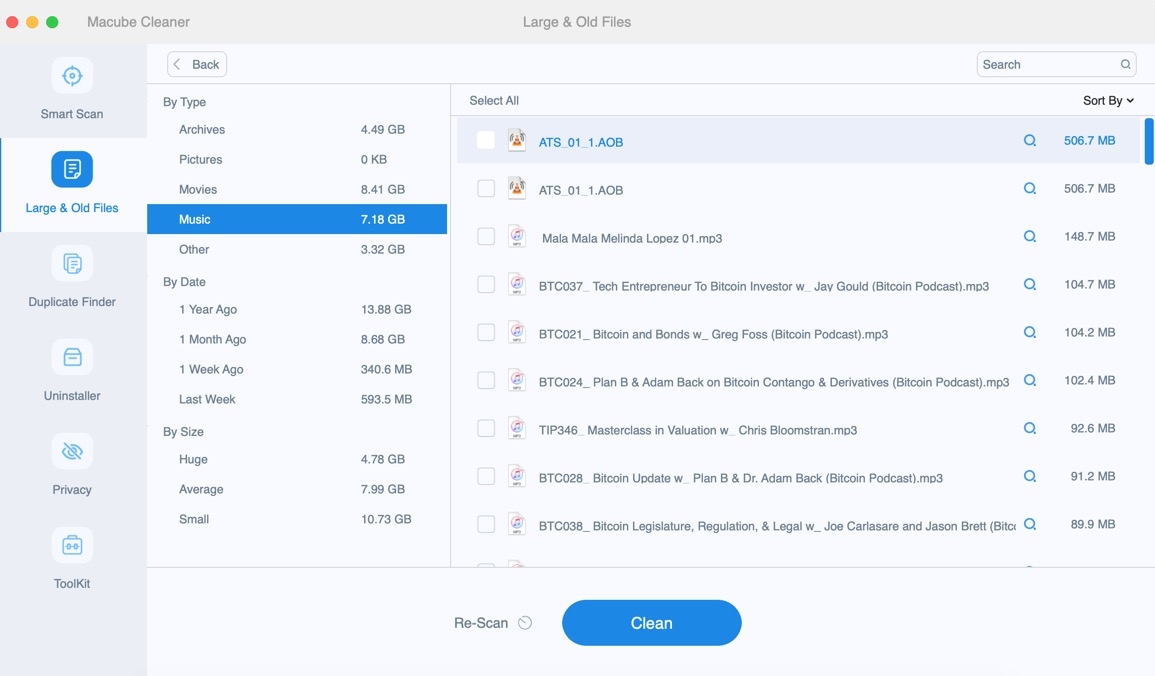
If you want to delete old files as easily as 1-2-3, then using Macube Cleaner is an ideal choice. Macube provides a smart feature for you to delete old and large files based on date/type/file size and what you need to do is simply choose the unneeded items and delete them.
Step 1: Run Macube Cleaner on your Mac.
Step 2: Choose Large & Old Files in the left side and click Scan.
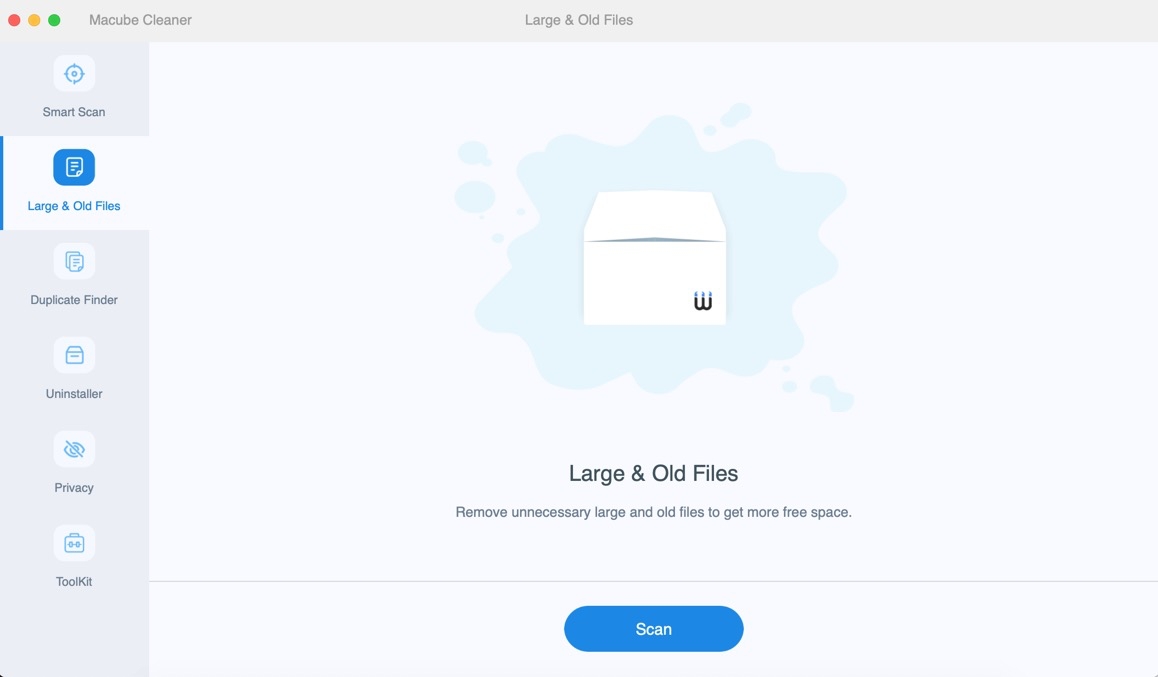
Step 3: Instantly, you will see all old and large files on your Mac. You are able to remove old documents by selecting them and hit Clean.
Way 8. Remove the Local Versions of iCloud Files
If you have uploaded files to iCloud, try to delete the local copies of these files. After deletion, you are allowed to download the files from iCloud whenever you want, so no worries about data loss. Instead of manually cleaning up the local versions of iCloud files, you can follow Way 6 above to easily get it done.
Bonus: How to Clear Purgeable Space on External Hard Drive
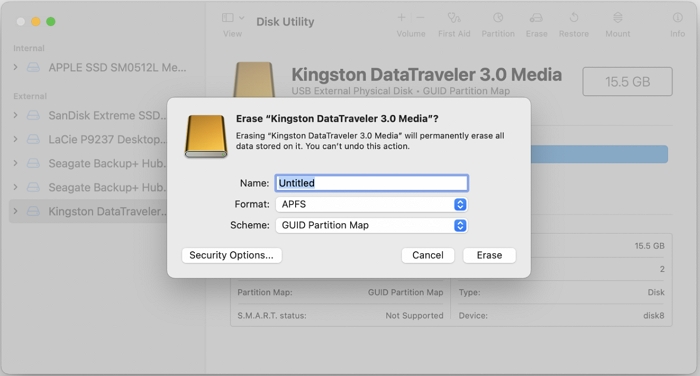
Erasing external hard drive is an efficient way to clear purgeable space on the external hard drive connected to your Mac. However, please mind that everything will be wiped from your external hard drive after erasing. So, don’t forget to back up the important files on the external hard drive first to prevent unnecessary data loss.
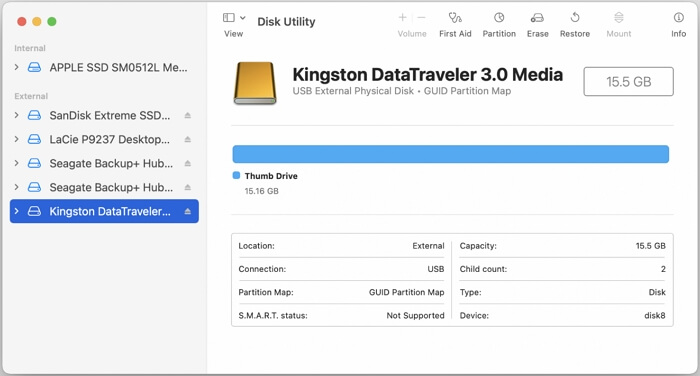
Step 1: Open Finder. Choose Applications folder > Utilities > Disk Utility.
Step 2: Click View > Show All Devices.
Step 3: Choose your external hard drive and click Erase in the upper pane.
Step 4: Set the name, Format(APFS for only use on Mac) and Scheme(GUID commonly).
Step 5: Click Erase to start formatting the external hard drive based on your settings.
Wrap Up
Believe that you know about how to remove purgeable space on your Mac with macOS Monterey/Ventura/Sonoma installed. You can try the easiest way restarting Mac to the most effective methods such as using Macube to clear cache. You can follow the ways one by one to clear purgeable space on Mac as much as possible.
Macube Cleaner
Speed up and troubleshoot your Mac super easily with a Macube full-featured free trial!
Start Free Trial