In today's world, where information is very important, it's crucial to make sure your stuff is safe. As technology keeps changing, getting rid of files on your MacBook for good is a big deal. This is especially important if you use your MacBook for lots of things like work, fun, and talking to people. In 2024, it's super important to know the best ways to permanently delete files Mac to keep things safe. This article talks about how to delete on a MacBook and gives you five ways to do it without spending money. By using these ways, you can make sure your private information is gone forever, and you can feel better about your digital privacy during this high-tech time.
Part 1: 5 Ways to Permanently Delete Files on MacBook
You can easily remove files from a MacBook using different methods. It's really fast and simple. Regardless of the app you're using, you can use these 5 methods to permanently delete files from on MacBook.
The Most Commonly Used Method: Empty Mac Trash
The easiest way to get rid of files on a Mac is by throwing them into the Trash. When you delete things from your Mac, they go to the Trash first. If you want them gone forever, you need to empty the Trash. Here's how:
Step 1: Look for the Trash can icon on the bottom of your screen. It's usually in the Dock.
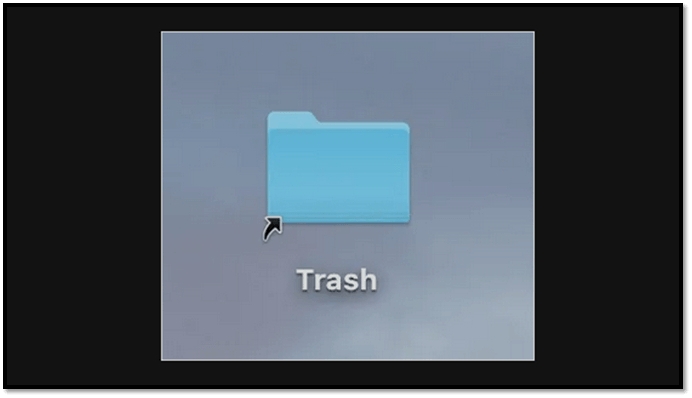
Step 2: Click on the Trash can icon to see what you've thrown away. It's like peeking inside to see what's there.
Step 3: To make things vanish for good, click the "Empty" button. You'll find it in the upper-right part of the Trash window. Sometimes, the computer will ask if you're sure.
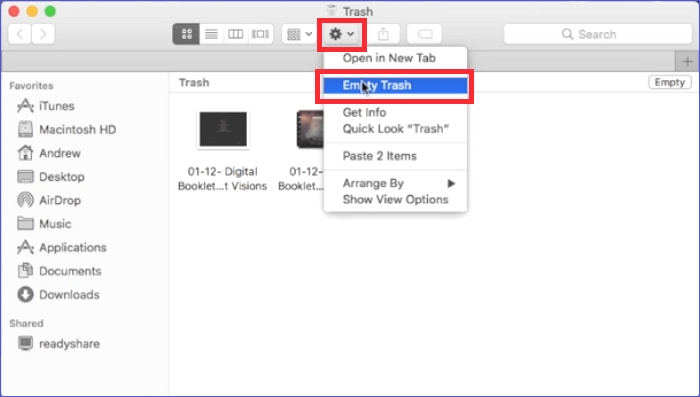
Step 4: If the computer asks, say "Yes" to empty the Trash. Just know that this is a big decision – once it's done, you can't bring back what you've thrown away.
Step 5: Once you say "Yes," the files will disappear from your Mac forever. This makes more room for new things.
Always be careful when you empty the Trash. Once files are gone, they can't come back. Take a good look at what you're throwing away before you make it disappear to avoid losing anything important.
2. The Most Powerful Method: Macube
Macube is the most powerful method for permanently deleting files on MacBook. This software has a feature named "File Shredder". This powerful feature can easily shred any file that is tough to remove. You can easily operate with this tool and destroy your unwanted files.
Features:
- Allows you to remove hidden or dangerous files easily.
- Junk files can be erased with just a simple click.
- Supports uninstalling Mac apps completely.
- Clears your browsing caches and histories to protect your privacy.
- Provides the preview function to avoid removing important files.
- Similar images can be located with its special algorithm feature.
Here are the steps to permanently delete files from MacBook
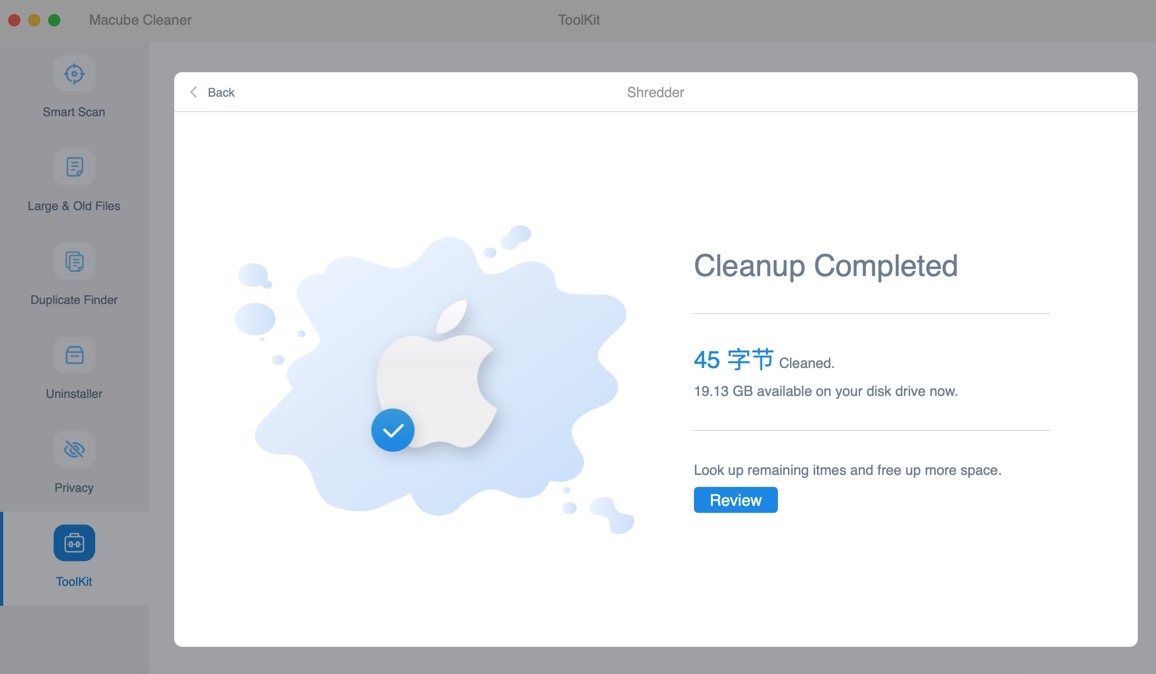
Step 1: Install Macube on your Mac computer and launch it. Choose "Toolkit" on the program's left side and select the "Shredder" option from there.
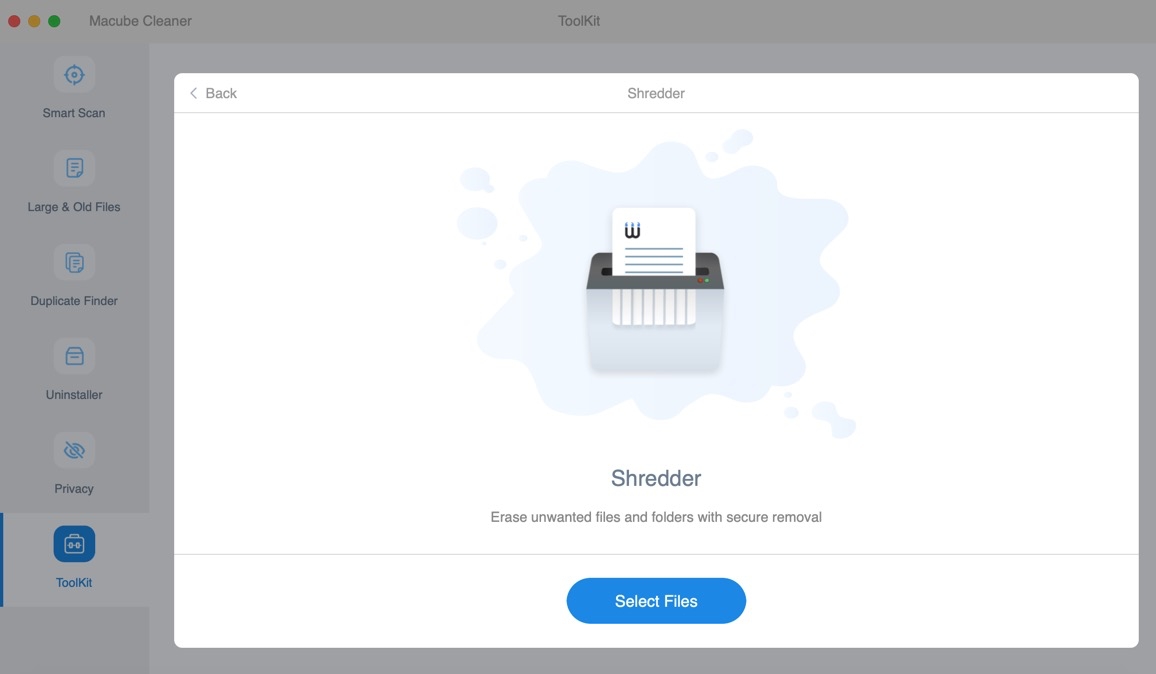
Step 2: After that, click the "Select Files" button and choose the files you want to remove.
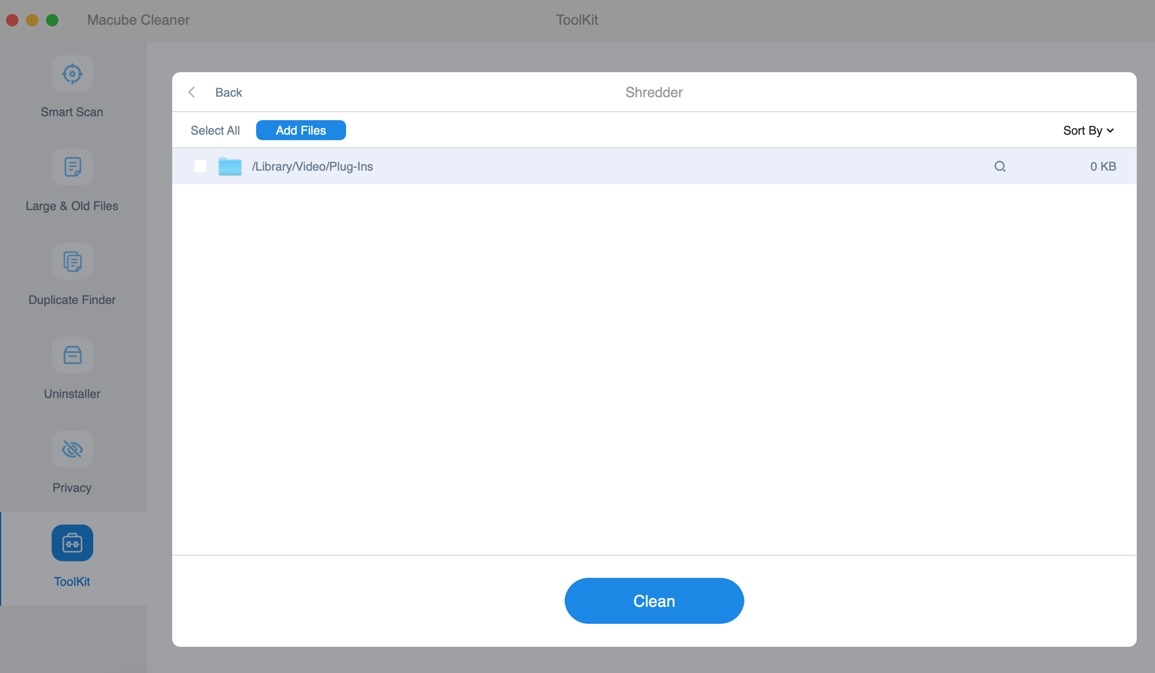
Step 3: After you choose the files you want to delete, simply click the "Clean" button to remove them from your Mac forever.
3. The Easiest Way: Use Mac Shortcuts
Using shortcuts on a Mac helps us work more easily, be faster, and not waste time. Let's find out about Mac shortcuts that make the process easier:
- Pressing Command + Delete is the quickest way to delete files. It moves the chosen file to the Trash.
- Using Option + Command + Delete removes the file forever and right away, without sending it to the Trash. Remember, if you do this, you can't undo the action.
4. The Most Technical Method: Terminal Command
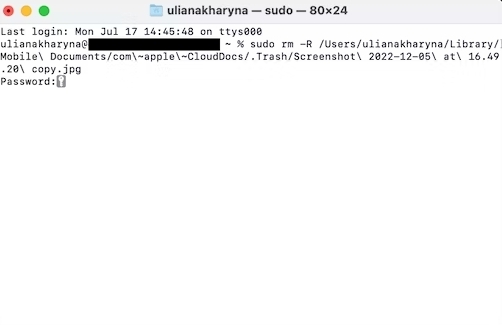
You can use the Terminal to get rid of files you don't want. When you use the Terminal, it deletes the files without making the Trash empty. But remember, there won't be any warning, so be cautious. Here are the steps to use the terminal command to permanently delete files Mac.
Step 1: Go to the "Applications" folder, then find and open the "Utilities" folder. Look for an application called "Terminal" and open it.
Step 2: Type what comes next, and be sure to add a space after the 'R': sudo rm –R
Step 3: Instead of pressing Return, click on Trash to open it.
Step 4: Move the files from the Trash and drop them onto the Terminal window.
Step 5: Press the Return key, and then type your administrator password.
5. The Least Efficient Way: From Disk Utility
Disk Utility is a tool on your MacBook that helps you control your storage stuff. It can also help you delete files in a way that they can't come back. This is good when you want to make sure private info is gone forever.
Step 1: Find Disk Utility by going to "Applications" > "Utilities" > "Disk Utility."
Step 2: In Disk Utility, you'll see a list of your storage things on the left. Choose the disk where the file you want to erase is.
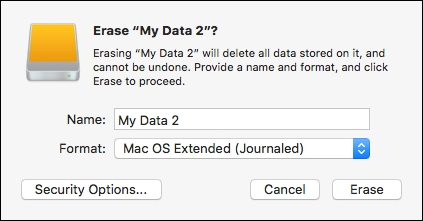
Step 3: Tap the "Erase" button at the top. Even though it sounds weird, this way will safely get rid of the chosen file.
Step 4: A window will pop up. You can choose how safe you want the erasing to be. If you want the file to be almost impossible to get back, pick "Secure Erase." If you want it to be even harder to recover, choose "Most Secure Erase." Just know that the more secure you choose, the longer it might take.
Step 5: You might need to confirm that you want to do this. Make sure you're erasing the right file because you can't undo this.
Step 6: To keep going, type your administrator password. This helps stop accidental deletes.
Step 7: After confirming everything, click "Erase" or "Start." It might take some time based on how safe you want it and how big the file is.
Step 8: When the erasing is done, you'll get a message. The file is now totally deleted and it's tough, maybe even impossible, for anyone to get it back.
Remember, this way is strong, so be careful. Once a file is erased like this with Disk Utility, it's hard for anyone to bring it back.
Part 2: How to Safely Clean Up and Delete Files for More Storage on Mac
Besides shredding files, Macube can also perform other chores. It can help you to get rid of files you don't want, find and delete duplicate files on Mac, and keep your private stuff safe. Macube checks important parts of your Mac, like iTunes, photos, email, and the internet, to find these kinds of files. When it's done, you'll see that your Mac has more room than before. It also takes care of files you get from the internet and makes your Mac work better by cleaning up your internet history. Macube does many things to help your Mac run better and keep your private stuff safe by clearing your internet history. It's an all-in-one tool that makes your computer work better, and you won't need other tools if you have Macube.
Here are the steps to safely clean up and delete files for more storage on Mac.
Step 1: Download and install Macube on your Mac computer. Launch the program and from the left side of the program, find "Toolkit" and choose "Smart Scan" from there.
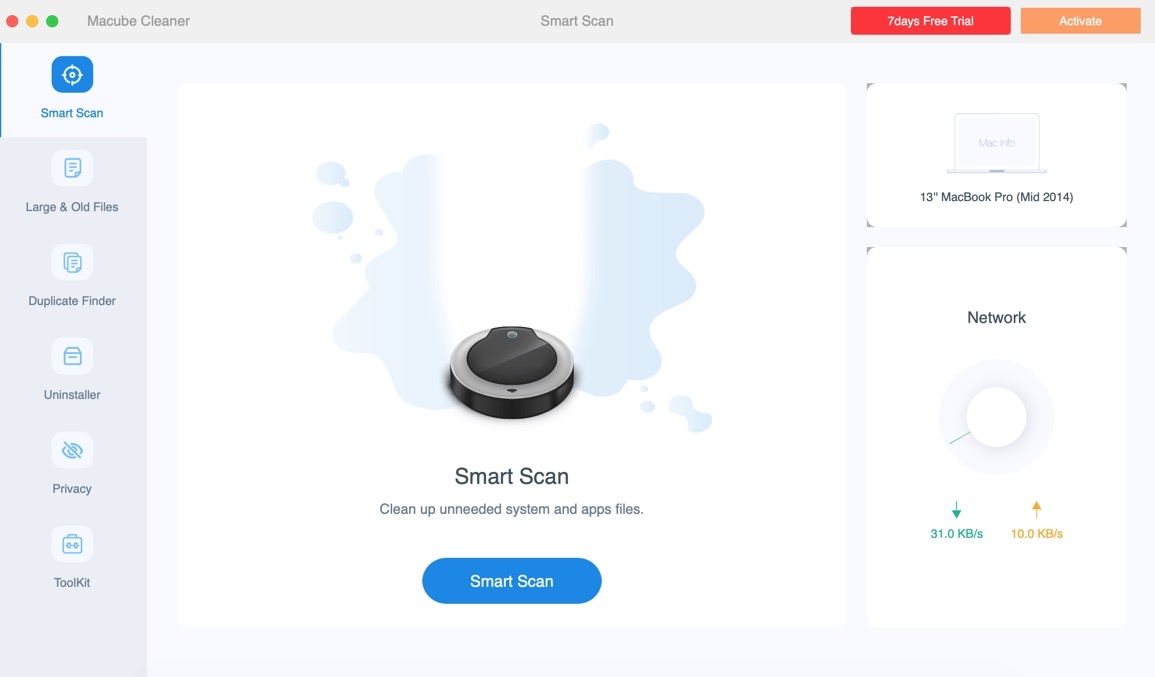
Step 2: Start the scanning process by clicking on the “Smart Scan” button. Once the scanning is finished, choose the unwanted files by previewing them.
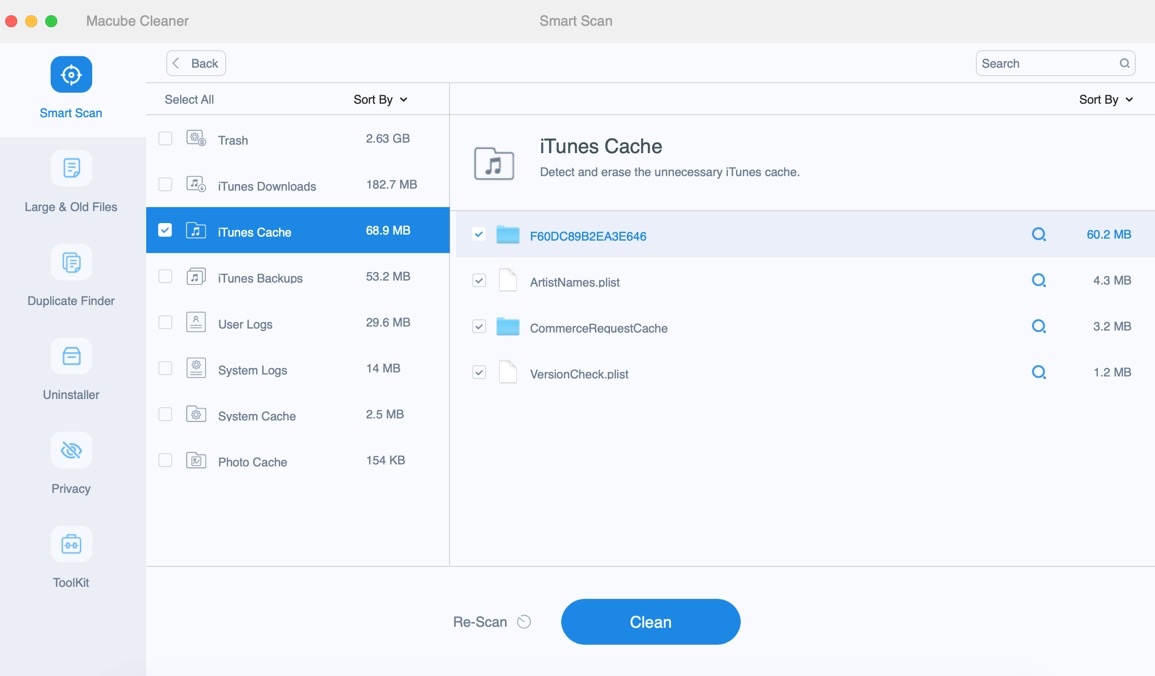
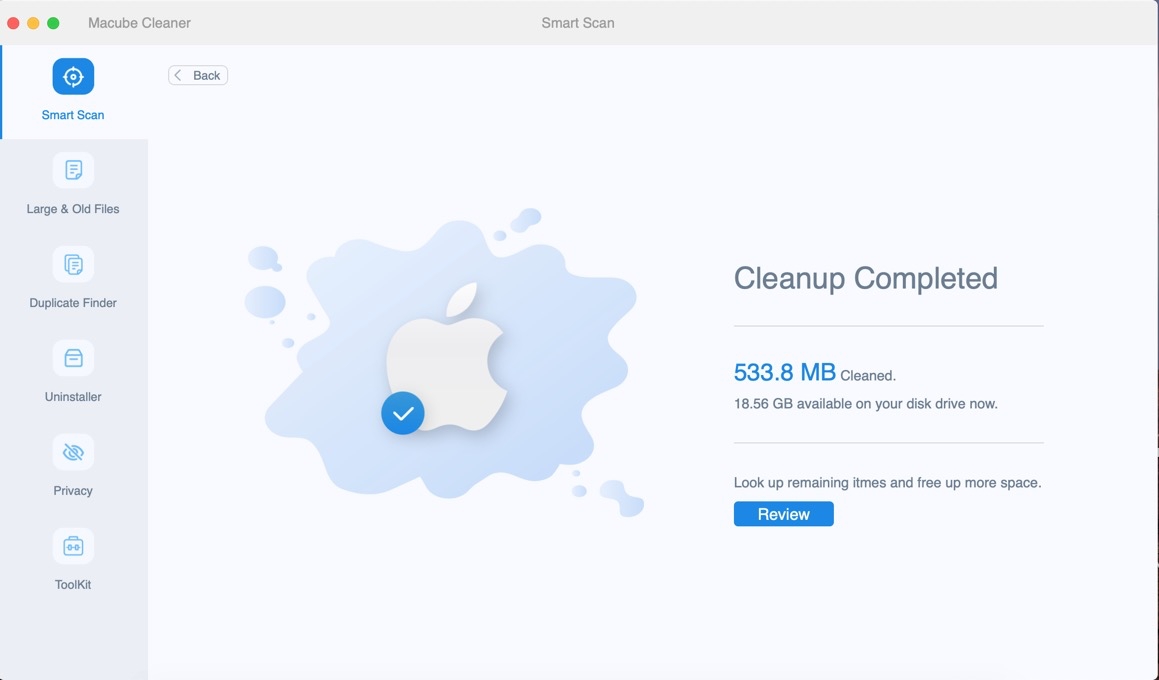
Step 3: Tap the “Clean” button after selecting the unwanted files and get your storage space again.
Conclusion
Keeping your personal information safe is very important. As technology gets better, making sure you erase MacBook files securely is a big deal, especially if your MacBook is where you do work, play, and talk to others. Knowing how to permanently delete files on MacBook in 2024 is super important for keeping your data private. This article talks about good ways to delete stuff and gives you five methods that don't cost anything. Macube is one really cool way – it helps your Mac work well and keeps your stuff safe. It gets rid of stuff you don't need, making more space on your Mac. It also clears away hidden files, making things efficient and safe. So, Macube is like a superhero for your Mac!
Hot Articles

Macube Cleaner
Speed up and troubleshoot your Mac super easily with a Macube full-featured free trial!
Start Free Trial