If you want to solve "Not Enough Space to Update Mac", you need to reserve enough space for system upgrades, and we will tell you how much space to clean up and how to clean it up. This article provides 11 solutions and categorizes them into five categories, which are securely deleteable part, lighten the system, stay away from heavy files, uninstall unused hidden programs and transfer&expand storage space. You can choose the part you want to delete to study. I believe you will get a satisfactory result.
Part 1: How Much Space Does Mac Update Need?
The amount of space required for a Mac update varies depending on the size of the update and the space available on the device. However, it is recommended to have at least 15-20 GB of free space on your Mac before updating.
According to the Apple Store, Big Sur is a 12 GB download. Beyond that, it appears to require about 35 GB of free space for installation. So we should usually reserve 10-20% of the disk as free space to allow temporary file writing and SSD self-management.
How much space does Ventura need?
Given that Apple has not disclosed the required storage space for installation, determining the exact answer is challenging. Nevertheless, considering that the installer itself is approximately 12GB in size, and based on past versions, allocating double that amount is recommended. Therefore, having about 25GB of available storage should be sufficient.
Part 2: How to Check Free Space on Mac
If you don't know how much space your Mac has for system updates and whether you can ensure that the system updates go smoothly, you can first check in the Apple menu and Disk Utility.
Method 1: Use Apple menu
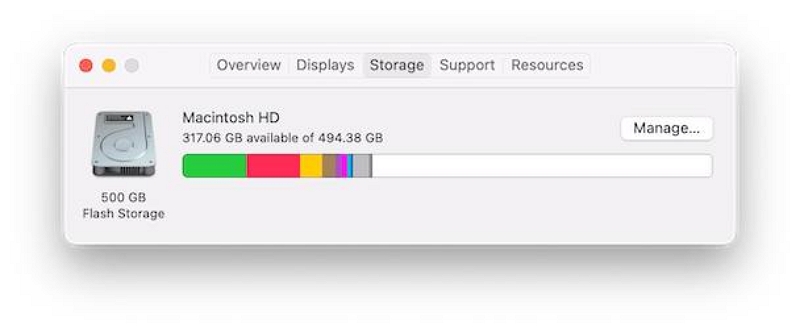
Step 1. Click the Apple menu>About This Mac> Storage bar.
Step 2. See the last white section is Available storage.
Method 2: Use Disk Utility
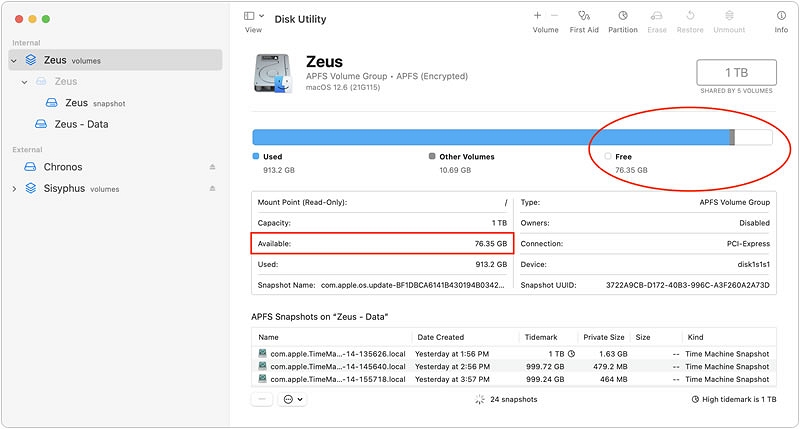
Step 1. Open Disk Utility
Step 2. Select the top level of your boot volume, check its free space number.
Part 3: 5 Major Categories to Deal With Not Enough Space to Update Mac
Category 1: Securely Deletable Part
The quickest way to make more space available for Mac updates is to delete some very basic junk files. Doing so will absolutely not threaten the normal operation of your computer, nor will you lose any important data.
Solution 1. Empty Trash
If you click on the Turn On button, files in your Trash will automatically be erased after 30 days. If you have not turned on the function of automatically cleaning the trash can, then the following will teach you how to clean it manually.
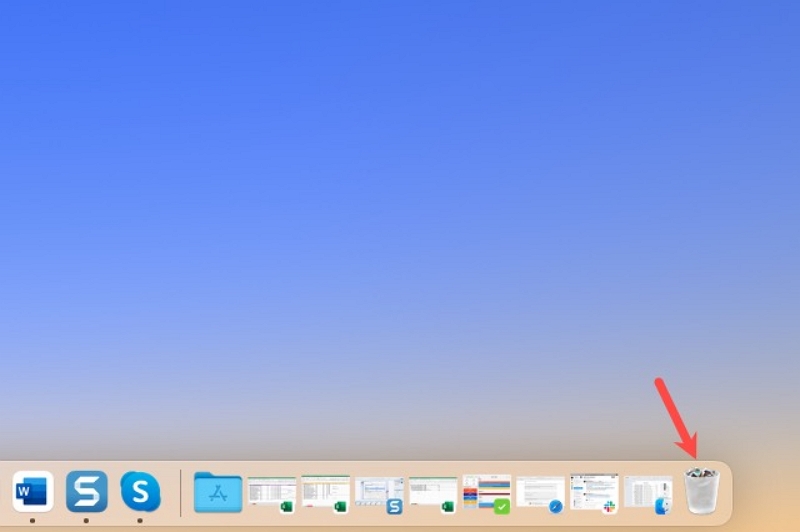
Step 1. To empty the items in the folder, select the Trash icon.
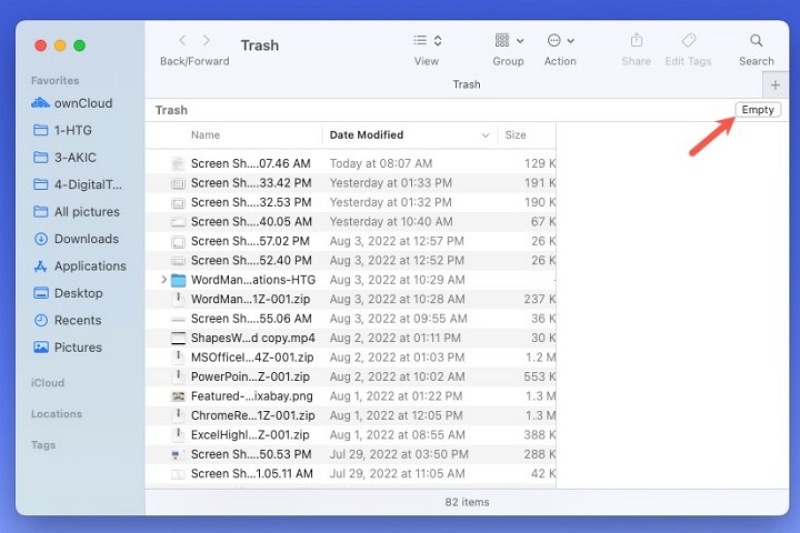
Step 2. On the top-right of the folder, choose Empty.
Step 3. When the confirmation message displays, pick Empty Trash to continue and delete the items.
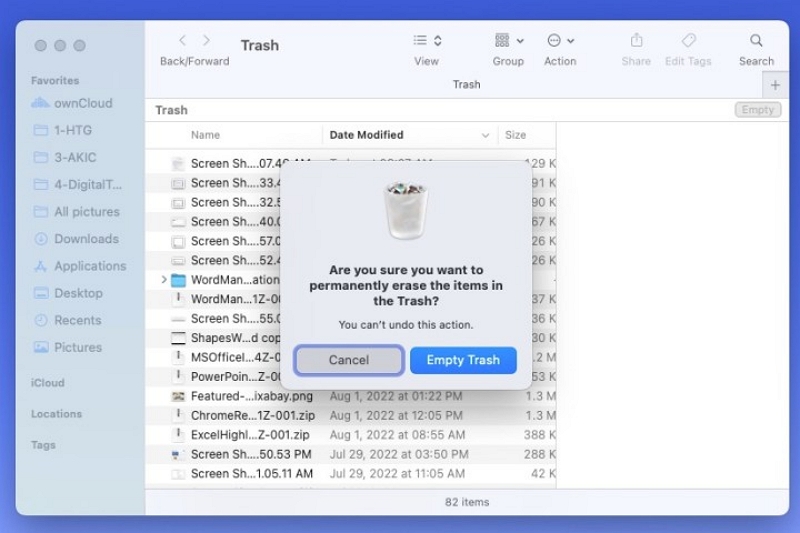
Step 4. Alternatively, you can right-click an item in the folder and pick Empty Trash. You can also select Finder in the menu bar and choose Empty Trash.
If you want to empty the Trash without the confirmation message, use the keyboard shortcut Option+Shift+Command+Delete.
Solution 2. Clean out system junk
In fact, there are still a lot of junk files in our system, which are not noticed in our daily use, but using the professional Mac cleaning software - Macube Cleaner, can perfectly solve this problem.
Macube Cleaner is an all-in-one Mac cleaning software that is dedicated to helping users clean up system junk files, duplicate files, similar pictures, music in iTunes, and even history in the browser. Safely delete after smart scan. You can destroy any type of file (MP4, JPG, GIF, DOC, DMG, etc.). Its usage steps are also very simple, which will be explained in detail later.
Step 1. Click Smart Scan on the first column on the left to find junk files throughout your Mac.
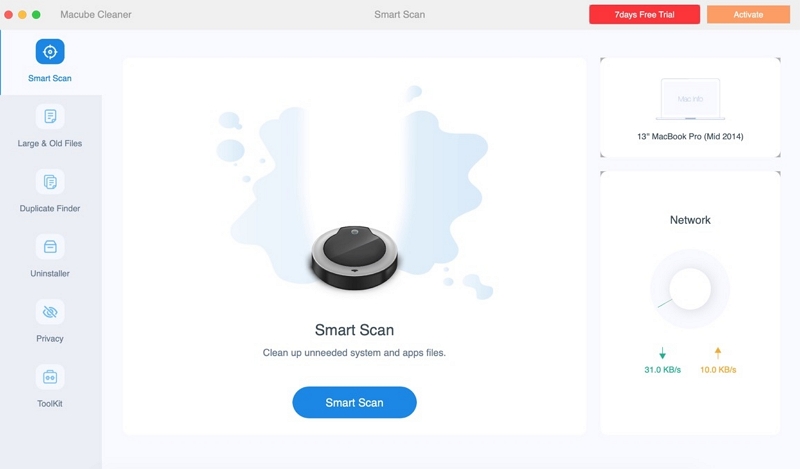
Step 2. After a few seconds, Smart Scan ends. Preview scan results and select files you don't need.
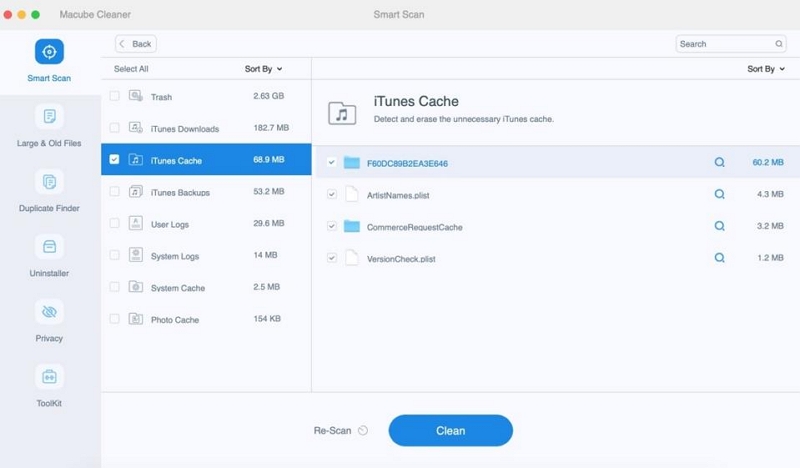
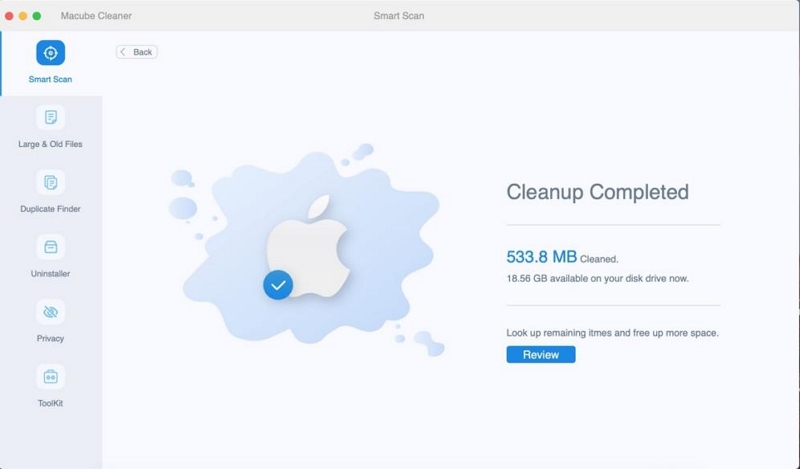
Step 3. Click “Clean” to clean up junk files and reclaim your disk space.
Category 2: Lighten the System
In addition to some easy-to-clean files, you can also perform memory optimization based on the parts your Mac recommends you manage.
Solution 3. Use MacOS Built-in Optimizations
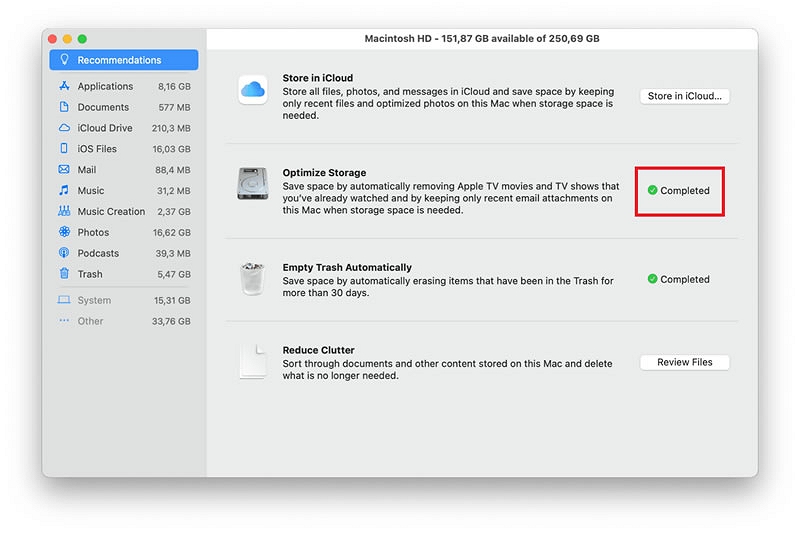
MacOS includes a built-in optimization tool that scans for and removes various files, such as email attachments, movies, or TV shows that you have already viewed. To access this tool, you can follow these steps:
Step 1. ClickApple menu>About This Mac>Storage> Manage.
The Recommendations section is already selected, so go ahead and review the suggestions.
Step 2. Finally, click on “Optimize Storage” and let the process be completed, as shown above in the screenshot.
Solution 4. Delete Time Machine Local Snapshots
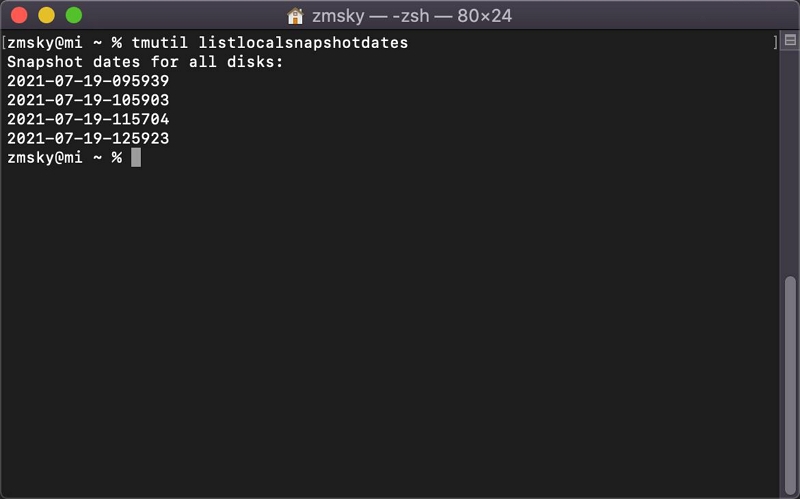
If Time Machine is set to automatically back up your Mac, you may have many local Time Machine snapshots on your Mac. Although they usually take up a small chunk of storage space, they can cause the Ventura to not have enough space to update.
Here’ s the method of delete Time Machine local snapshots:
Step 1. Click Apple menu > System Preferences > Time Machine.
Step 2. Check if the Back Up Automatically option is checked. If it is, uncheck the box.
Step 3. Launch Terminal via Spotlight or Launchpad.
Step 4. Paste the commandtmutil deletelocalsnapshots "date"replacing“date”with the date of the backup you want to delete, then press Return.
Category 3: Stay away from Heavy Files
There are also some heavy files that you can quickly find and delete because there is no benefit in having duplicate&large and old files on your Mac.
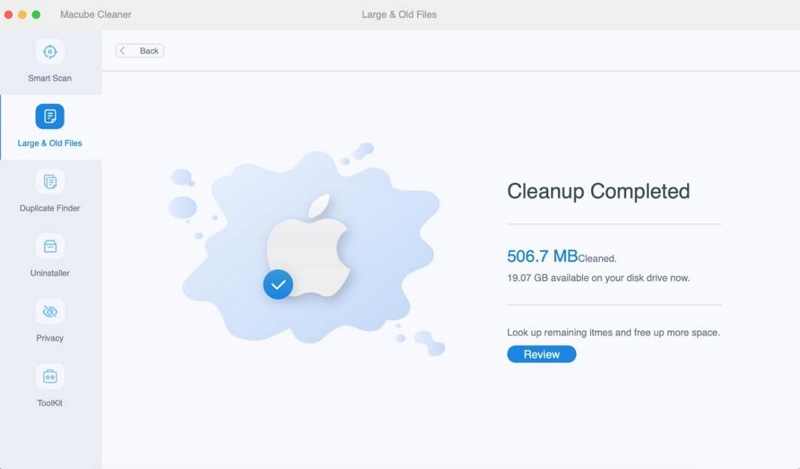
Solution 5. Clean up large and old files
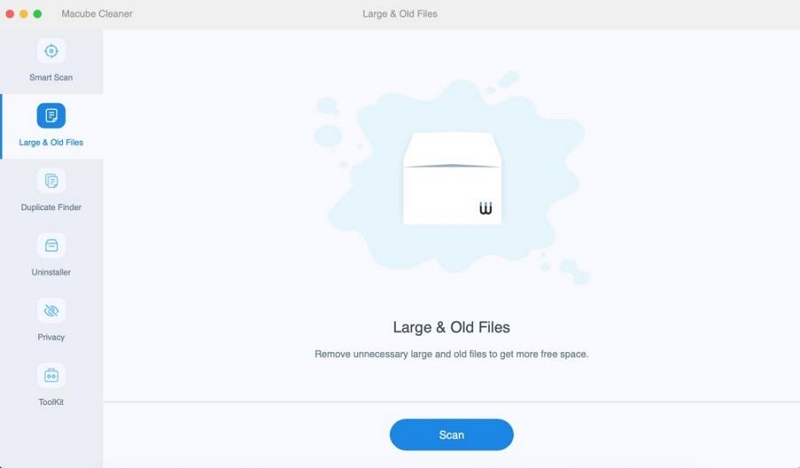
There are some files that you may have saved so long ago that you can hardly remember what it was. These files are old and large and useless to you, then you can delete it with Macube Cleaner.
Step 1. Choose “Large&Old Files” to find large and old files on the entire Mac.
Step 2. Preview the scanning results and select the unneeded large and old files.
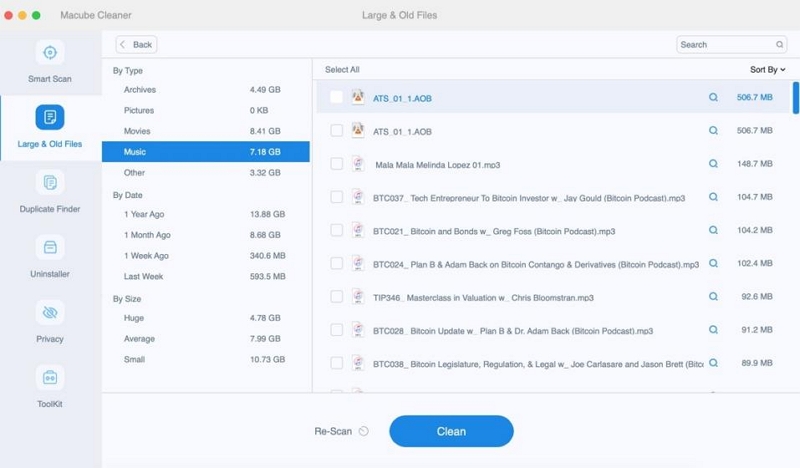
Step 3. Clear the useless files in a few seconds and reclaim your disk space.
Solution 6. Delete Duplicate Files
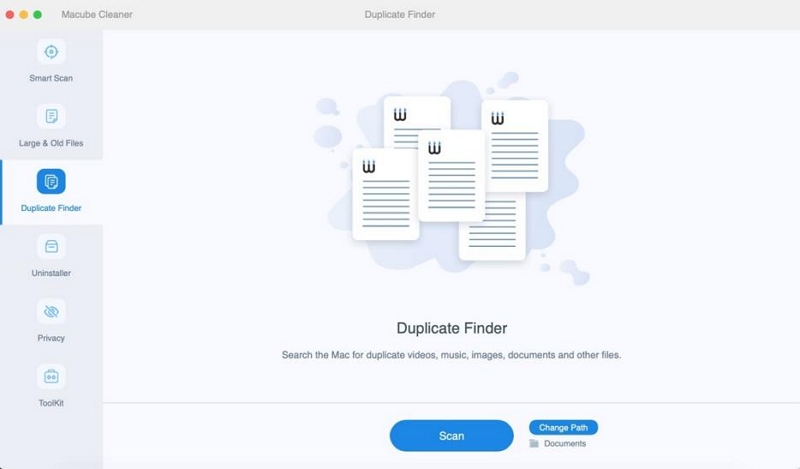
Of course, you can also use Macube Cleaner to delete duplicate files, otherwise you may get confused when choosing files to use.
Step 1.Select a “Duplicate Finder” and begin to scan duplicate files.
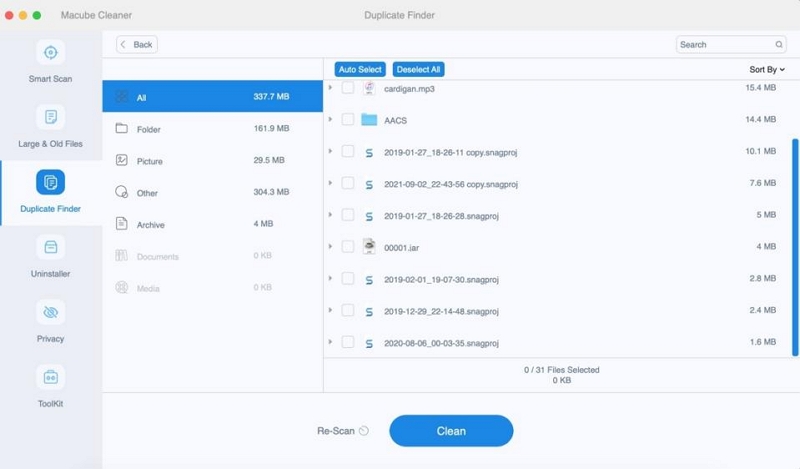
Step 2. Preview the scanning results and select the unneeded duplicate files.
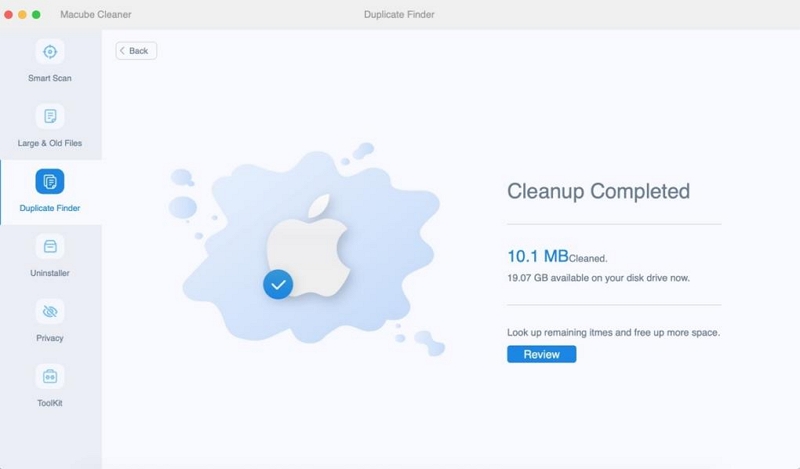
Step 3. Clean the duplicates in one click to reclaim more disk space.
Category 4: Uninstall unused hidden programs
The application that takes up the most memory on the Mac is the application, and some files that have been deleted have reappeared in your Mac, causing you to always not have enough space to update the system. The following article will provide you with two solutions.
Solution 7.Completely Uninstall unused apps
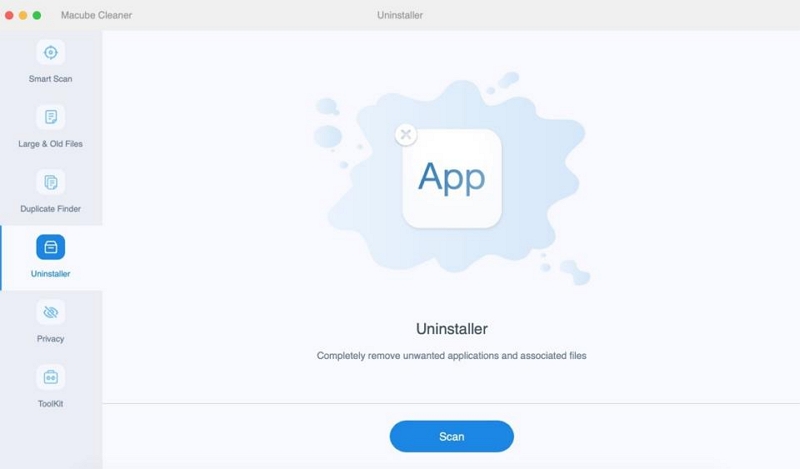
With Macube Cleaner you can completely uninstall applications along with all App files and App caches. For example, daily-used software like Microsoft Office has many complicated cache residues, and it is complicated and time-consuming to completely delete it. But Macube also saves you from having to deal with this hard work, you can uninstall it with just a few clicks on the screen. Proceed as follows:
Step 1. Move to “Uninstaller” on Macube, and click “Scan”.
Step 2.Preview the results and select the unneeded applications.
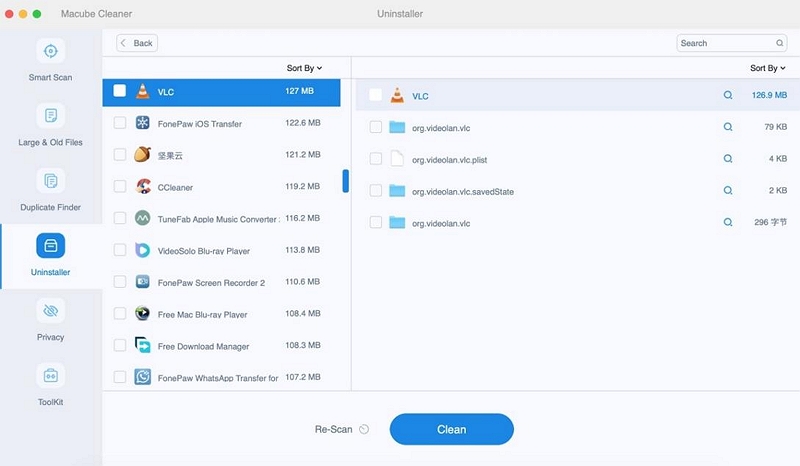
Step 3. Delete applications and trace files from your Mac.
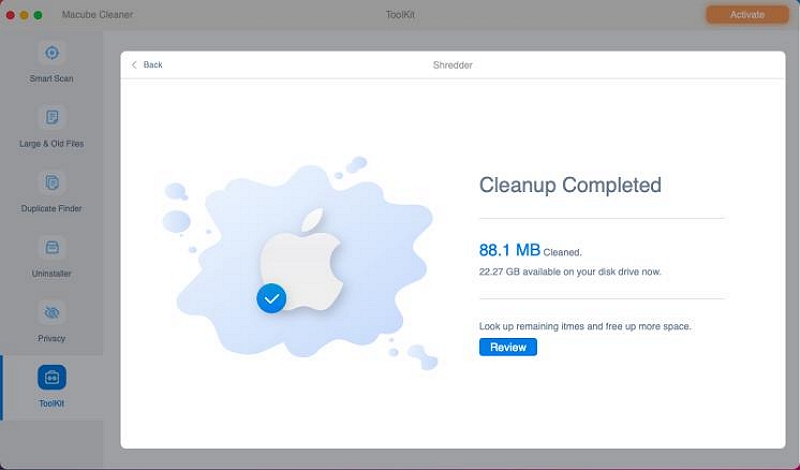
Solution 8. Files Shredder
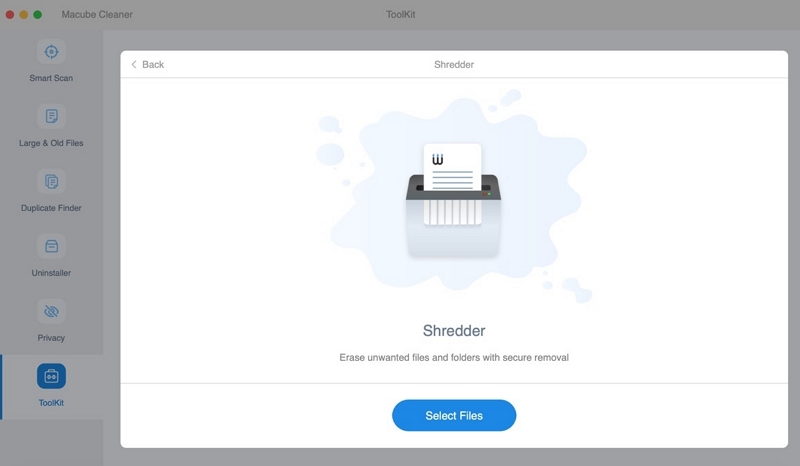
To permanently shred unwanted files to make space for system upgrades, you can also use Macube Cleaner:
Step 1. Click Shredder feature in the Toolkit.
Step 2. Get ready to destroy files that you have selected.
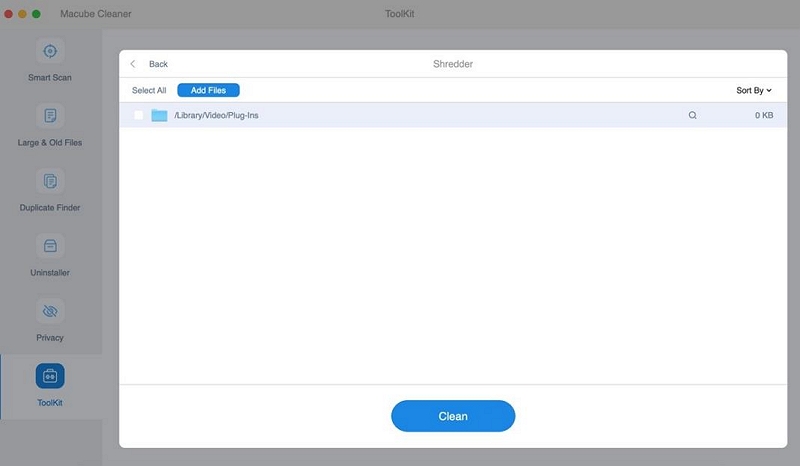
Step 3. Choose “Clean” icon to permanently remove the file.
Category 5: Transfer&Expand storage space
If you really don't want to clean up the existing files, then you can try to expand or transfer the memory.
Solution 9. Store in iCloud or External Drive
If you’ve deleted unneeded files but are still not freeing up enough space on your Mac, consider moving some of your files, particularly large files and files that you won’t be using frequently, to iCloud or an external drive. To do this, you can follow these steps:

Step 1. Select the files that you want to move from your Mac.
Step 2. Drag and drop or copy the selected files to the designated destination folder, which could be iCloud or an external drive.
Step 3. Once the files have been successfully transferred to the destination, you can safely delete the original files from your Mac to reclaim storage space.
Step 4. Remember to create a backup of important files before deleting them from your Mac to avoid accidental data loss.
 Note:
Note:
- The process may vary slightly depending on the specific tools or services you are using, as well as the version of macOS you have installed.
Solution 10. Upgrade from external drive
If you prefer to upgrade your Mac’s operating system using an external drive, here’s a detailed step-by-step guide to help you through the process:
Step 1. Prepare the external drive: Make sure you have a compatible external drive (such as a USB flash drive or external hard drive) with sufficient storage capacity. Format the drive as macOS Extended (Journaled) using Disk Utility.
Step 2. Download the macOS installer: Visit the Apple App Store and download the latest macOS installer. This will be saved in the Applications folder by default.
Step 3. Create a bootable installer: Open Terminal (found in the Utilities folder within the Applications folder) and enter the appropriate command based on your macOS version:
1. For macOS Big Sur and later:
sudo /Applications/Install\ macOS\ [version].app/Contents/Resources/createinstallmedia --volume /Volumes/[Your External Drive Name]
2. For macOS Catalina and earlier:
sudo /Applications/Install\ macOS\ [version].app/Contents/Resources/createinstallmedia --volume /Volumes/[Your External Drive Name] --applicationpath /Applications/Install\ macOS\ [version].app
Replace [version] with the appropriate macOS version and [Your External Drive Name] with your chosen name for the external drive.
Step 4. Authenticate: Terminal will prompt you to enter your admin password. Enter it and press Enter. The process of creating the bootable installer will begin.
Step 5. Upgrade your Mac: Restart your Mac and hold down the Option key. Select the external drive with the bootable installer from the Startup Manager screen.
Step 6. Install macOS: Follow the on-screen instructions to install the upgraded macOS version on your Mac. Select the appropriate disk and click “Install” to proceed.
Step 7. Wait for the installation to complete: The installation process may take some time. Your Mac will restart several times during the process.
Step 8. Set up macOS: Once the installation is complete, you’ll be guided through the setup process. Follow the prompts to set up the upgraded macOS on your Mac.
 Note:
Note:
- Please note that upgrading your Mac’s operating system using an external drive can be a complex process. It’s important to carefully follow the steps and seek additional help or guidance if needed.
Solution 11. Remove Old iPhone and iPad Backups
The fastest way to get more storage space available is to delete backups. Specifically, iPad and iPhone backups can take up a lot of your storage space. Here's how to delete a backup:
Step 1. Connect your old iPad or iPhone to your Mac.
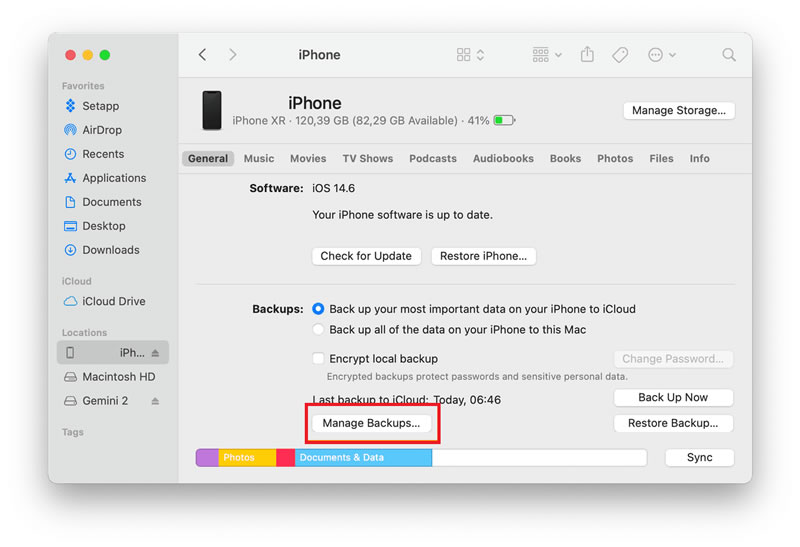
Step 2. Next, open Finder and locate the device under the “Locations” tab.
Step 3. Now, select “Manage Backups”, as shown in the screenshot above.
Step 4. Finally, choose a backup and click Delete.
Favorable turn: Wait for a new installer
If you still can't seem to get past the "Insufficient free space" error while upgrading macOS, even after clearing all needed storage space, you don't know what to do. My advice is to wait.
Yes, it's frustrating. I know this, but macOS upgrade installers have been buggy in the past, and yours may be the same. While the latest macOS Ventura installer seems to work fine for most people, it might just be a one-off for some devices.
Therefore, waiting for Apple to provide a fix is the only solution, and you need to wait for its release.
FAQs:
Q: What happens if I ignore the "not enough space" warning and try to update anyway?
If you ignore the "not enough space" warning and try to update anyway, there is a high chance that the update process will fail or get stuck in the middle. This can cause various issues such as data loss, corruption of files, and even damage to your device.
Q: Is it a good idea to upgrade to macOS Monterey?
It depends on your specific needs and circumstances. If you have an older device, it may not be compatible with the new operating system. Additionally, if you rely heavily on certain apps or software that may not be compatible with Monterey, it may not be worth the upgrade. However, if you have a newer device and are excited about the new features and improvements, it could be a good idea to upgrade.
Conclusion:
When you encounter "Not Enough Space to Update Mac", don't panic and don't be impatient, try to delete some files you don't need, and at the same time, develop the habit of regularly cleaning up junk files in your daily life. If you really can't remember what to do, I suggest you download a Macube Cleaner, which can solve most of the Mac cleaning problems.

Macube Cleaner
Speed up and troubleshoot your Mac super easily with a Macube full-featured free trial!
Start Free Trial