Fail to save your iMovie projects due to the Not Enough Disk Space warning? Don't worry. This guide will help you out! Whether you meet "iMovie not enough disk space at the selected destination" on your Mac or encounter "iMovie not enough space to export this movie" on your iPhone, you can get the issues fixed with X solutions here. Let's move on to more details now.

Fixed: iPhone iMovie Not Enough Space to Export/Share This Movie
If you receive a Storage Almost Full prompt when trying to save your iMovie projects on your iPhone, insufficient phone storage may come to your mind first. However, according to feedbacks from online users, this pop-out could even occur when there is a large amount of available phone space. Next, we will show you how to fix iMovie not enough space to export this movie issue easily.
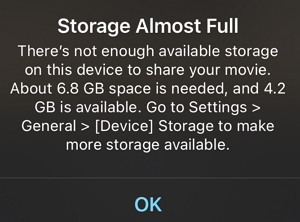
Before fixing iPhone iMovie not enough space:
Go to Settings > General > iPhone Storage and check the device storage space. Then follow the section below, based on whether your phone has enough storage.
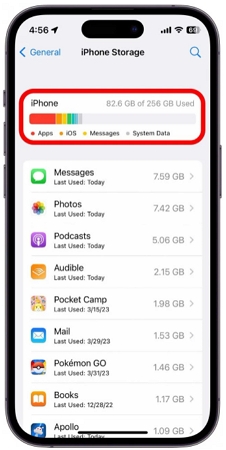
Fixes When Your iPhone Has Sufficient Space:
Fix 1. Clear iPhone Storage
The fastest way to release a certain amount of iPhone space is by deleing some large apps like games and streaming software. You can find out such software in the iPhone Storage Settings and then uninstall them.
Step 1: Scroll down iPhone Storage screen and locate the big app.
Step 2: Tap the app name and hit Delete App. You can remove several big apps to clear much more phone space.
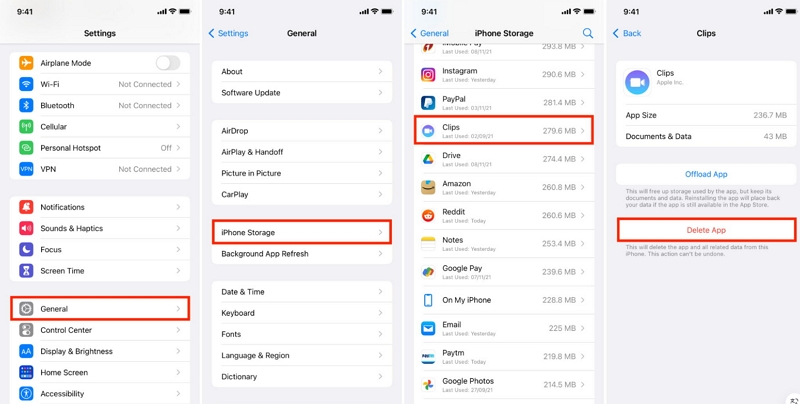
Fix 2. Export Movies to External Drive
If you’re unable to free up enough space on your iPhone or it’s filling up quickly, consider exporting your iMovie project to an external hard drive. Alternatively, you can save the original video directly to the external drive.
Step 1: Connect the external drive to your iPhone with an adapter.
Step 2: Head back to your iMovie project that you want to export. Then, tap the Share button and click Save to Files.
Step 3: Choose the external drive and hit Save.
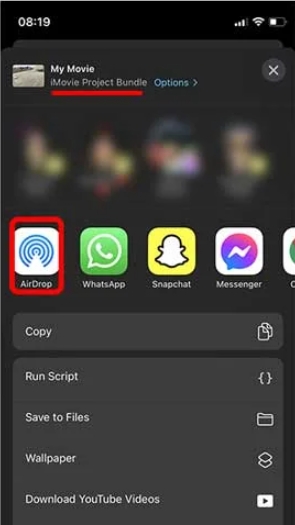
Fixes When Your iPhone Has Large Enough Space:
Fix 1. Reboot iPhone
Perhaps there are iOS glitches causing iMovie to identify your iPhone storage properly. At that time, restarting iPhone would fix the issue easily.
Fix 2. Use iMovie Desktop
The storage space on a Mac is much larger than that on an iPhone. You might consider trying iMovie on your Mac. Using iMovie on a Mac is also easier to operate.
Fix 3. Change to Another Video Editing Tool
If the problem is still not solved, you can look for an alternative to iMovie, such as InShot.
Fixed: Mac iMovie Not Enough Disk Space by Clearing iMovie Disk Space
iMovie can take up too much space on Mac due to its cache, render files, media, etc., making it necessary to clear iMovie disk space. After releasing the disk space taken by iMovie, you may find the issue resolved, because there is much storage for iMovie again.
Fix 1. Clear iMovie Cache
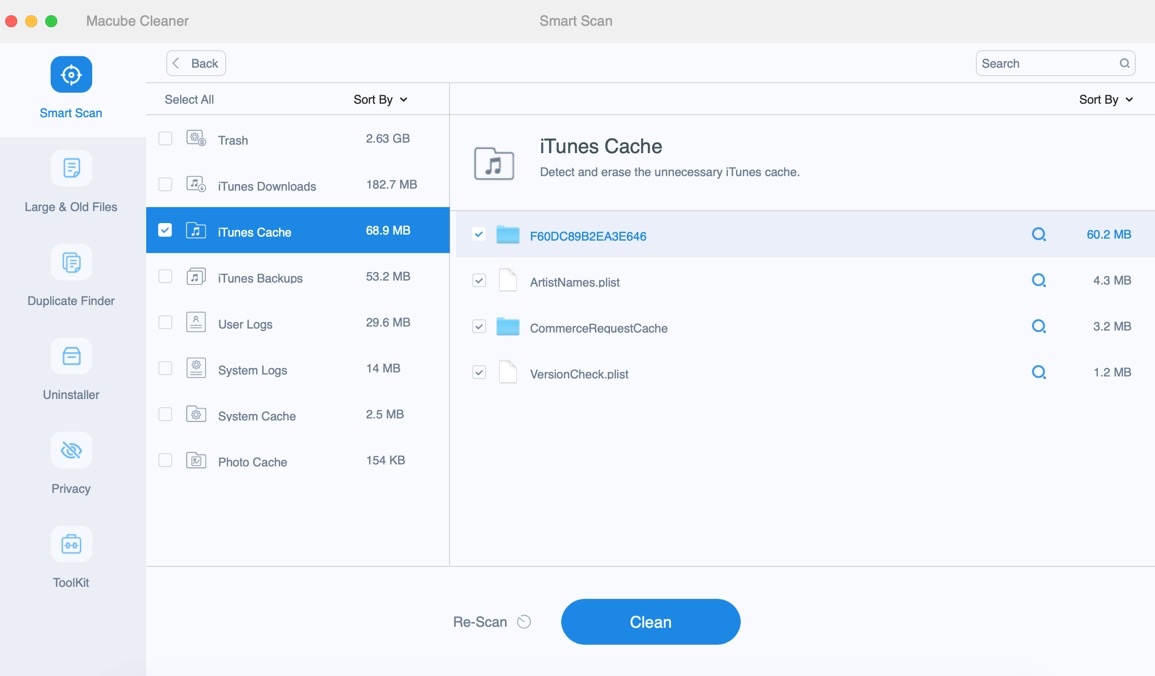
iMovie generates a significant amount of cache when you edit videos, leading to “Not Enough Disk Space” prompt. So, it’s suggested to clear iMovie cache and Macube Cleaner is highly recommended for this task. Macube Cleaner enables you to wipe app cache (e.g. iMovie cache) and system cache from macOS in 3 steps. With the software, you are free from heading to the cache folder for manual cleanup that is troublesome and risky due to the possibility of deleting vital system files.
Discover More About Macube
- Completely remove apps and their corresponding files.
- Thoroughly delete sensitive files without leaving the opportunity of being recovered.
- Conveniently manage extensions, plugins and login items in one place.
- Provide a user-friendly trial version for you to experience its features without any cost.
3 Steps to Clear iMovie Cache with Macube
Step 1: Get Macube on your iMac or MacBook.
Step 2: Click Smart Scan on the software main screen.
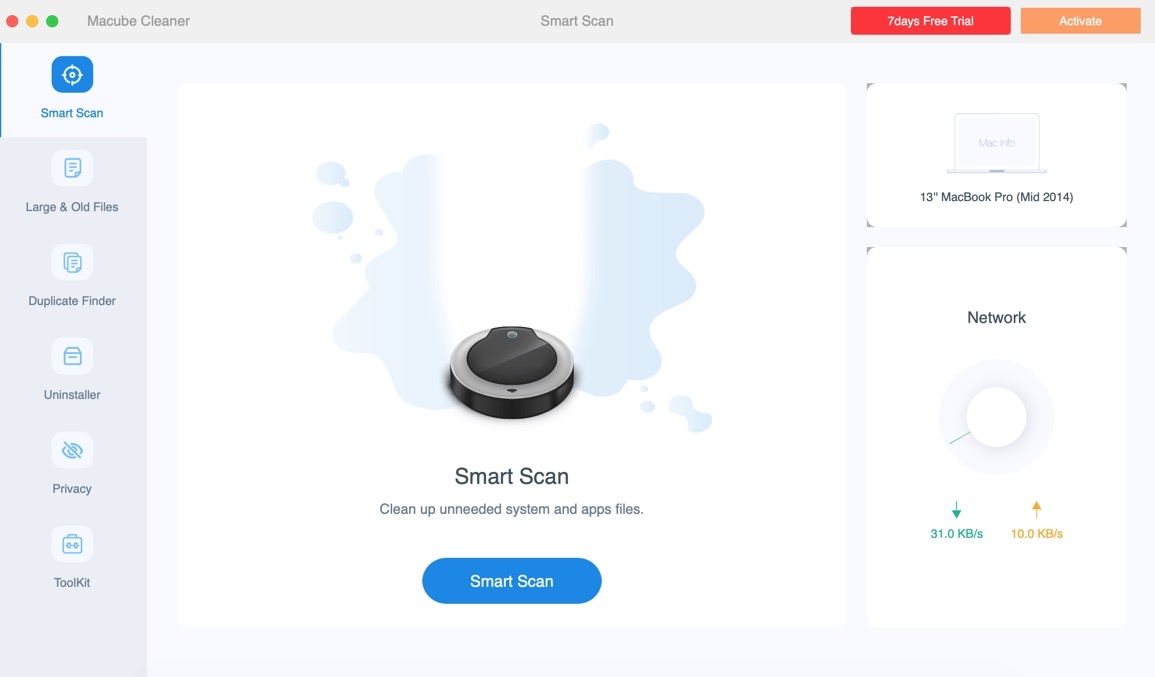
Step 3: Choose the iMovie cache on the left side and hit Clean on the right section to clear iMovie cache.
Fix 2. Delete Unneeded Projects
No matter whether the projects are finished or not, they will be saved on iMovie by default. Although this is convenient for your access and continuous edit, these projects could use a lot of space. So, don’t hesitate to check the project list to delete the ones you no longer need, such as the exported or outdated projects.
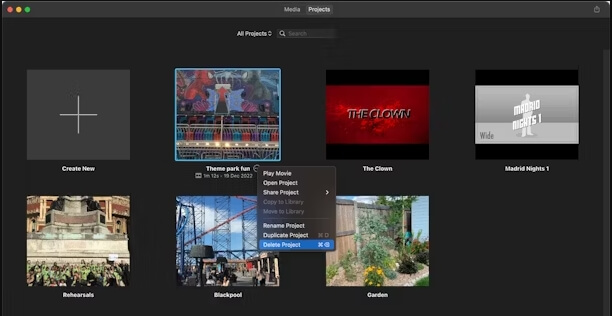
Step 1: Run iMovie on your Mac and switch to Projects at the top menu.
Step 2: Scroll through the projects to locate the unwanted ones. Hover your mouse over its name. Then, click the three-dot icon and choose Delete Project.
Fix 3. Remove Useless Events and Media Clips
If there are unneeded event files or media clips on your iMovie, try to remove them and some space will be reclaimed after that.
Step 1: Open iMovie on your Mac computer.
Step 2: Check your events in the sidebar and right-click the one you don’t need. Next, click Delete Event in the context menu to delete it.
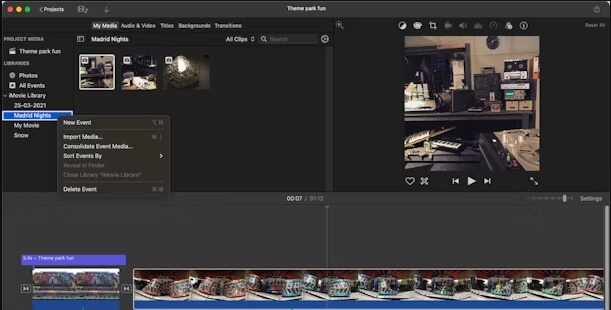
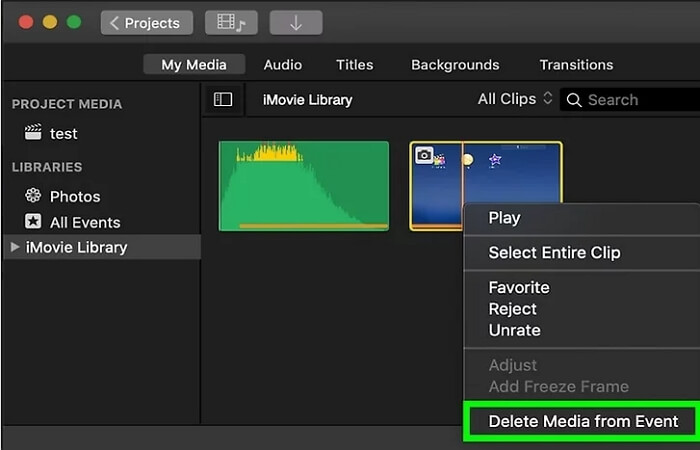
Step 3: To delete a media clip, open the corresponding event and click the target clip while pressing Control, followed by selecting Delete Media from Event.
Fix 4. Clear iMovie Render Files
Render files are temporary items created when a video is previewed or exported and will be generated the next time you use them, which means they are available to delete. To wipe these render files, the steps are as follows.
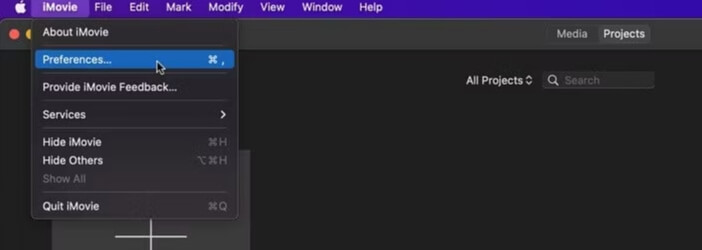
Step 1: Access the iMovie menu and choose Preferences.
Step 2: In the Preferences window, locate Render Files and click Delete.
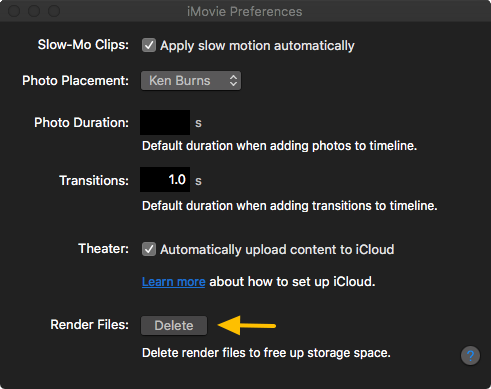
Step 3: Confirm your operation by hitting Delete again.
Fixed: Mac iMovie Not Enough Disk Space by Cleaning up Entire Mac Storage
Besides clearing iMovie disk space, Mac storage cleanup is also a good option to get rid of “Not Enough Disk Space on iMovie”. Adequate Mac storage can provide enough space for iMovie to use and thus the problem is fixed for sure. To help you clear your Mac efficiently, a one-stop solution using Macube Cleaner is introduced for you. Macube can tidy and optimize your Mac storage via its 5 powerful tools including junk cleaner, app uninstaller, large & old files finder, duplicate remover and browser wiper. You can follow the steps below to clear your Mac with the free version of Macube and regain gigabytes of available storage space.
Preparation: Launch Macube Cleaner after installing it on your Mac.
Step 1: Click Smart Scan and Macube will find all app clutters and system junk for you.

Step 2: Select all junk items and hit Clean to remove them from your macOS.

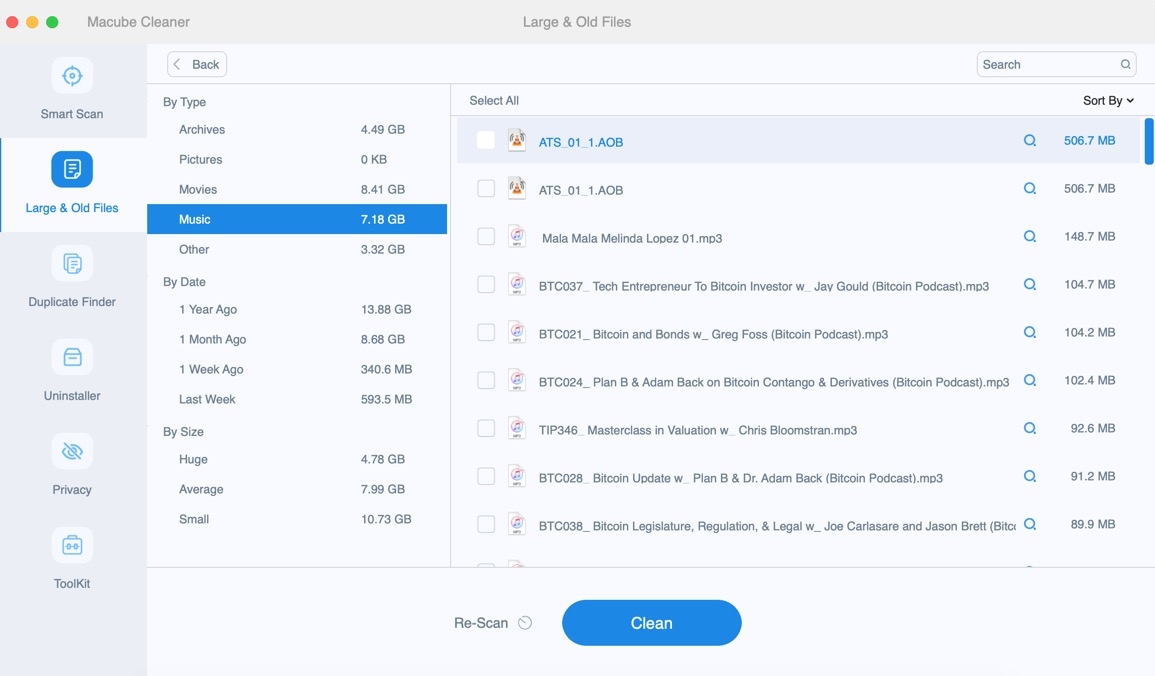
Step 3: Click Large & Old Files in the sidebar and choose Scan.
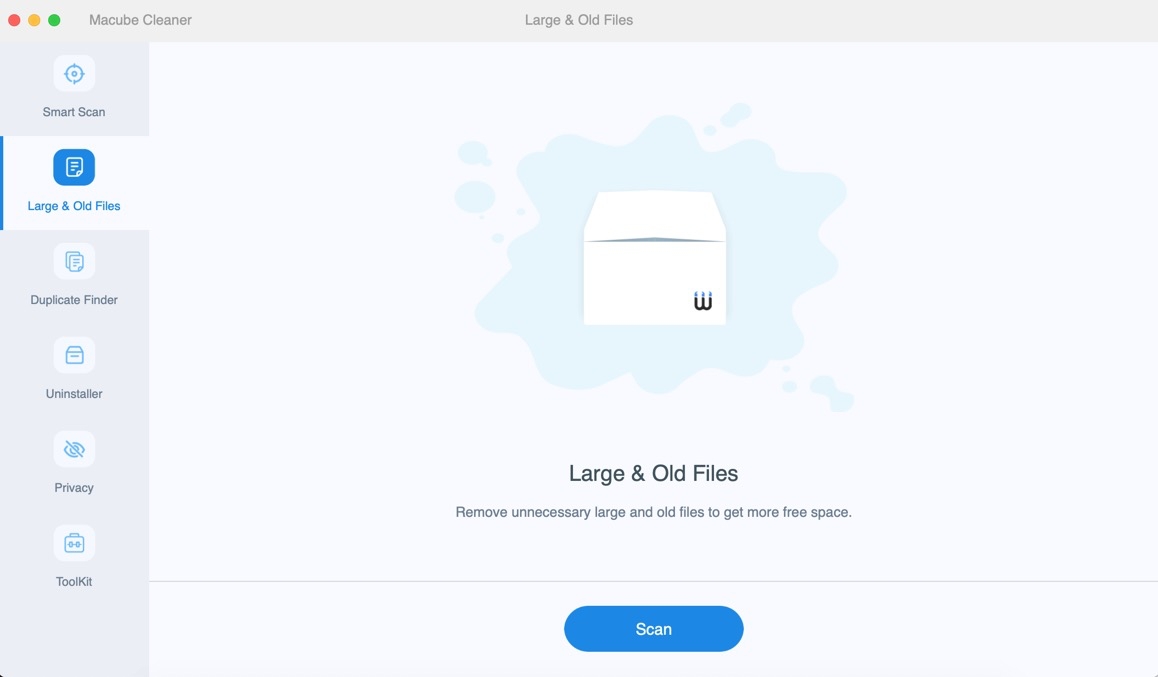
Step 4: The large or old files will be scanned out instantly and you are able to remove these files by selecting them and clicking Clean.
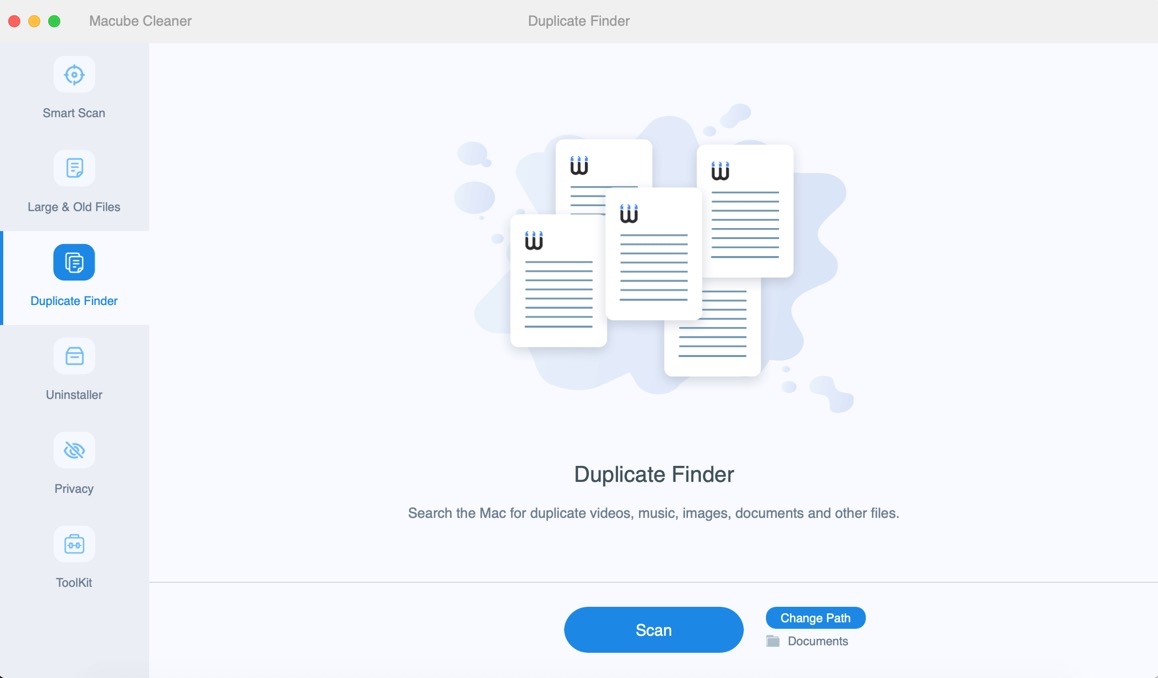
Step 5: Move to Duplicate Finder feature. Then, click Scan to find all duplicate files on your Mac.
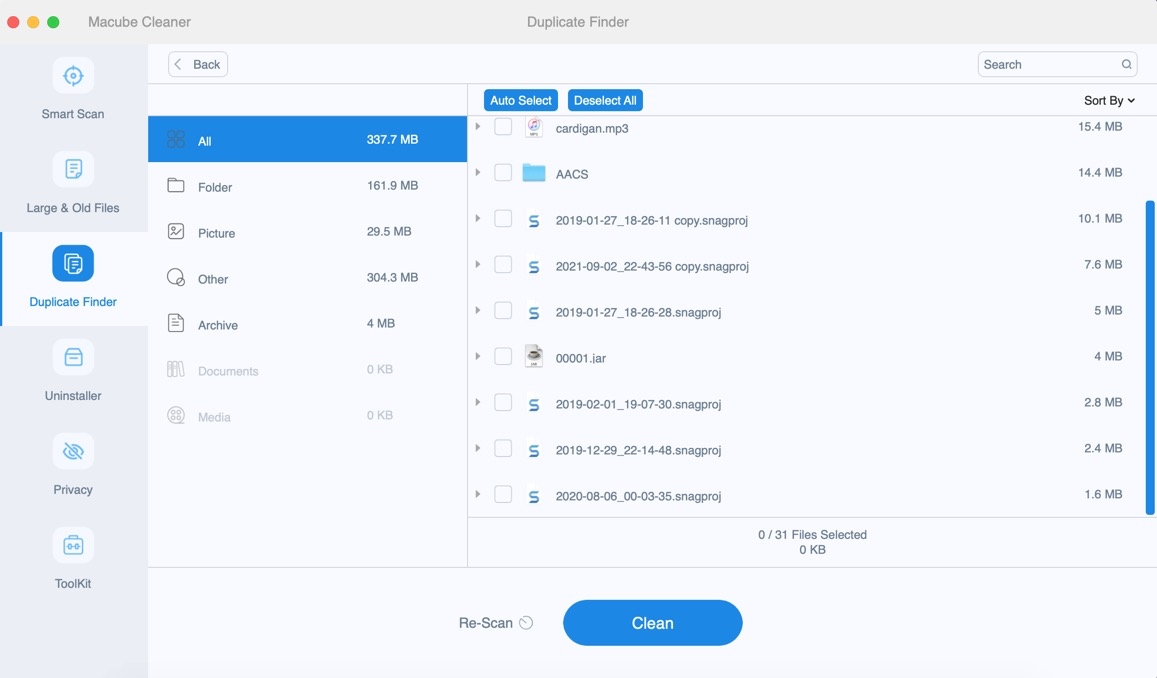
Step 6: Check the duplicates and delete them by hitting Clean.
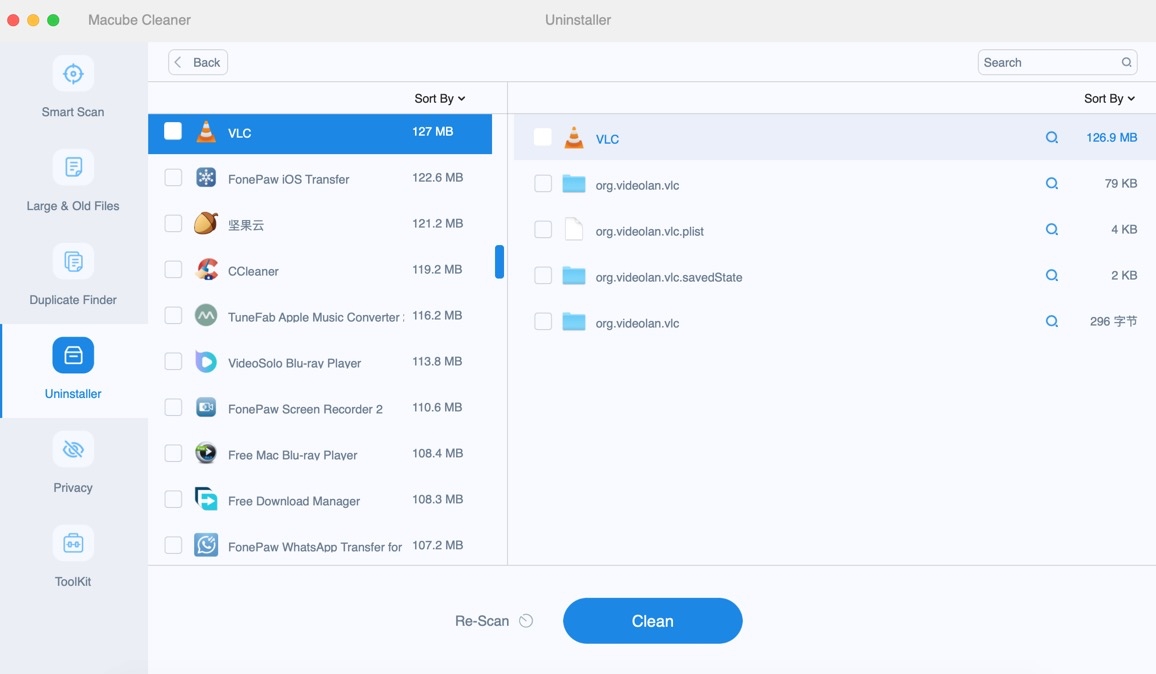
Step 7: Choose Uninstaller from the sidebar and click Scan.
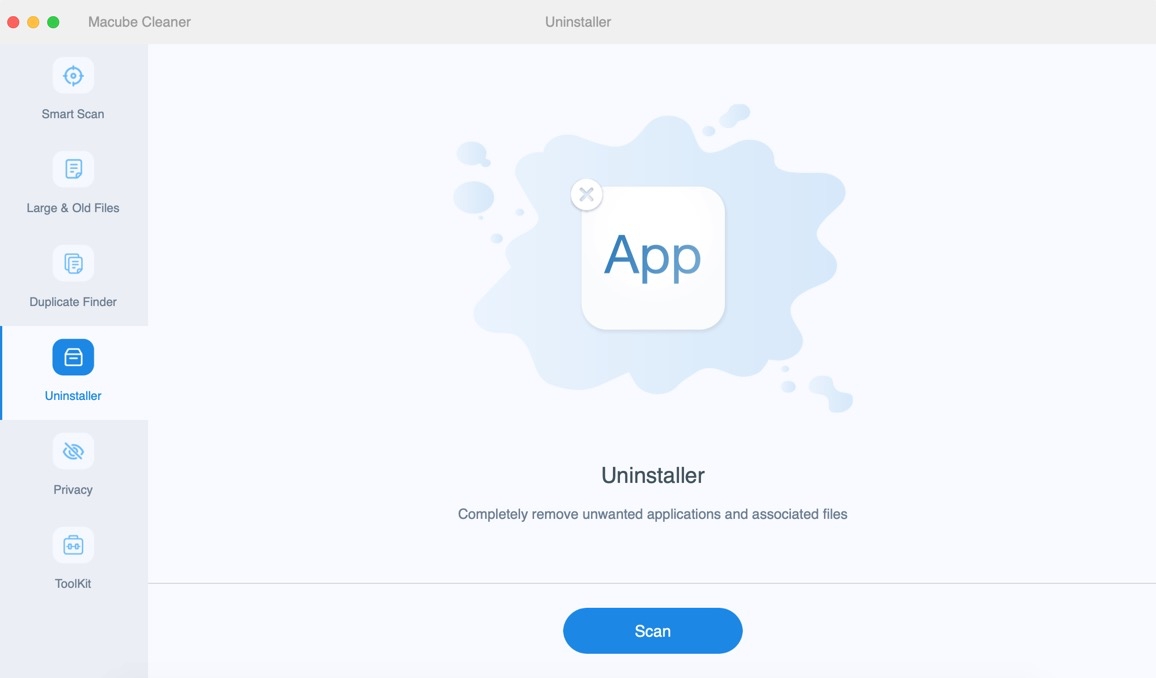
Step 8: From all apps listed by Macube, check the unneeded ones and hit Clean to remove the apps without leftovers.
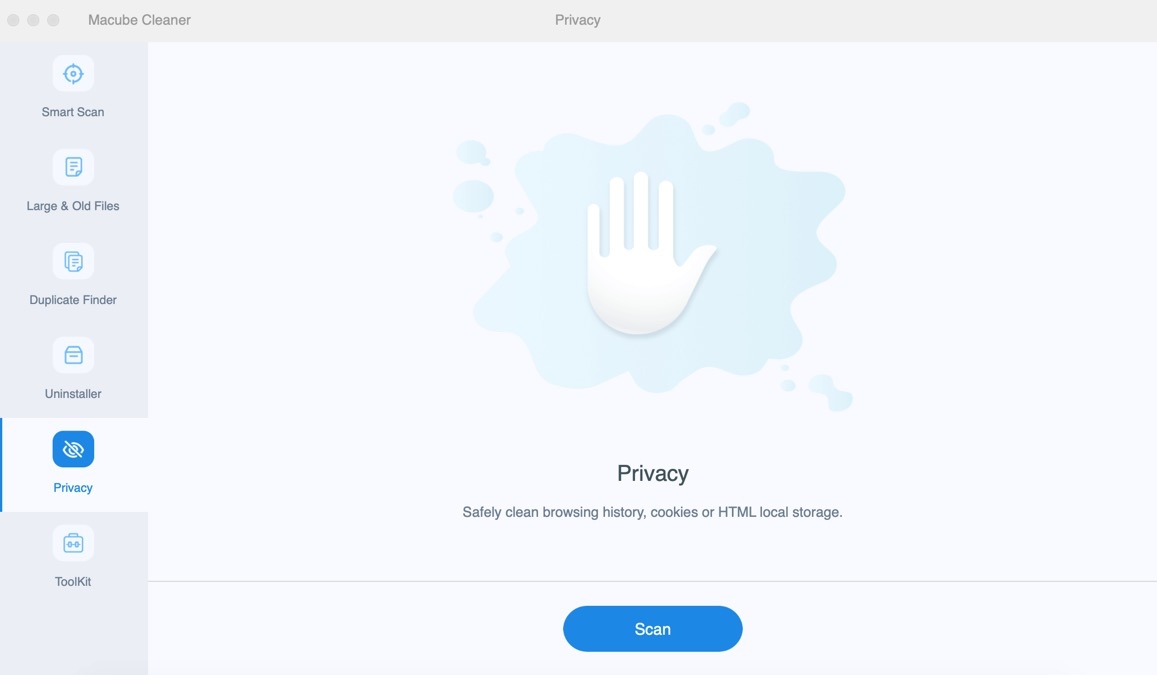
Step 9: Use the Privacy feature to scan out the data from browsers on your Mac.
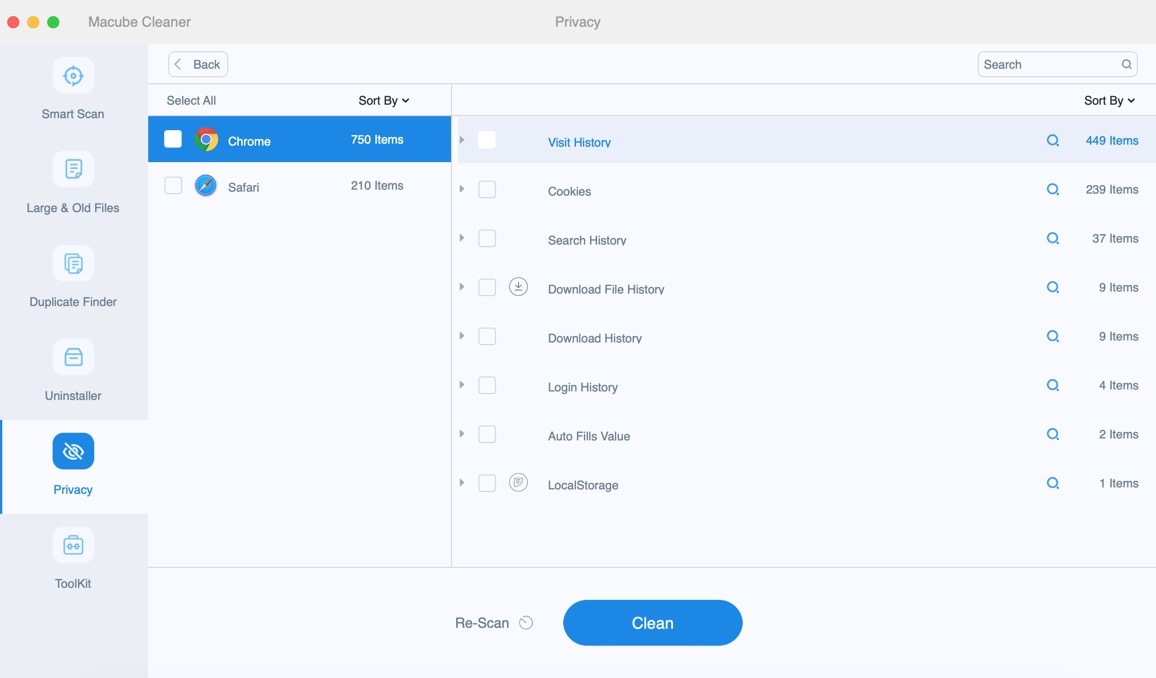
Step 10: Choose the browser first and then its corresponding files to delete.
How to Fix Mac iMovie Not Enough Disk Space without Cleanup
If iMovie “Not Enough Disk Space” quickly reappears after following the fixes above due to the small-capacity Mac hard drive, then consider migrating the iMovie library that contains projects, events and media to an external hard drive via the steps here.
Step 1: Completely close iMovie.
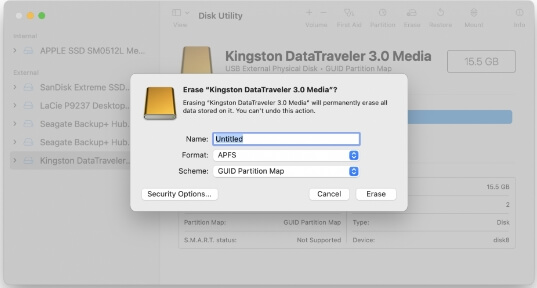
Step 2: Connect an external drive to your Mac. Erase the drive in Disk Utility and format it as APFS, if it’s not empty.
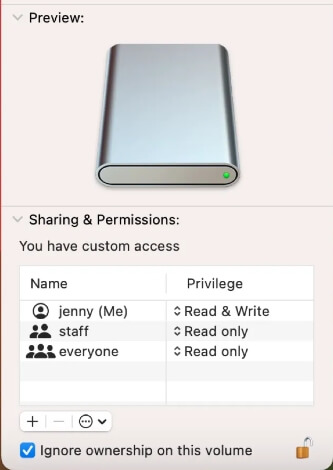
Step 3: After formatting, open Finder and click the external drive in the sidebar. Then, press Command + I to access the Get Info box.
Step 4: In the Info window, expand Sharing & Permissions and check Ignore ownership on this volume.
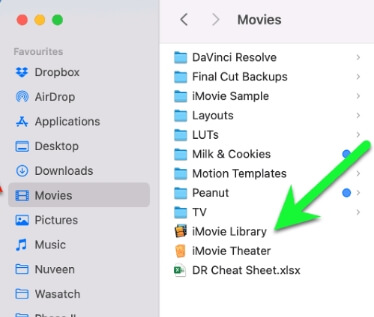
Step 5: Access Movies in Finder. Then, drag the iMovie Library and drop it on the external disk.
Step 6: Once the iMovie Library transfer is finished, open the migrated Library in iMovie and ensure all your files are included.
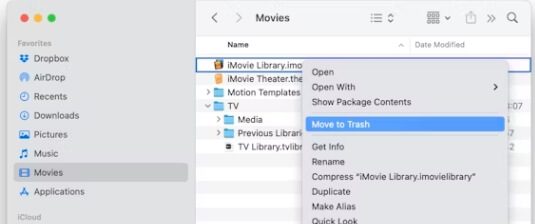
Step 7: Move the iMovie Library files from the Movies folder to the Trash. At last, right-click Trash and choose Empty Trash.
What to Do If iMovie Says Not Enough Disk Space but There is on Mac
Getting “iMovie Not Enough Disk Space” pop-out even when there is plenty of available space on your Mac? It’s possible that the iMovie itself is the culprit. In such cases, you can attempt to fully uninstall iMovie first and then reinstall it.
To uninstall iMovie, there are 2 options for you. One option is to move iMovie to Trash and delete its leftovers in the related folders of ~Library, such as Preferences, Caches, Container, and Application Support. The other option is to use the app uninstaller of Macube Cleaner to entirely uninstall iMovie in one click.

Wrap Up
If your Mac drive is huge, you can follow the steps about clearing iMovie disk space and Mac storage to get rid of the issue “iMovie Not Enough Disk Space”. While your Mac disk is small, it’s suggested to move iMovie Library to an external hard drive to ensure enough space for iMovie. When the iMovie Not Enough Disk Space issue occurs on your iPhone, simply clear your iPhone storage or switch to the alternative to iMovie.

Macube Cleaner
Speed up and troubleshoot your Mac super easily with a Macube full-featured free trial!
Start Free Trial