A cluttered startup disk on your Mac can significantly impact its overall performance and responsiveness. As files, applications, and system data accumulate over time, the available storage space diminishes, leading to reduced efficiency and potential issues.
Your startup disk is the primary storage location where macOS and all your essential files and applications reside. When this disk becomes cluttered, it can hamper your Mac's ability to operate smoothly. When your startup disk is nearly full, you might experience a range of issues that affect your day-to-day computing. Slow boot times, application crashes, and system freezes are common symptoms of a full disk. In this guide, we will provide a comprehensive outline of effective methods to clear and free up space on your Mac's startup disk. By the end of this guide, you will have the knowledge and tools necessary to optimize your Mac's startup disk, regain valuable storage space, and enjoy a smoother and more responsive computing experience.
Part 1: Diagnosing Startup Disk Usage Before You Clear Startup Disk
A. Checking Startup Disk Storage:
- To check the storage status of your startup disk on a Mac (macOS), follow these steps:
- Click on the Apple logo in the top-left corner of the screen.
- From the drop-down menu, select "About This Mac."

- In the window that appears, click on the "Storage" tab. This will give you an overview of your Mac's storage usage.
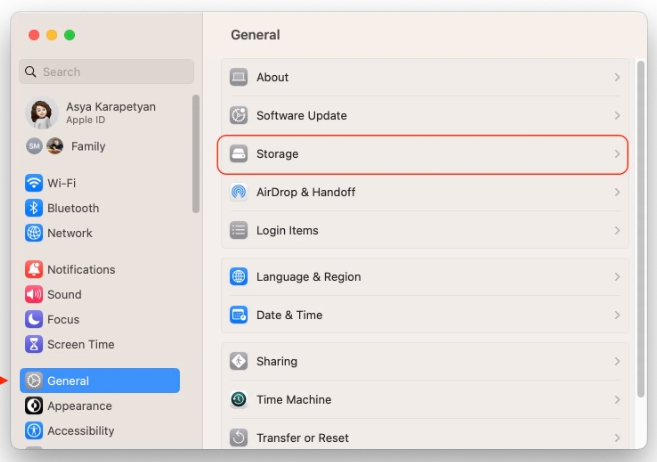
- You will see a colored bar representing different categories of files taking up space on your startup disk. The categories typically include "System," "Documents," "Apps," "Music," "Movies," "Photos," and more.
- The bar will show you how much space each category is occupying. Hover your mouse pointer over a section of the bar to see the specific size of that category.
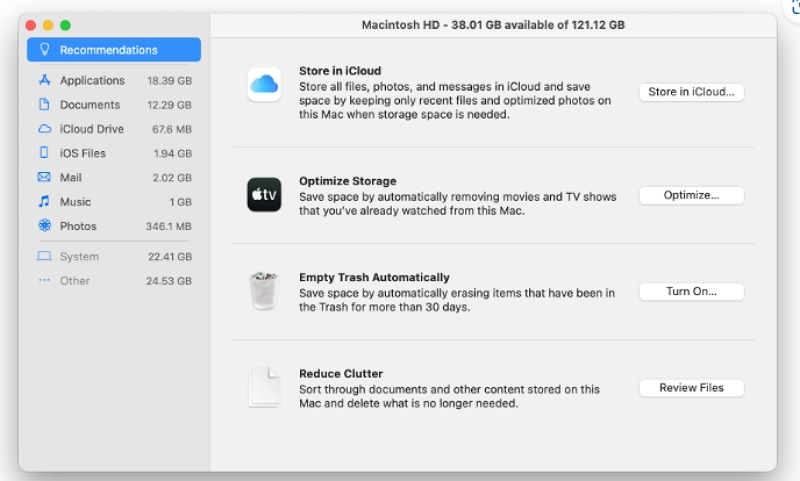
- To get more detailed information about a particular category, click on the "Manage..." button. This will take you to the "Storage Management" window.
- In the "Storage Management" window, you can see a breakdown of files within each category. It will display which files and applications are taking up the most space, making it easier for you to identify and manage large files. Move the files you do not find necessary and free up space.
B. Identifying Space-Hogging Files and Applications:
Once you're in the "Storage Management" window, you can identify and manage space-hogging files and applications as follows:
1. Large Files:
Click on the "Documents" section. This will display all your documents sorted by size, with the largest ones at the top. Review and consider deleting or moving any large files you no longer need.
2. Large Applications:
Click on the "Applications" section. It will show a list of applications installed on your Mac, sorted by size. Identify any applications that are taking up a significant amount of space but are rarely used. You can uninstall these applications to free up space.
3. System Files and Other Categories:
- Be cautious when dealing with system files, as deleting the wrong files can cause issues. It's generally best to focus on user-generated files and applications first.
- You can review other categories like "Music," "Movies," "Photos," etc., to see if there are any large files that you can remove or move to an external drive if they are not regularly accessed.
4. Empty Trash:
After you've identified and deleted or moved the large files and applications you don't need, remember to empty your Trash to reclaim the space occupied by the deleted items.
5. Cloud Storage and External Drives:
Consider utilizing cloud storage services (e.g., iCloud, Google Drive, Dropbox) to store files and documents you don't frequently need on your local drive. Use external drives to offload large files, such as old backups,
Remember, when deleting files, always double-check that you won't need them in the future. It's a good idea to create backups of important data before making significant changes to your storage. This way, you can be confident in clearing space on your startup disk without losing essential files.
Part 2: Methods for How to Clear Startup Disk on Mac
Method 1: Removing Unnecessary Files and Applications
Delete Unused Files, Downloads, and Applications:
- Regularly review your files and folders to identify items that are no longer needed. Look for old documents, temporary files, or duplicates that you can safely delete.
- Clean up your Downloads folder, as it tends to accumulate large files that might no longer serve any purpose. Transfer important files to appropriate folders or external storage if needed.
- Uninstall applications that you rarely use or no longer need. Removing unnecessary software can free up considerable disk space.
Permanently Delete Files from the Trash:
- When you delete files by moving them to the Trash, they are not immediately removed from your disk. Emphasize the importance of emptying the Trash regularly.
- Explain that permanently deleting files from the Trash is essential to reclaim the occupied disk space.
- Remind readers that files left in the Trash can still consume valuable storage, and emptying the Trash ensures efficient disk management.
Method 2: Transferring Large Files to External Storage
Move Large Files to an External Drive:
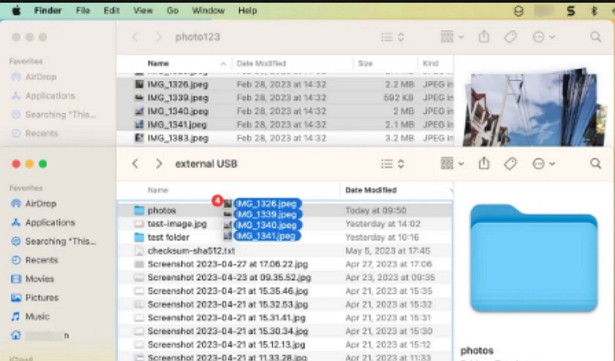
- Transfer large videos, photos, and documents to an external hard drive or USB storage.
- This frees up space on the startup disk while keeping files accessible when needed.
Utilize Cloud Storage for Backup:

- Use cloud services like iCloud, Google Drive, or Dropbox to back up important files.
- Store files in the cloud to free up space on the local disk and access them from anywhere.
By following this method, users can effectively manage large files, create backups, and free up valuable disk space on their Mac's startup disk.
Method 3: Clearing Cache and Temporary Files
Cache and Temporary Files and Their Impact on Disk Space:
- Cache files are temporary data stored by applications to speed up future access to resources. While useful, they can accumulate and take up significant disk space over time.
- Temporary files are created by applications for various purposes but are meant to be temporary and can become redundant once their purpose is served.
Instructions on Clearing Cache and Temporary Data: For Web Browsers:
Chrome: Go to Settings > Privacy and security > Clear browsing data. Select the time range and check "Cached images and files." Click "Clear data."
Safari: Go to Safari > Preferences > Privacy. Click "Manage Website Data" and remove cache and data for selected websites.
Firefox: Go to Options > Privacy & Security > Cookies and Site Data. Click "Clear Data" and select "Cached Web Content." Confirm by clicking "Clear."
For macOS System Cache:
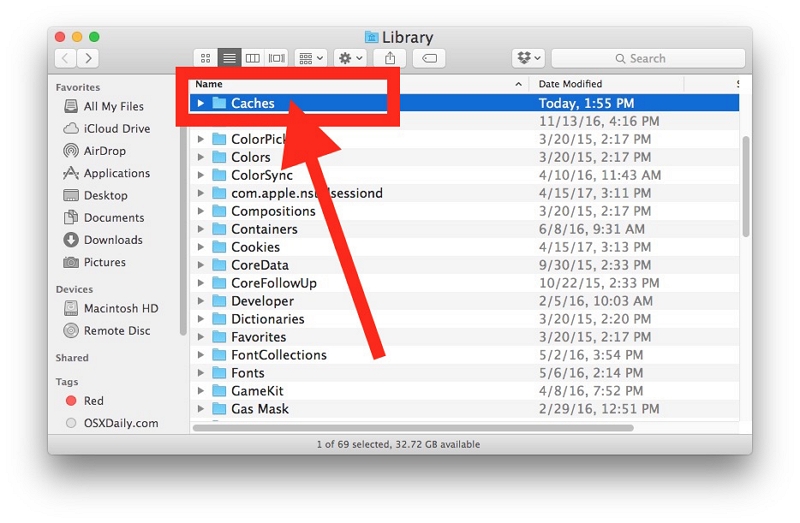
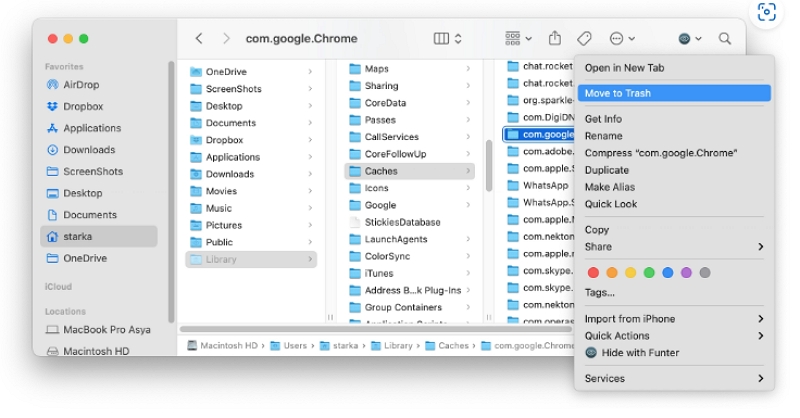
- Go to Finder > Go (in the menu bar) > Go to Folder.
- Enter "~/Library/Caches" (without quotes) and press Enter. This opens the Caches folder.
- Select and delete cache folders from applications you no longer use. Exercise caution and avoid deleting cache from important apps.
For App Temporary Files:
Some apps store temporary files in their preferences or support folders. Check these folders and delete temporary files from applications you rarely use.
Using Third-Party Cleaning Tools:
Alternatively, users can use third-party cleaning applications like Macube, CleanMyMac, CCleaner, or Onyx, which can safely clear cache and temporary files.
Method 4: Managing System and Application Updates
Removing Old System Updates and Installer Packages:
- Go to the Apple menu in the top-left corner of your screen and choose "About This Mac."
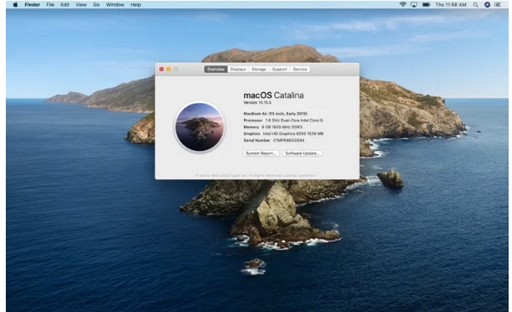
- In the window that appears, click on "Storage" and then "Manage."
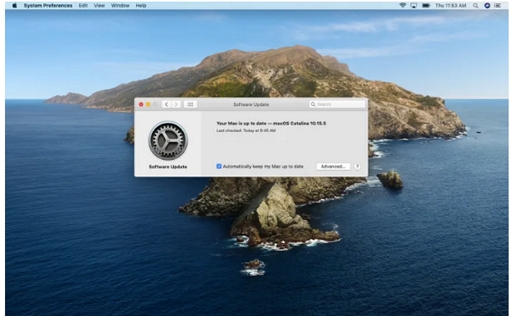
- In the left sidebar, click on "Updates" to see a list of installed updates and installer packages.
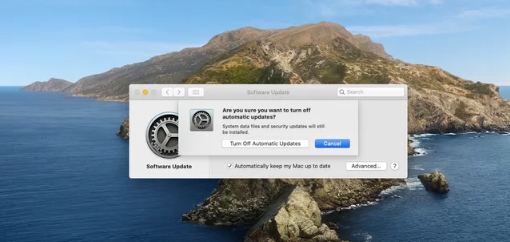
- Review the list and identify any old or unnecessary updates or installer packages that are taking up space.
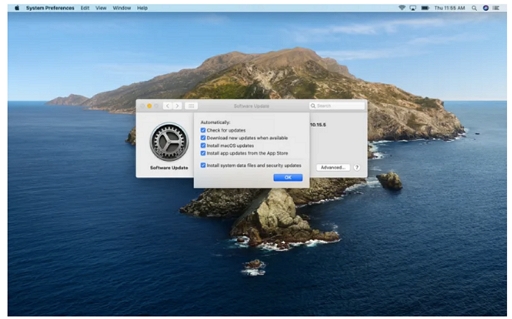
- To remove an update or installer package, simply select it and click on the "Delete" button.
Method 5: Checking for Application Updates:
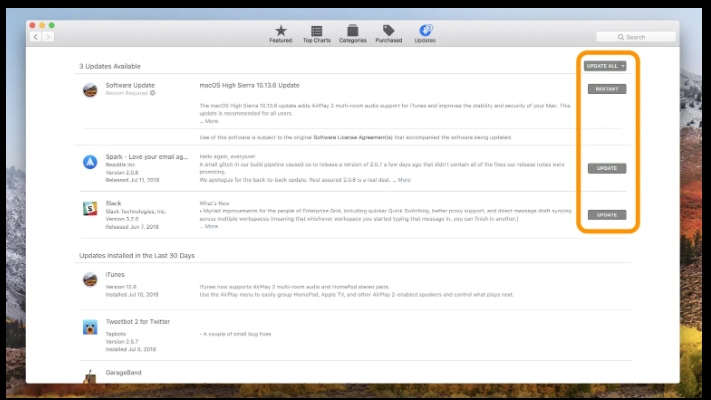
Most applications on your Mac can be updated through their respective App Stores or by checking for updates within the applications themselves.
For App Store Apps:
- Launch App Store.
- Click on your profile picture in the bottom-left corner.
- Under "Updates," you'll see a list of available app updates. Click "Update" next to each application to install the updates.
For Non-App Store Apps:
- Launch the application for which you wish to check for updates.
- Look for a "Check for Updates" or "Update" option in the application's menu or preferences.
- Install the most recent version by following the on-screen directions.
Part 3: How to Free Up Space on Mac Startup Disk Using Macube
A useful utility tool for Mac that focuses on cleaning activities is called Macube Cleaner. It offers a variety of cleaning options, such as deleting system clutter, uninstalling programs, deleting large and outdated files, finding duplicates, destroying stubborn files, and others. The majority of the features work effectively and can aid in recovering a sizable amount of Mac storage space.
However, Macube might be the right choice if you're searching for a lightweight app with a simple, clean UI that won't slow down your Mac. It's worth downloading the trial edition at the very least to see what it can accomplish for you.
Features of Macube:
- Junk Files Removal: Identifies and deletes unnecessary system junk files, optimizing storage.
- Duplicate Files Finder: Detects and deletes duplicate files, recovering additional space on the disk.
- Privacy Protector: Safely deletes privacy-sensitive files, protecting your personal information.
- App Uninstaller: Allows you to uninstall applications and their associated files completely.
- File Shredder: Permanently deletes files, making them unrecoverable for enhanced data privacy.
Step by step:
Step 1: Download and install Macube Cleaner.

Step 2: Select Smart Scan from the main interface. In order to immediately address the startup disk almost full issue, this feature instantly scans garbage files, system files, caches, logs, and iTunes backups throughout your entire Mac.

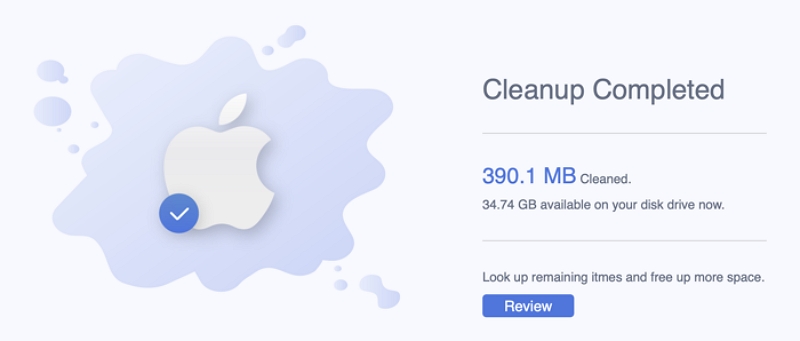
Step 3: Following the scan, you will be shown all of the garbage files. You can freely inspect it, choose the items you no longer require, and then click "Clean" to delete them all at once.
Step 4: Instantaneously, your Mac's disk space will be made available.
Part 4: Precautions and Considerations Before Clean Up Startup Disk Mac
Back Up Important Data Before Cleanup:
- Create backups of essential data before proceeding with the cleanup process.
- This precaution ensures data safety in case of accidental deletions or any unforeseen issues during the cleanup.
Caution Against Deleting System Files:
- Take caution against deleting or modifying critical system files or folders.
- Focus only on removing unnecessary user-generated files and applications during the cleanup.
In conclusion, optimizing the startup disk on a Mac is crucial for improved performance and efficiency. We discussed various methods, including removing unnecessary files and applications, transferring large files to external storage, clearing cache and temporary data, and managing system updates. By following these methods, users can free up valuable disk space and ensure a smoother computing experience. To maintain disk space in the long run, users should regularly perform disk cleanup and organization. It helps prevent the accumulation of unnecessary clutter and ensures the system stays optimized. As an efficient disk cleaning and optimization tool, Macube can be a valuable asset in maintaining a clean startup disk and managing disk space effectively.

Macube Cleaner
Speed up and troubleshoot your Mac super easily with a Macube full-featured free trial!
Start Free Trial