As long as you have got a Mac computer, you must know how to empty trash on Mac. This is quite a simple task. However, things could be tricky when something goes wrong, and the trash just won’t empty on your Mac.
Why can’t you delete some of the file from your Trash? Here are 4 common reasons: Some files are in use; Some files are locked or corrupted and need to be repaired; A file is named with a special character that makes your Mac think it's too important to be deleted; Some items in the trash cannot be deleted because of system integrity protection;
Now that you are aware of the reasons, how to solve the problem? Read on and here’s 8 fixes for you to force empty Trash on Mac fast when your Trash cannot empty.
Part 1. Fix Cannot Empty Trash on Mac When the File is in Use [1st-3rd Way]
The issue that the file is in use is the most common reason why you cannot empty Trash on Mac. Sometimes, you thought you have closed all app that are possibly using the file while your Mac thought otherwise.
How to fix this dilemma?
1st Way: Restart your Mac
Firstly, restart your Mac and then try to empty the Trash again. Although you think that you have quit all apps that could possibly be using the file, maybe there is an app with one or more background processes that are still using the file. A restart can terminate the background processes.
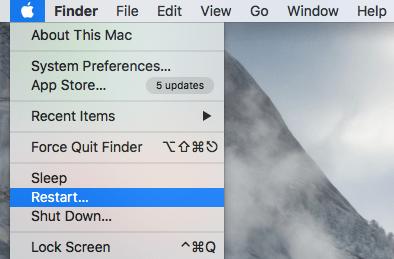
2nd Way: Empty the Trash in Safe mode
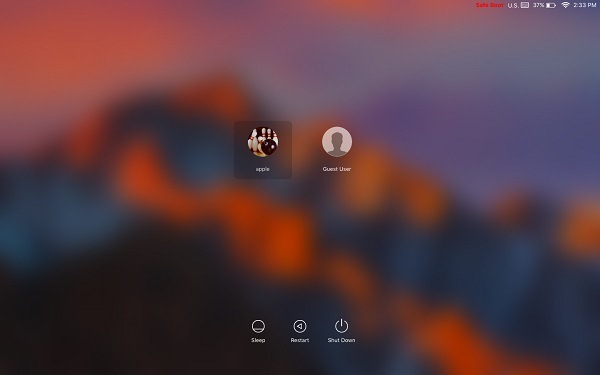
The Mac will say that the files is in use when the file is using by a startup item or login item. Therefore, you'll need to start up the Mac in safe mode, which won't load any third-party hardware drivers or startup programs. To enter safe mode:
For Intel Macs
- Hold down the Shift key when your Mac boots.
- Release the key when you see the Apple logo with progress bar.
- Then you can empty the Trash on Mac and restart your computer to exit safe mode.
For Apple Silicon Macs
Press and hold the Power button until the startup options appear.
From the startup options menu, select the startup disk.
Press and hold the Shift key and choose “Continue in Safe Mode.” Release the Shift key.
Once your Mac has started up in Safe Mode, try emptying the Trash again.
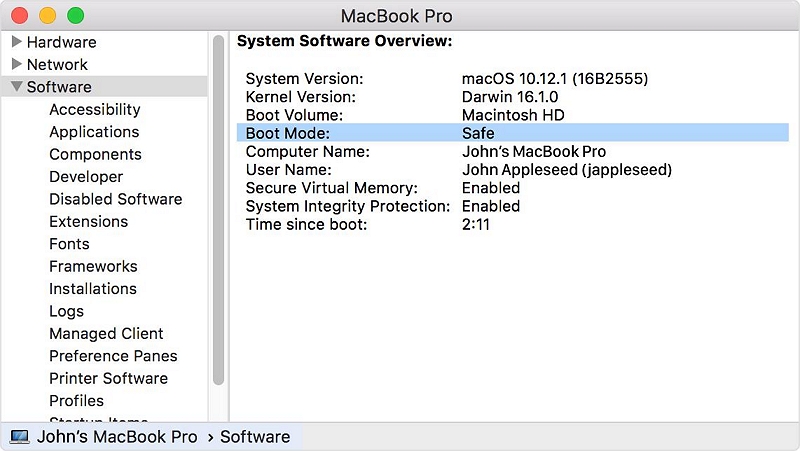
By starting up your Mac in Safe Mode, you can potentially resolve any issues that may be interfering with emptying the Trash.
3rd Way: Use Mac Cleanup Software - Macube Cleaner
If the above methods don't work, using a professional cleanup tool for Mac is also a good way, for example, Macube Cleaner, which specializes in efficiently clearing junk files from your Mac. With Macue Cleaner, you can safely clear Trash in one click.
What's better about using Macube Cleaner is that you can free up more space by performing a whole cleanup on your Mac, clearing caches data, logs, mail/photos junks, unneeded iTunes backups, apps, large and old files and more. Here’s how to delete the trash with Macube Cleaner:
Step 1. Download and install Macube Cleaner on your Mac. It’s free to use for up to 7 days with full function.
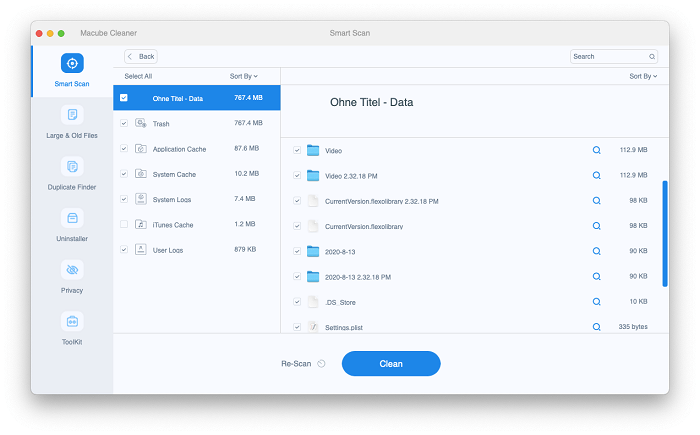
Step 2. Launch the program and choose Smart Scan to clear junk files. The program will scan out all junk files on your Mac in seconds.
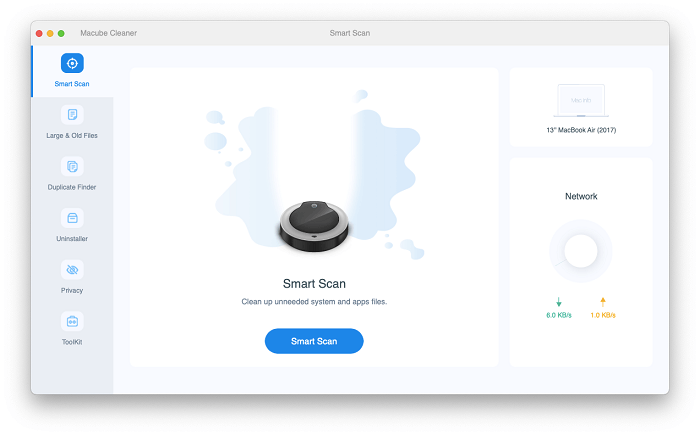
Step 3. Tick certain items in the Trash option and click Clean button.
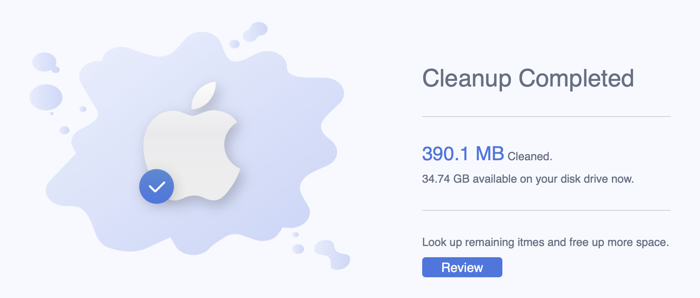
Step 4. The Trash will be emptied on your Mac.
Part 2. Fix Cannot Empty Trash on Mac When the File is Locked [4th Way]
If the Mac says that the operation could not be completed because the item is locked or named with a special character, what you need to do is to unlock or rename the file.
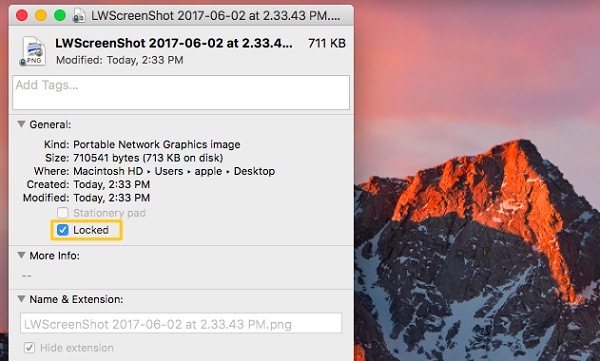
Firstly, make sure the file or folder is not stuck. Then right-click on the file and choose "Get Info". If the locked option is checked. Uncheck the option and empty the Trash.
Also, if the file is named with weird characters, just rename the file, and usually you will be able to delete it normally.
Part 3. Fix Cannot Empty Trash on Mac When the File is Corrupted [5th Way]
If it’s the corrupted file that results in the Trash won’t empty problem, you need extra effort to delete it permanently from the Trash - repair the disk with Disk Utility, and then delete the file.
Step 1. Start up your Mac in Recovery mode: hold down Command + R keys when the Mac starts up.
Step 2. When you see the Apple logo with progress bar, release the keys.
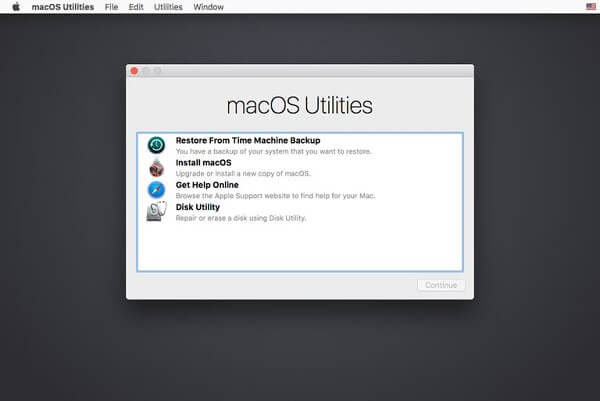
Step 3. You will see the macOS Utilities window, select Disk Utility > Continue.
Step 4. Choose the disk that contains the file that you want to delete. Then click First Aid to repair the disk.
After the repairing is done, quit Disk Utility and restart your Mac. You can empty the Trash now.
Part 4. Fix Cannot Empty Trash on Mac Due to System Integrity Protection [6th Way]
System Integrity Protection(SIP), also called rootless feature, was introduced to Mac since Mac 10.11 to prevent malicious software from modifying protected files and folders on your Mac. To remove files protected by SIP, you need to disable SIP temporally. To turn off System Integrity Protection in OS X El Capitan or Later:
Step 1. Reboot your Mac in Recovery mode by pressing Command + R keys when the Mac reboots.
Step 2. On macOS Utilities window, choose Terminal.
Step 3. Enter the command into the terminal: csrutil disable; then reboot.
Step 4. Hit Enter button. A message will appear saying that System Integrity Protection has been disabled and the Mac needs to restart. Let the Mac reboot itself automatically.
Now the Mac boots up, empty the Trash. After you have done clearing the Trash, you're recommend to enable SIP again. You need to put the Mac into Recovery mode again, and this time use the command line: csrutil enable. Then reboot your Mac to make the command to take effect.
Part 5. Force Empty Trash on Mac with Terminal on macOS Sierra [7 Way]
If the methods above don’t work, you can also try an ultimate method – force empty Trash on Mac with Terminal. Using Terminal to perform command is very effective to force empty the Trash. However, you should follow the steps very carefully, otherwise, it will erase all your data.
In Mac OS X, we used to use sudo rm -rf ~/.Trash/ command to force empty Trash. In macOS Sierra, we need to use the command: sudo rm –R . Now, you can follow the specific steps below to force the trash to empty on a Mac using Terminal:
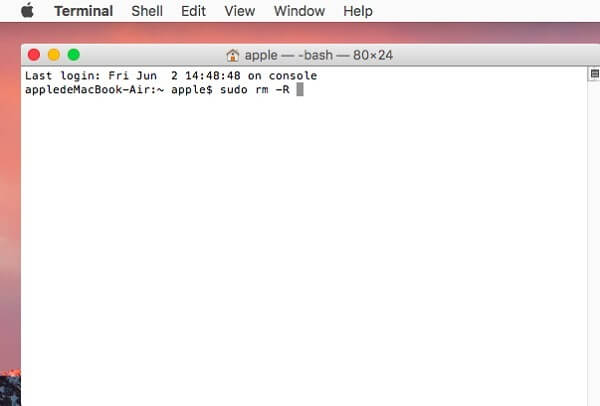
Step 1. Open Terminal and type: sudo rm –R followed by a space. DO NOT leave out the space. And DO NOT hit Enter in this step.
Step 2. Open Trash from the Dock, select all the files and folders from the Trash. Then Drag and drop them in Terminal window. The path of each file and folder will appear on the Terminal window.
Step 3. Now hit Enter button, the Mac will begin to empty the files and folders on the Trash.
Part 6. Fix Can't Empty Trash Due to No File Permissions [8th Way]
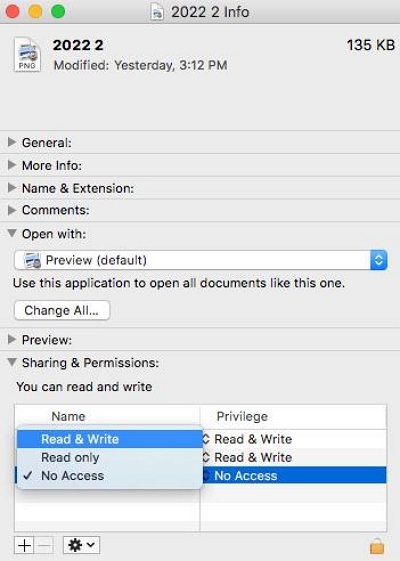
If you are unable to empty the Trash on your Mac, you should also check the file permissions. In order to delete a file, you must have both read and write permissions for it. Additionally, it’s important to ensure that your disk permissions are set correctly for your Mac to work properly.
To check and modify file permission settings, follow these steps:
1. Open the Trash folder.
2. Right-click on the file you want to delete and select “Get Info”.
3. In the information window, expand the “Sharing & Permissions” section to view your permissions.
4. If necessary, click on the lock icon located at the bottom right corner of the window. You will be prompted to enter your password to proceed with the changes.
5. After unlocking, you can modify the permissions to include both read and write access.
Bonus: What if I delete the file I need by mistake?
You can use Data Recovery software to recover lost data or accidentally deleted files. Here, we recommend Eassiy Data Recovery, a software that helps recover lost, deleted or formatted files from various storage devices (hard drives, USB drives, memory cards, etc.). Eassiy has a user-friendly interface, so even if you are a novice computer user, you can easily recover files you deleted from Mac.
The specific recovery steps will be shown to you below. If you are interested, you can click to download and try the seven-day free trial to experience all recovery functions.
Free Download Free Download Free Download Free Download
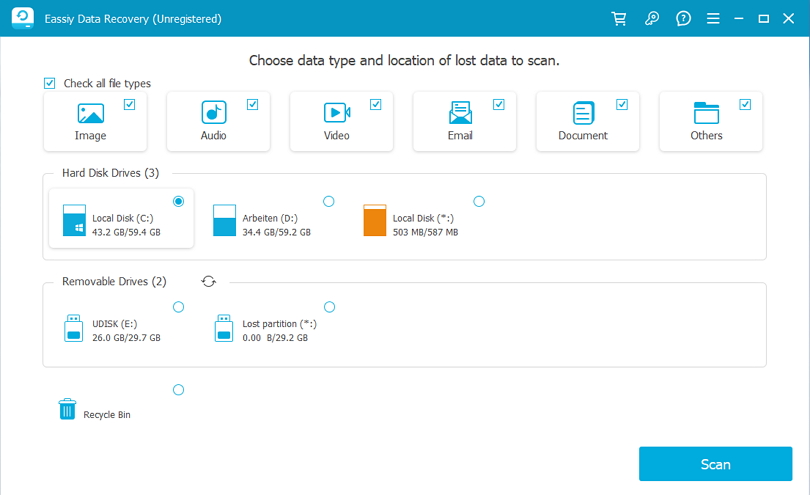
Step 1: Open Eassiy Data Recovery and select the type of data to be recovered and the hard drive to be scanned. Then click Scan.
Step 2: Eassiy Data Recovery provides users with Quick Scan and Deep Scan.
The Quick Scan starts automatically when you start a scan, and we recommend using it if you have recently lost data. If you are still not satisfied with the scan results, you can click Deep Scan to further scan the storage to find your lost files.
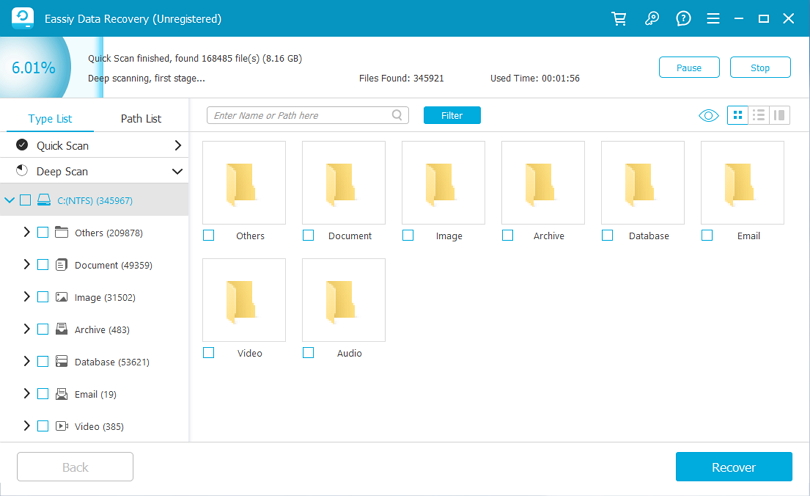
Step 3: After listing the data types of all deleted files, please select the files you want to recover. If you want to find deleted files more easily, you can use the search bar to find files by name or path, or use the icon next to the Filter button to change the preview mode.
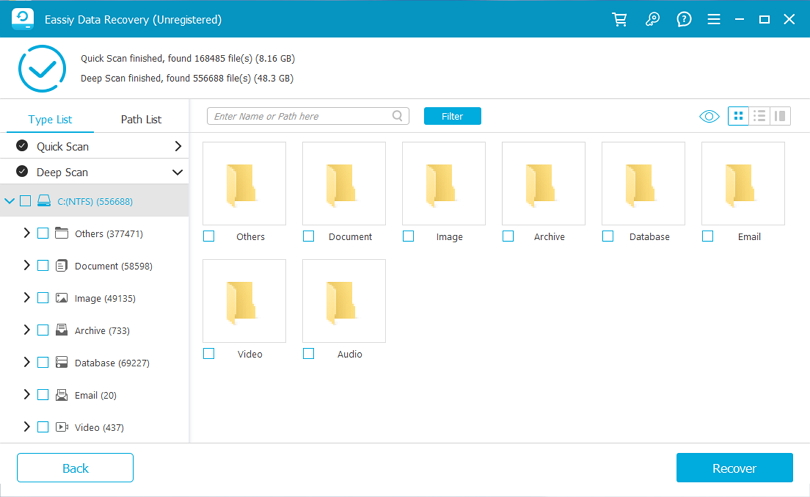
Finally, please click the "Recover" button to recover your selected files.
Conclusion
Here’s all the 8 fixes to the Mac trash won’t empty problem. I am sure that you can empty the Trash on your Mac now. We also guide you on how to recover accidentally deleted files, giving you a reversible option for emptying your Mac trash. If you have other question, leave your comment below.

Macube Cleaner
Speed up and troubleshoot your Mac super easily with a Macube full-featured free trial!
Start Free Trial