Being alerted by Photoshop or another application that you are out of memory? Running out of Mac memory is always a headache. You open Storage management and notice that mail has taken up a large portion. That's when you think about those inboxes filled with unread advertising emails or read login code information. These are all things you can do to clean them up quickly. Whether you want to manage these emails or delete your Mail app, you can do so with this guide. Read on!
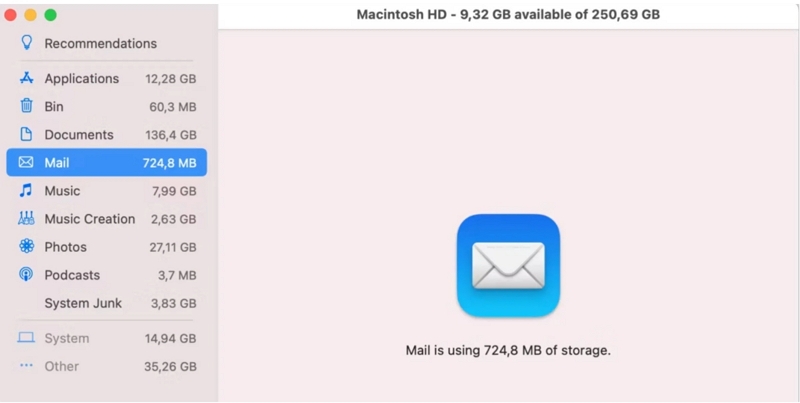
Part 1: Why Does My MacBook Refuse to Let Me Delete Emails?
| Reason 1. Server Settings | Incorrect IMAP or POP settings can prevent emails from being deleted from the server. These settings dictate how your email client interacts with the server. If they're not configured properly, it can lead to issues like emails not deleting. |
| Reason 2. Software Bugs | Occasional glitches in the software can also cause problems. Make sure to keep your Mac Mail and macOS updated to the latest versions. Updates often include fixes for known issues, which can help prevent bugs from causing deletion problems. |
| Reason 3. Syncing Issues | If your email isn't syncing correctly across your devices, it may result in emails not being deleted as expected. This is especially common when using multiple devices to access the same email account. Poor synchronization can cause discrepancies, such as emails not disappearing after deletion. |
Most people are caused by the third reason. As Apple develops more and more products, people can check email on iPhone, iPad, Mac, and even iWatch. As a result, if you don't sync your email, you may need to delete the same email on all four devices to completely delete it. So how do I sync email?
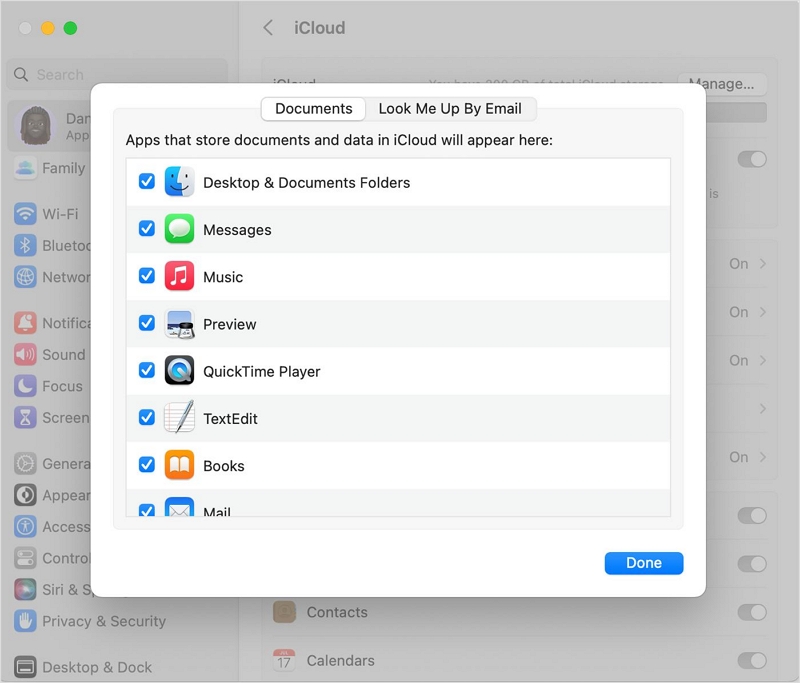
Option 1: For Mac (Apple Mail): Open System Preferences, click on iCloud, ensure you're signed in, and Mail is checked.
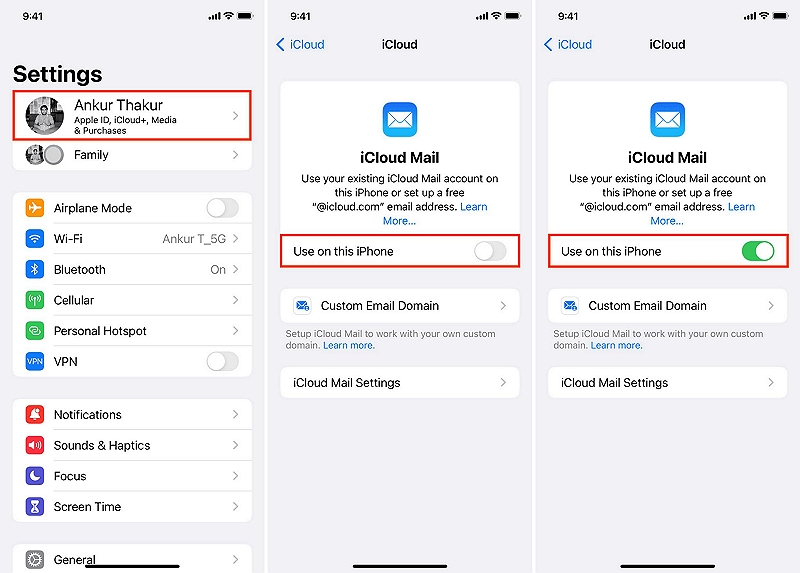
Option 2: For iOS Device (Mail): Open Settings, tap on iCloud, ensure you're signed in, and Mail is enabled.
Option 3: If you are using Other IMAP (Internet Message Access Protocol) Client: Go to the app, find account settings, choose iCloud or create a new account, and input the settings found on the support page.
Part 2: How to Delete Received Email on Mail?
After you sync successfully, your actions in Mail will be synchronized to each device. Let's learn how to manually delete messages that have been read or received.
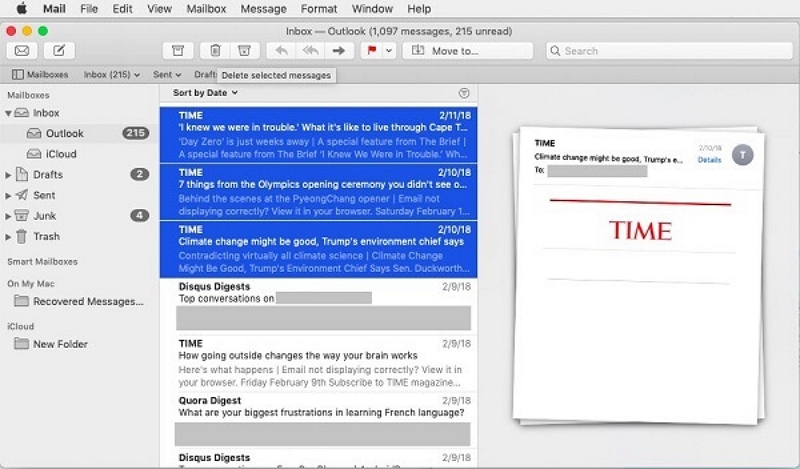
Step 1: In the Mail app on your Mac, click Shift key to choose email from the list.
Step 2: Click the Trash button in the Mail toolbar or press the Delete key.
 Note:
Note:
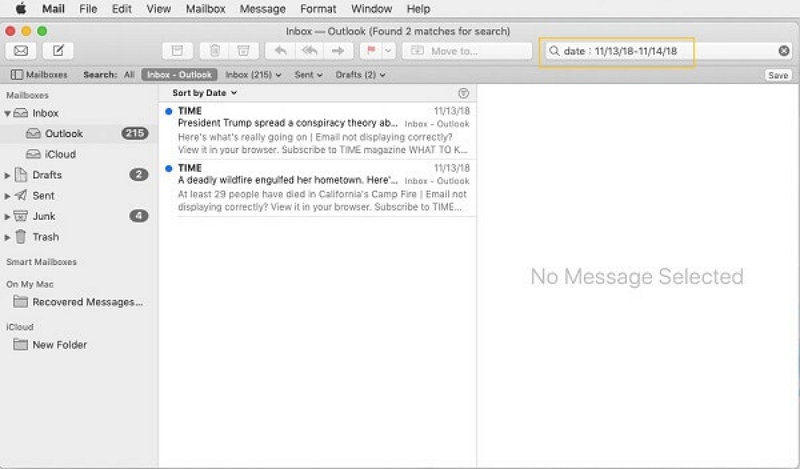
- To delete multiple emails from the same person, type their name in the search bar to find all their emails. If you want to delete emails received or sent on a specific date, enter the date range, like "Date: 11/13/18-11/14/18," in the search bar.
In order to permanently delete emails, do the following:
Step 1: Select Email > Erase Deleted Items > select an account.
Step 2: In the Mail sidebar, ctrl - click the Trash Box
Step 3: Select Erase Deleted Items.
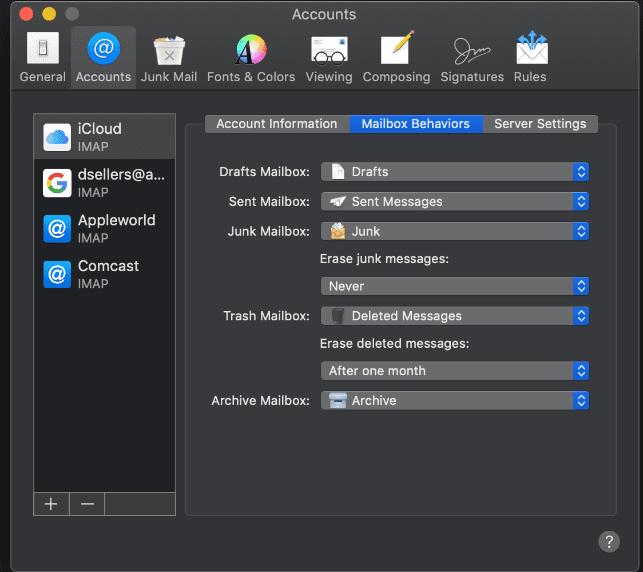
You can set the "Erase Deleted Messages" option in the Mailbox Behaviors to have the mail permanently remove deleted messages for you at a specified time. If you want to learn more about Mailbox Behaviors, please read the Apple official article.
Part 3: How to Automatically Clean Up Mail Storage on Mac?
Basically, the message body of each message doesn't take up too much storage space, but attachments do. Therefore, if you can tame attachments, you can effectively reduce the total size of the message box. At this point, you can use clean software for Mac.
It takes up a small amount of memory, can free up a lot of available storage for your Mac, it is Macube Cleaner.
Macube Cleaner not only has the function of cleaning Mail, but also can uninstall apps and clean up junk files in Mac, old and large files, duplicate files, similar photos, and browser plug-ins and extensions. At the same time, it has the industry's advanced scanning technology, can quickly scan all the files in the Mac, and display by time, size or name order. Save users a lot of time.
Key Features:
- Intelligently clean system caches, mail caches, iTunes music and various unknown "Other Stores."
- Easily delete images, videos, PDFs, and ZIP files from email attachments after previewing.
- Customize file duplication and similarity settings to efficiently filter out duplicate files and similar photos for deletion.
- Use the file shredder function to permanently delete stubborn files, making them unrecoverable even by recovery software.
How does Macube Cleaner delete Mail storage?
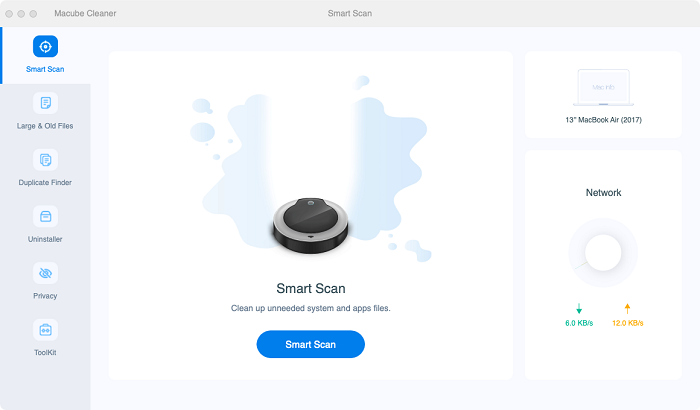
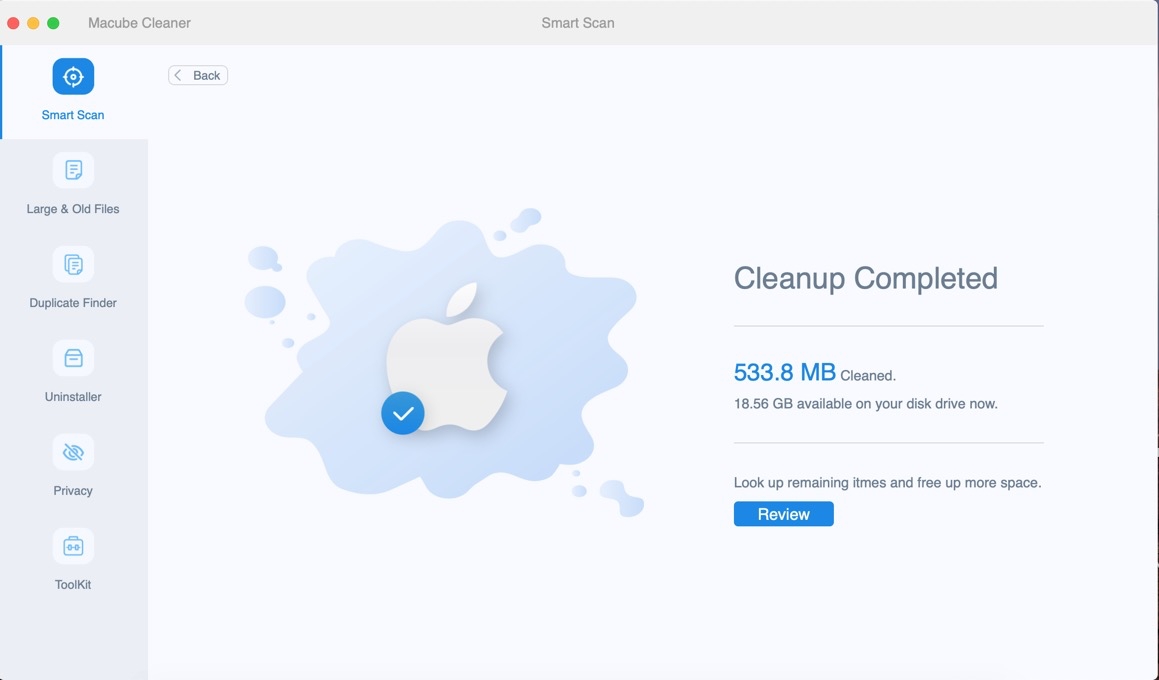
Step 1: Open the downloaded Macube Cleaner and select the Smart Scan function. Click the Smart Scan button and wait for Macube to scan your computer, which takes less than a minute.
Step 2: When the scan is complete, all the files in your Mac that can be deleted are displayed. Select Mail Attachments or Mail Junk. Use the magnifying glass on the far right to check whether all selected attachments need to be deleted.
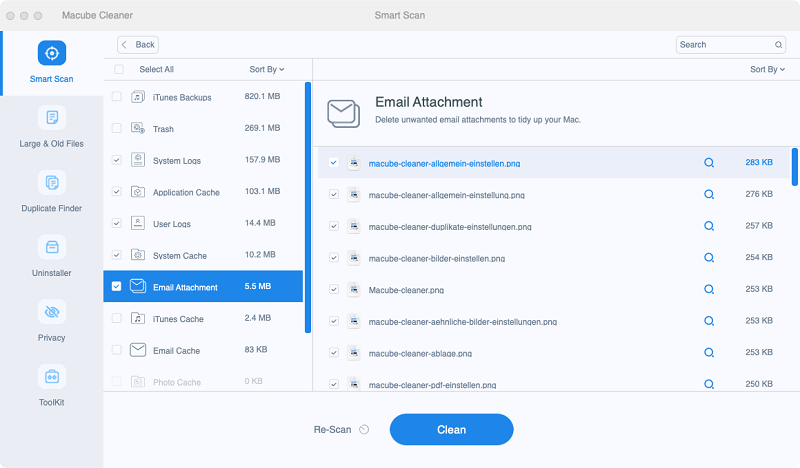
Step 3: Click Clean to completely delete the attachments in the Mail.
Of course, you can also delete email attachments manually, but you will need to repeat the steps several times.
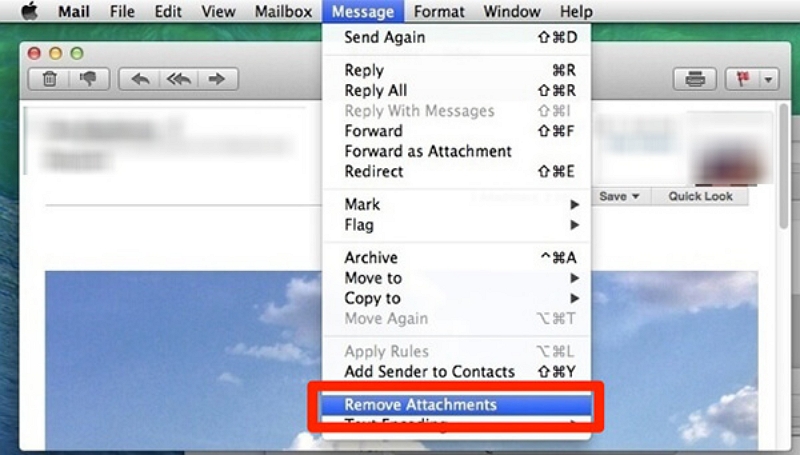
A. Remove Attachments from Single Mail on Mac
Step 1: Open the Mail app and select the email.
Step 2:Click on "Messages" in the top navigation.
Step 3: Choose "Remove Attachments."
B. Remove Attachments from Multiple Emails on Mac
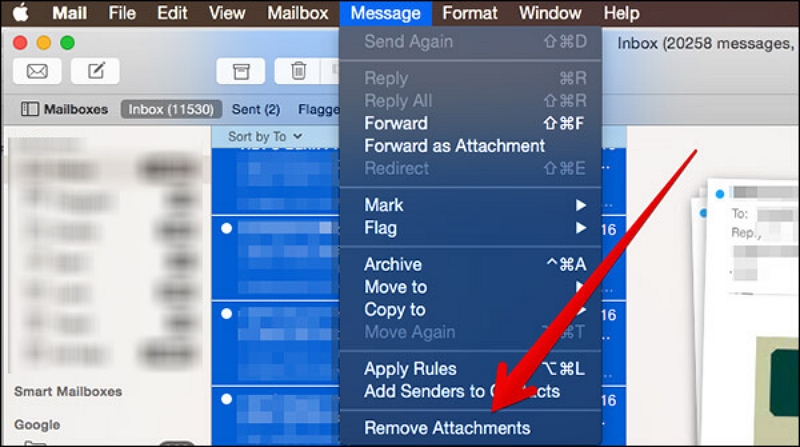
Step 1: Open the Mail app and select multiple emails.(Press Command+A can select all of the emails on the screen)
Step 2: Click on "Message"
Step 3: Choose "Remove Attachments" from the dropdown menu.
Step 4: Delete multiple attachments on Mac.
Part 4: How to Uninstall Mail App on Mac?
If you use third-party email apps a lot, you want to uninstall the Mail App to free up more space. It can be done, it just needs to be done with care and caution. If it's not necessary, we recommend that you prioritize cleaning Mail's storage as an alternative to forcibly uninstalling Mac's built-in apps. To delete the Mail App, proceed as follows:
Step 1: Restart your Mac in Recovery Mode.
For Intel Macs:
1. Turn off your Mac.
2. Press and hold Command-R while pressing the power button.
3. Release both buttons when you see the Apple logo.
4. You'll enter macOS Utilities.
For Apple Silicon Macs:
1. Turn off your Mac.
2. Hold down the power button until you see the boot options.
3. Click Options, then Continue.
4. Enter your admin password and click Continue.
Step 2: Disable SIP (System Integrity Protection).
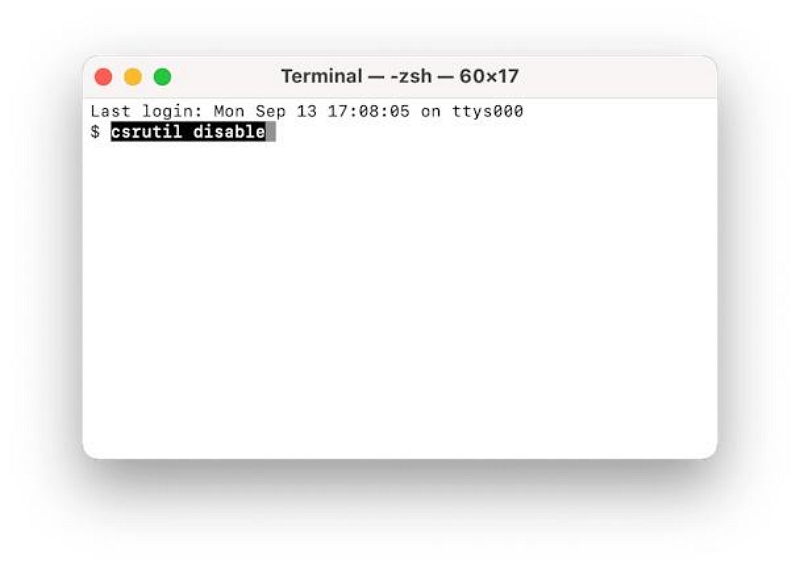
1. Open Terminal from Utilities in Applications.
2. Type "csrutil disable" and press Enter.
3. Restart your Mac.
 Note:
Note:
- SIP stands for System Integrity Protection, and it is a security feature in macOS that protects system files and processes from being modified by unauthorized users or software.
For Apple Silicon Macs:
1. Open Terminal from Utilities.
2. Enter "csrutil disable" and press Enter.
3. Type Y and press Enter, then enter your admin password.
4. Close Terminal and restart your Mac.
Step 3: Delete the mail application
With SIP disabled, you can proceed to uninstall Mail. Here's how to do it using Terminal:
1. Navigate to Applications > Utilities and open Terminal.
2. Type the following command:

3. Press Enter, then Enter your password when prompted.
Step 4: Enable SIP
The Mail app has been successfully removed from your Mac. Now, there's one final step: re-enabling SIP. Here's how to do it:
1. Follow the earlier instructions to start your Mac in recovery mode.
2. Select Terminal from the Utility menu.
3. Type the command:

4. Press Enter, then restart your Mac.
Part 5: How to Remove Mail Accounts on Mac?
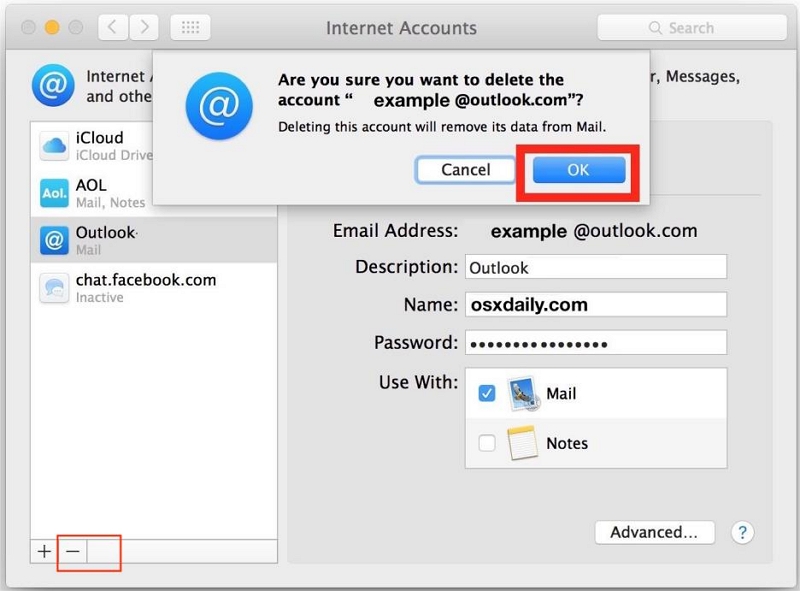
You can remove email accounts from the Mail app without uninstalling the app. When you do this, it deletes all messages linked to the account from your Mac, but the original messages are still kept on the email servers.
By removing email accounts from the Mail app, you ensure that those messages are no longer accessible from your Mac. However, it's essential to understand that the original messages remain stored on the email servers. This means you can still access them from other devices or email clients.
This process helps to clear up space on your Mac while maintaining access to your emails from other platforms.
1: Open Mail and access Settings.
2: Go to Accounts.
3: Choose the account you wish to delete and click on the "-" button.
FAQs
How to Stop Mail from Automatically Downloading Attachments?
Step 1: Open the Mail app on your device.
Step 2: Go to the "Mail" menu in the top-left corner of the screen.
Step 3: Select "Preferences" from the dropdown menu.
Step 4: In the Preferences window, click on the "Accounts" tab.
Step 5: Choose the email account for which you want to adjust settings.
Step 6: Go to the "Download Attachments" section.
Step 7: Select the option that best suits your preference, such as "None".
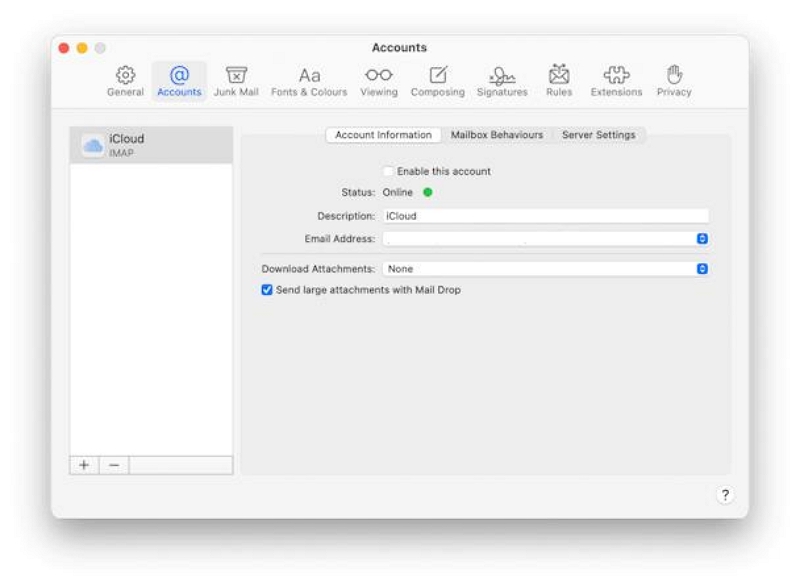
Step 8: Close the Preferences window to save your changes.
- Choosing "All" ensures that Mail consistently downloads all attachments you receive.
- Opting for "Recent" results in Mail downloading attachments received within the preceding 15 months.
- If you choose "None," Mail refrains from downloading any attachments whatsoever.
How to Delete Mailboxes on Mail?
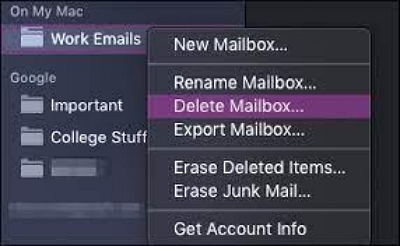
When you delete a mailbox in the Mail app on your Mac, it permanently removes the mailbox and all its contents, including other mailboxes within it. This action cannot be undone. To delete a mailbox:
Step 1: Open the Mail app on your Mac and select the desired mailbox from the Mail sidebar.
Step 2: Go to Mailbox > Delete Mailbox.
 Note:
Note:
- Since smart mailboxes just search and don't actually store your emails in them, you can delete them without worrying about losing your data. Data will remain in their original locations.
Additionally, if you have set up Time Machine to back up your Mac, you can use the backups to restore content that Mail downloaded.
If you encounter difficulties deleting a mailbox for an IMAP account, contact your account provider for assistance.
Conclusion:
This article lists all the ways you can clean up your Mac storage via Mail. You can operate according to your actual situation. The most convenient solution is definitely to use smart tools to clean up a lot of junk mail at once, Macube Cleaner can provide you with 7 days free trial, if you are tempted to act!

Macube Cleaner
Speed up and troubleshoot your Mac super easily with a Macube full-featured free trial!
Start Free Trial