“I find that other volumes in container takes up 1/3 of my Mac hard drive. How can I clean this out? Or can I delete other volumes in Container?”
If you are also stuck with the issue above, then this post must be what you want. In this guide, we illustrate 6 ways for you to securely clear other volumes in Container on your Mac. For more details, let’s move on now.
Part 1. Can We Delete Other Volumes Instead of Clearing Other Volumes in Container?
Before we dive into the answer, let’s understand what are other volumes in container first. “Other Volumes” and “Container” are items coming with macOS High Sierra that releases the new file system - APFS. A container is just like a partition in a hard drive and includes multiple virtual volumes. Other volumes consist of Preboot Volume(for macOS boot-up assistance), Recovery Volume(for macOS repair), and Virtual Memory Volume(for RAM supplement). Read till here, believe you have gotten the answer of why we can clear other volumes but not remove them in container. This is because other volumes are important for the normal operating of macOS.
Part 2. How to Clear Other Volumes in Container on Mac
To free up other volumes in container, here are 6 ways for you.
Way 1. Delete Unnecessary Time Machine Snapshots
Time Machine snapshots could related to the recovery volume, a part of other volumes. Therefore, deleting Time Machine snapshots may help reduce the space of other volumes.
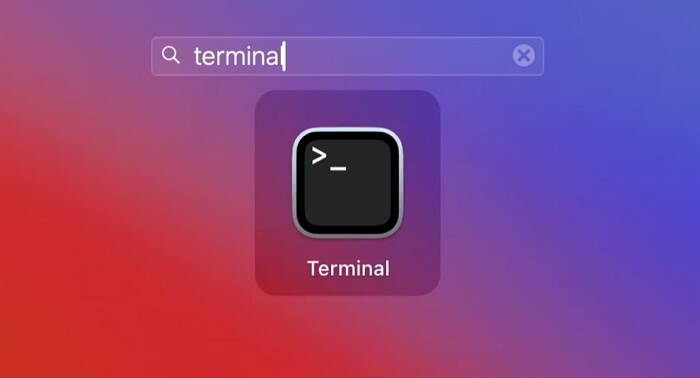
Step 1: Open Launchpad and search Terminal. Then, click Terminal to open it.
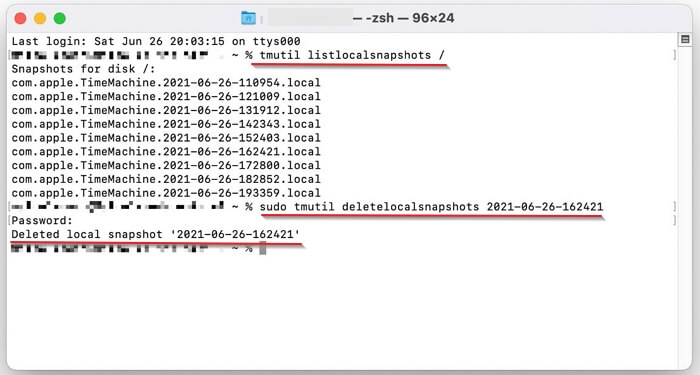
Step 2: Input “tmutil listlocalsnapshots /” and press Enter to get all snapshots with date and time stamp.
Step 3: Enter “sudo tmutil deletelocalsnapshots date and time stamp” such as “sudo tmutil deletelocalsnapshots 2021-06-26-162421” and press Enter to delete a snapshot. Type your Mac password if required after pressing Enter.
When you see “Deleted local snapshot date and time stamp”, it means that the target snapshot is successfully removed.
Way 2. Clear Cache
It’s possible that some cache aren’t cleared normally in VM volume and thus enlarges the size of other volumes. At this time, we can consider clearing cache on macOS. To get it done conveniently but effectively, Macube Cleaner is highly recommended to you. As a powerful macOS cleaner, Macube Cleaner excels in wiping various junk like cache of apps and system, temporary files and duplicate images from your Mac, which saves precious Mac storage space and in turn speed up the running speed of your macOS.
Highlights of Macube Cleaner
- Release Gigabytes of disk space for your Mac via complete junk removal and app uninstallation.
- Shred your private files permanently.
- Manage plug-ins and add-ons on your Mac in one place.
- Support macOS 10.11 and higher.
Quick Guide to Clear All Cache on Mac with Macube Cleaner
Step 1: Download, install and run Macube Cleaner on your Mac.
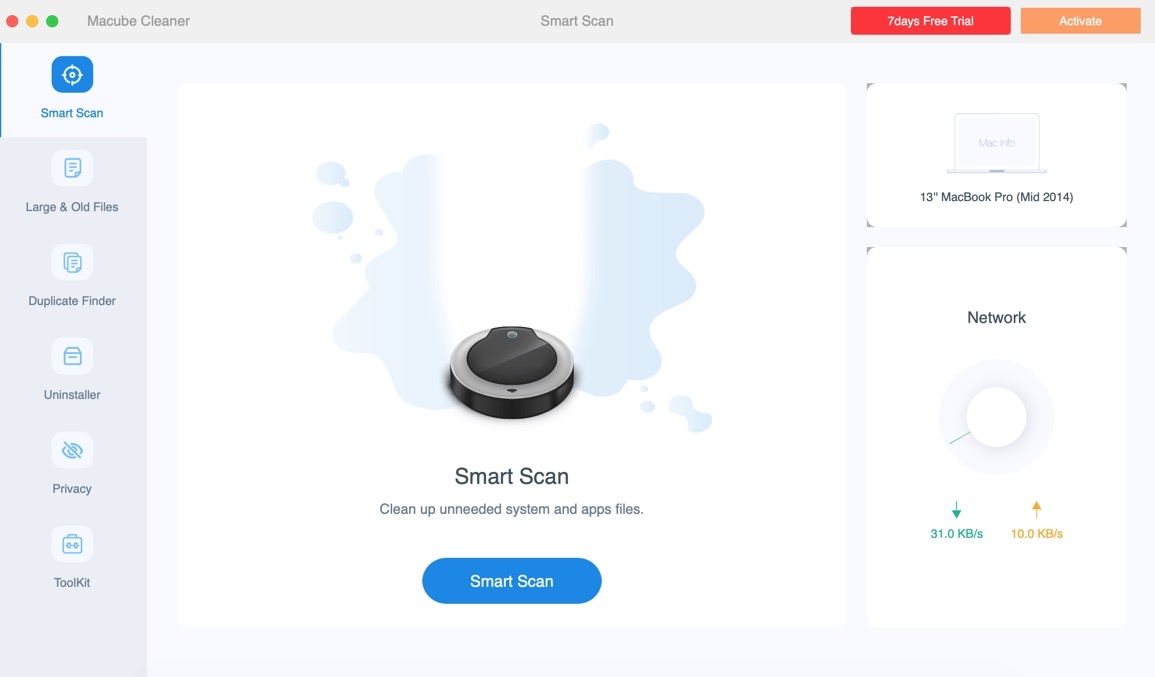
Step 2: Click Smart Scan to start the junk scanning process.
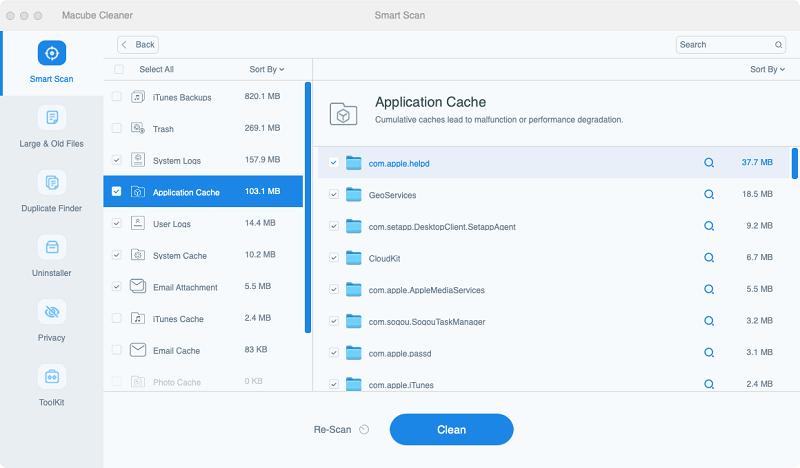
Step 3: Check all cache items and hit Clean to remove them from macOS.
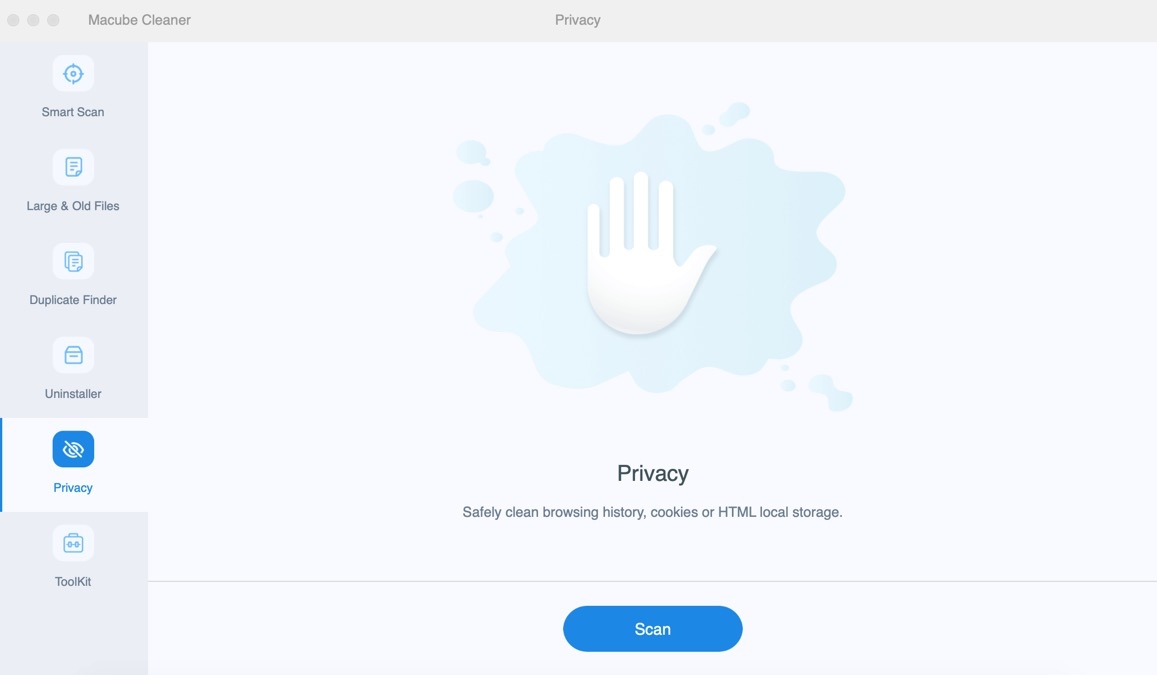
Step 4: Choose Privacy from the left pane and click Scan so that Macube can find browsing data including cache for you.
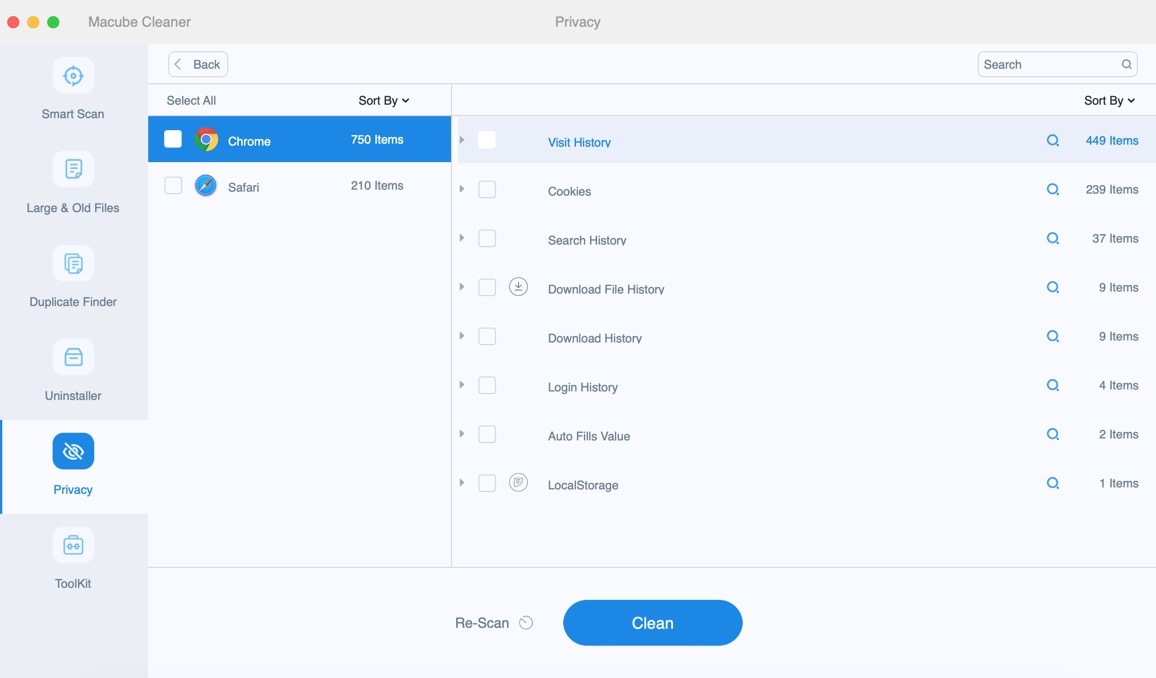
Step 5: Tick Visit History including cache images and click Clean to delete browser cache.
Way 3. Run Disk Utility Repair in macOS Recovery
Some users online find this way works for them, which makes it worth trying. You can follow the steps below to have a shot.
Step 1: Boot your Mac into Recovery Mode.
Mac with Apple silicon M1:
- Shut down your Mac and press the power button until you access startup options.
- Choose Options and then Continue to enter Recovery Mode.
Mac with Intel chip:
- Click Apple icon at the upper-left corner of your desktop and select Restart from the drop-down menu.
- Press Command + R on your keyboard and release them when the Apple logo or spinning globe is shown on your Mac screen.
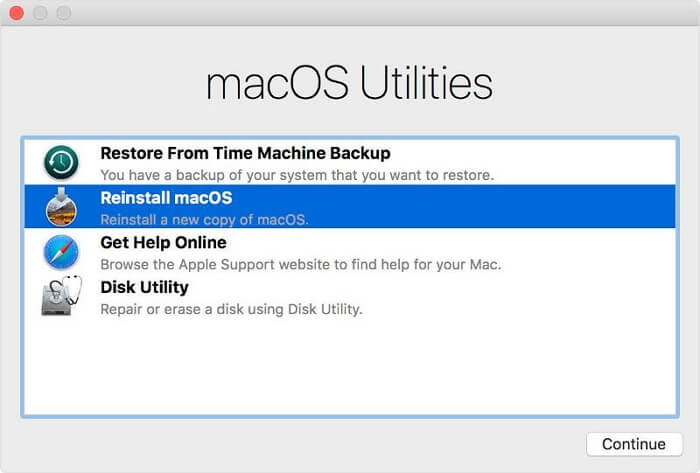
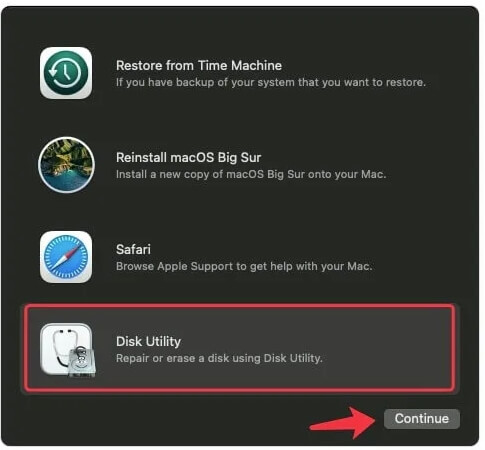
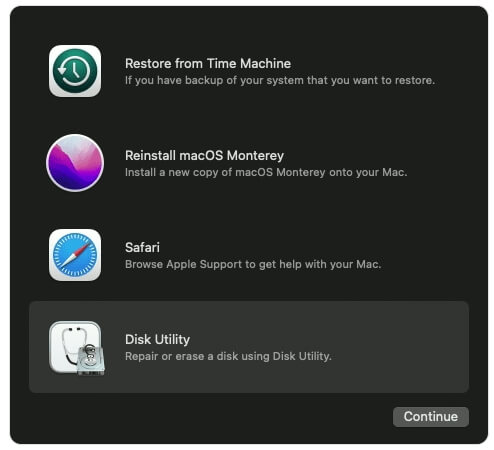
Step 2: Choose Disk Utility from the Utility window and click Continue to proceed.
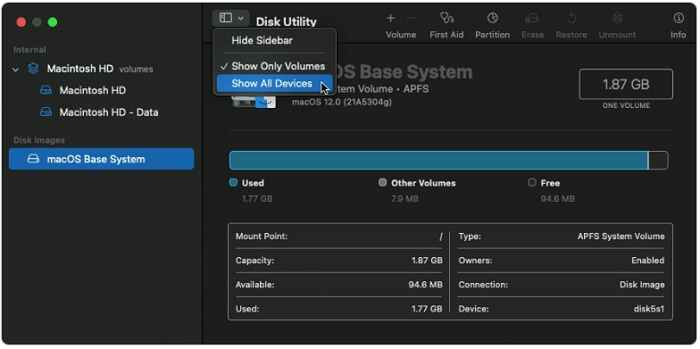
Step 3: Click View > Show All Devices. Next, choose the hard drive where other volumes are located.
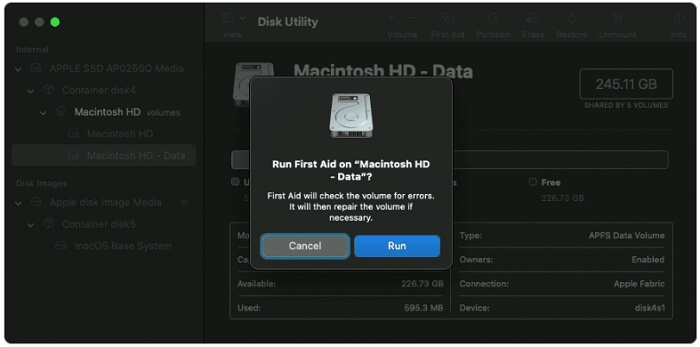
Step 4: Hit First Aid in the upper bar and click Run in the shown prompt to start the disk troubleshooting.
Way 4. Create a New User Account
Although the method sounds like it might not be useful, it works sometimes indeed. So, don’t hesitate to use it for cleaning up other volumes in container.
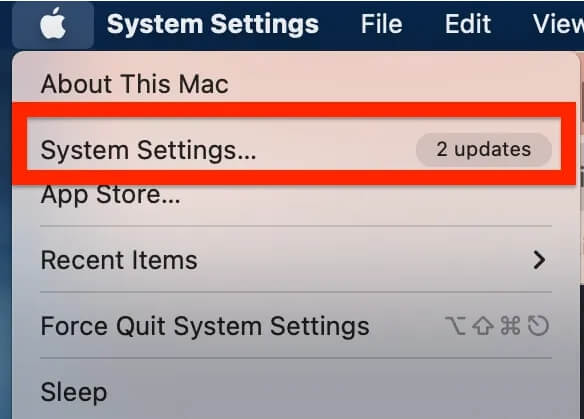
Step 1: Click Apple logo at the upper left corner of your Mac desktop, followed by choosing System Settings.
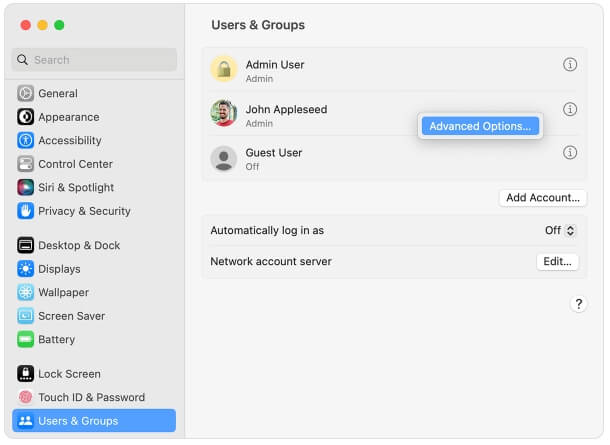
Step 2: Select Users & Groups in the left sidebar and click Add Account in the right section.
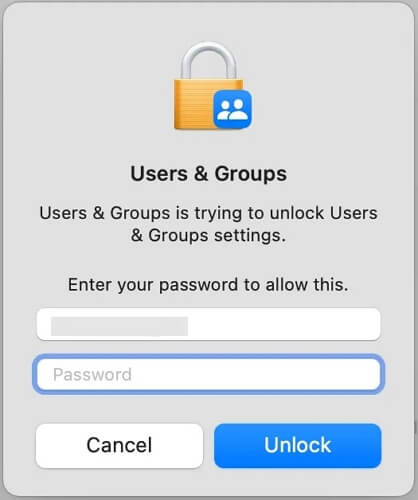
Step 3: Enter your Mac password if asked.
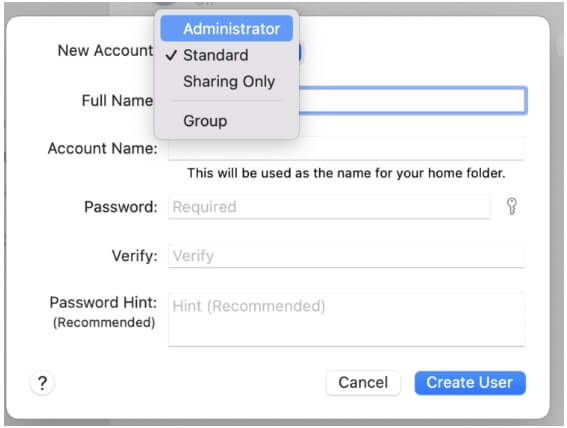
Step 4: Set the New account as Administrator, fill in the related details and click Create User to save your settings.
At last, restart your Mac and login it with the new admin account. This way, some space may have been released from other volumes.
Way 5. Turn off Content Caching
Content cache may be stored on the VM volume, which increases the disk space used by other volumes. However, no worry, we can disable Content Caching feature with the easy steps below.
Step 1: Hit Apple logo in the top pane of your Mac and choose System Settings.

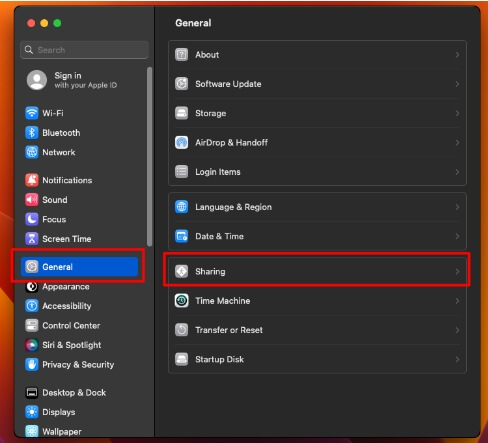
Step 2: Choose General > Sharing in the Settings window.
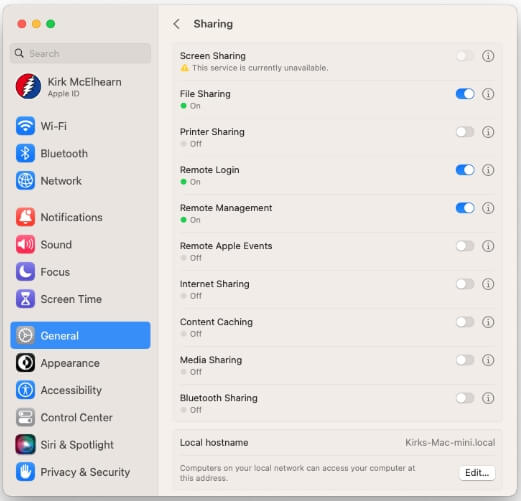
Step 3: Uncheck Content Caching in the left pane.
Way 6. Reinstall macOS After Erasing Disk
If other volumes in container still occupy a huge amount of disk space, you can consider erasing the hard drive and then reinstalling macOS. Data loss will happen if taking this method, please don’t forget to back up your data on Mac with built-in Time Machine tool or third-party software, etc.
Step 1: Put your Mac into Recovery Mode and open Disk Utility via the steps in Way 3 above.
Step 2: Select Macintosh HD from the sidebar of Disk Utility and click Erase in the upper menu.
Step 3: Choose Macintosh HD as the drive name and select APFS in the Formal field. Then, click Erase.
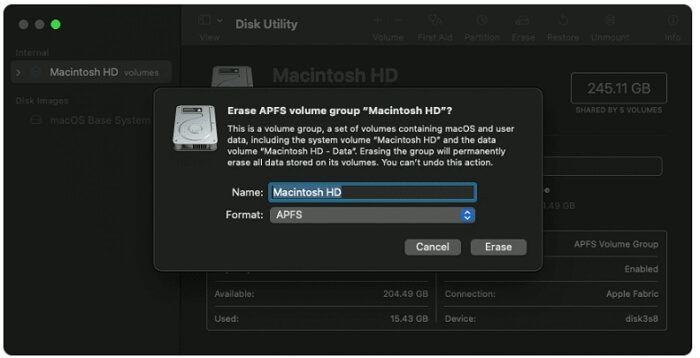
Step 4: Once the erasing process ends, delete any volumes in the sidebar but remember to keep the Macintosh HD volume.
Step 5: Close Disk Utility to back to the Utilities window. At this time, click Reinstall macOS. After system installation, other volumes should be in the smallest size.
Part 3. How to See Other Volumes in Container on Mac
To check other volumes in container, you can follow the steps below.
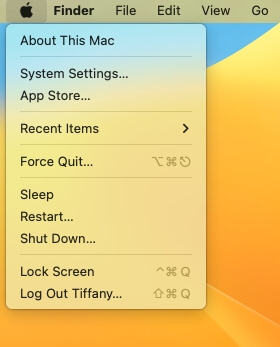
Step 1: Access Apple menu to choose About This Mac.
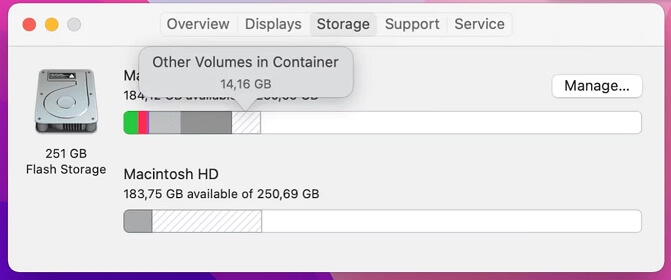
Step 2: Switch to Storage tab and then you can see the storage space of other volumes in Container.
Wrap Up
Although we can’t delete other volumes in container to free up disk space on Mac, it’s available to clear other volumes and this post has introduced 6 effective ways for you to get it done. Simply using a method like clearing cache with Macube that suits you.

Macube Cleaner
Speed up and troubleshoot your Mac super easily with a Macube full-featured free trial!
Start Free Trial